Showing posts with label Italian food. Show all posts

Wednesday, July 13, 2011

WIAW and Oh How Pinteresting Wednesday, Food Edition

Last night I made another delicious recipe from my Cooking from the Farmer's Market cookbook.  As I mentioned in this post, I wasn't able to make it to the Farmer's Market on Saturday morning but the folks at Dierberg's (a local grocery store chain here in St. Louis) saved the day.  They had quite a few fruits and vegetables for sale that were locally grown and harvested including eggplant, which was the star of last night's dish, Rolled Eggplant with Sausage and Mozzarella.  This dish was easy-peasy and tasted delicious.  It could very easily be made vegetarian by omitting the sausage from the sauce.

Rolled Eggplant with Sausage and Mozzarella, modified from Cooking from the Farmer's Market cookbook

Ingredients:
1 1/2 pounds Italian or Asian eggplant, trimmed and cut lengthwise into slices approximately 1/4 inch thick--approximately two medium sized eggplant

1/4 cup plus 2 tablespoons olive oil

Salt and freshly ground pepper

5 ounces Italian sausage, casings removed--I browned up a pound and a half and then added the remaining sausage to our leftover tomato sauce from earlier this week to freeze and have for dinner next week!

2 cups tomato sauce--we used homemade, find the recipe here

1 cup whole-milk ricotta--as I got out the ingredients to make dinner, I discovered the ricotta (which I bought over a week ago) had gone bad.  I used 1/2 cup mascarpone cheese and 2 ounces of cream cheese instead which worked great!

4 ounces fresh mozzarella cheese, cut into small pieces--if you have a Trader Joe's nearby, I recommend getting your mozzarella (and other cheeses) there.  I saved two dollars by buying the cheese for this recipe there!

4 tablespoons grated hard cheese, such as Parmesan

1 tablespoon chopped flat-leaf parsley--we used 1 teaspoon dried parsley instead


Kitchen Supplies:
Baking sheet
Ramekin
Pastry Brush
Frying pan
Medium bowl
9 inch baking dish

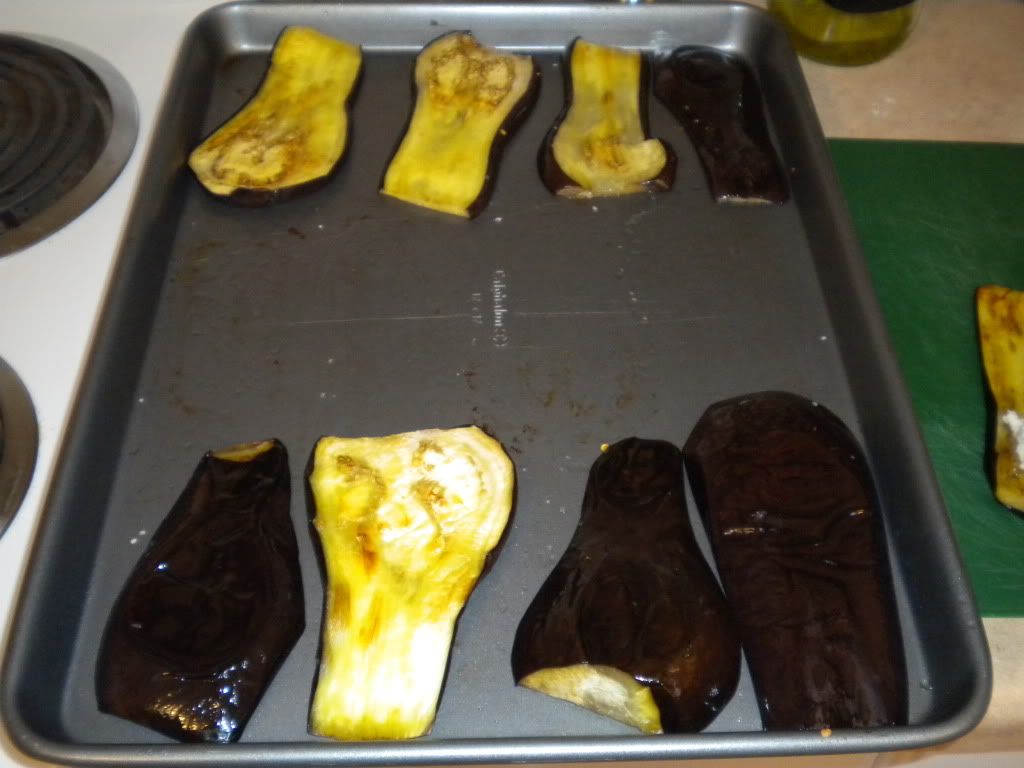
Preheat the oven to 450 degrees.  Brush both sides of the eggplant with the 1/4 cup of olive oil and season with salt.  Place in an even layer on a baking sheet and bake until lightly browned on the bottom, about ten minutes.  Turn the slices and bake until tender, approximately six minutes.  Remove from the oven and reduce the oven temperature to 350 degrees.

Meanwhile, combine ricotta, mozzarella, 2 tablespoons of the Parmesan and parsley together.  Season with salt and pepper.

In a frying pan over medium-high heat, warm the remaining 2 tablespoons of olive oil.  Saute the sausage until cooked through, about 3 minutes.  Note that it will take longer (about 10 minutes) if you are browning a whole package of sausage as I did.  Stir in the tomato sauce and bring to a boil.  Reduce the heat to low and simmer for 5 minutes.

Spread half of the sauce on the bottom of the baking dish.  Place a spoonful of the cheese mixture near the wide end of each eggplant slice, roll up, and place in dish.  Continue assembling the rolls until all eggplant slices have been filled.

Photobucket

Spoon the remaining sauce between the rolls and sprinkle with remaining 2 tablespoons Parmesan.  Bake until the sauce is bubbling, about 20 minutes.  Serve immediately.

Photobucket
Blogger is being weird and won't let me load photos properly--grr!

Serves: 4

As you can see, there is nothing particularly carnivorous about this dish and with all those great cheeses in each roll-up, a meat-free version might taste even better!  As per usual, I had the leftovers today which is what makes this a WIAW post.



Now onto the Oh How Pinteresting part of the post.


google


I, like many people, have discovered the wonder  that is Pinterest and have been pinning my heart away for several weeks now.  One of my favorite boards is my cooking board, Recipes to Make, especially right now where my creativity in the kitchen is limited to using up ingredients we already have. 

So today, here are some recipes I really hope to make in the near future (perhaps from South Bend!)

Pasta with Prosciutto, Snap Peas, Mint and Cream

Source: food52.com via Kt on Pinterest


Linguine with Sardines, Fennel and Tomato

Source: food52.com via Kt on Pinterest


Chilled Avocado Soup


Kiwi Summer Roll--new things to stuff wonton wrappers with!


Bacon Streusel Maple Cream Cheese Cupcakes


Are you on Pinterest?  If so, let me know so I can follow you!  If you'd like to check out more of my foodie pins (or home decor or any other kind for that matter) I can be found here.

Don't have Pinterest yet but want to get on board?  Leave me a message in the comments with your email address and I'll send you an invite!

What are you eating this Wednesday?  Anything in particular you are pinning pining over this Wednesday evening?

P.S. If you do not already read Jen's (Peas and Crayons) or Michelle's (The Vintage Apple) blogs, you really should.  Click on the links and head on over.  You know you want to!

Monday, July 11, 2011

Spinach and Mushroom Ravioli with Tomato Sauce

With our big move less than three weeks away, we have begun the process of cleaning out our refrigerator and freezer.  This process is definitely going to force us to be more creative in the kitchen and will really kick our meal-planning into overdrive!

We started out with a bang with our dinner last night.  We had approximately 35 wonton wrappers left from our yummy Crab Rangoon last night and after seeing Stacy's post last week, I knew I wanted to use them to make ravioli.  But what kind?

We did not make it to the Farmer's Market on Saturday so I began by checking out the sales ads at our local grocery store.  Low and behold, they had button mushrooms on sale for a dollar a container! Mushroom ravioli it is.  After some googling around, I found another Giada recipe (seriously, that girl never lets me down) that called for mushrooms AND another ingredient we had in the freezer: frozen spinach.  I was sold.  Giada's recipe calls for egg roll wrappers but I knew I could easily substitute this for wonton wrappers.

The recipe took a little while to make but the flavors were absolutely worth it!  Who would have thought that wonton wrappers would taste like the freshest pasta imaginable once you boiled it for a few minutes?!

Spinach and Mushroom Ravioli with Tomato Sauce, modified from Every Day Italian by Giada de Laurentiis

Ingredients:
For the ravioli
1/2 cup extra virgin olive oil, plus 2 tablespoons for boiling water (will keep the ravioli from sticking)
6 ounces button mushrooms, sliced
(1) 10 ounce package frozen chopped spinach, thawed and squeezed dry
1/4 cup Marscapone cheese
1/3 cup grated Parmesan, plus more for serving
12 wonton wrappers
2 large eggs, beaten with 1 teaspoon of water
1/2 cup mushroom (cremini, shittake)--we used Baby Bella mushrooms, finely diced
2 cups homemade tomato sauce (you can of course use store bought but homemade tastes better)
Salt and pepper for seasoning

For the tomato sauce
1/2 cup extra-virgin olive oil
1 small onion, chopped
2 garlic cloves, peeled and minced
1 celery rib, finely chopped
1 carrot, peeled and finely chopped--I used five baby carrots because we never seem to use up a bag of carrots before it goes bad but we don't have that problem with baby carrots!
Salt and freshly ground black pepper
2 (28 ounce) cans of crushed tomatoes
2 dried bay leaves

Kitchen Supplies:
Large stockpot
Cutting board
Large skillet
Food processor 
Medium stockpot (for pasta)
Ramekin for egg wash
Pastry brush
Fork, for crimping edges 
Serving dish
Aluminum foil
Spider strainer

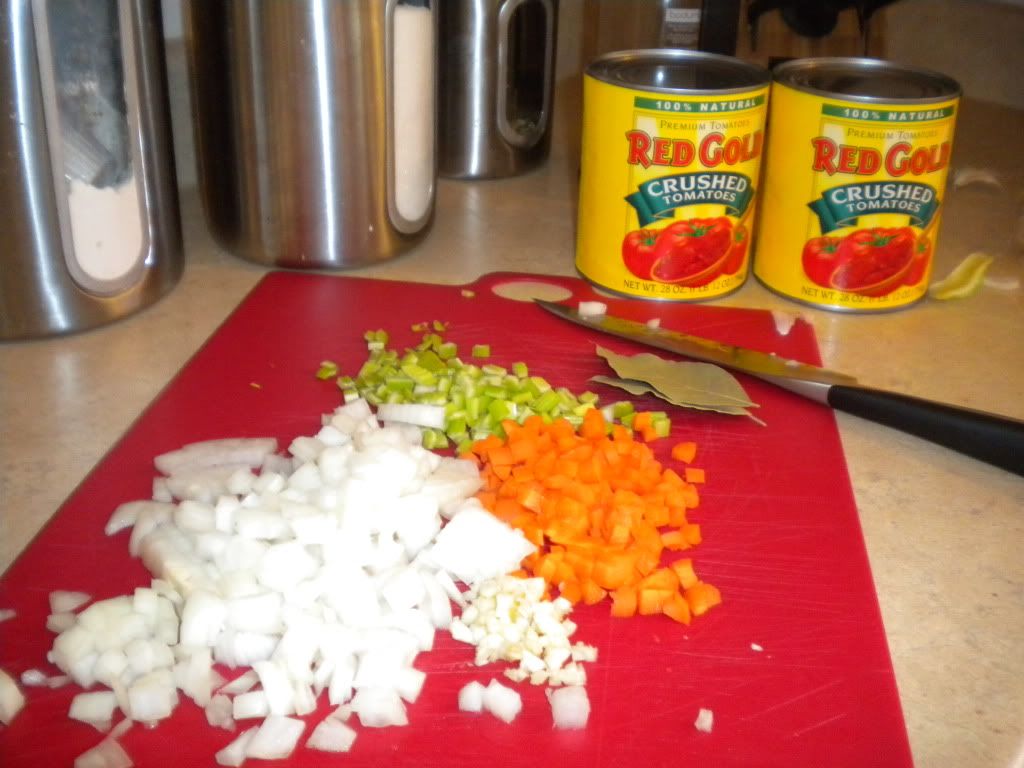
In a large stockpot, heat olive oil over medium-high heat.  Add garlic and onions and saute until soft and translucent, about six minutes.  Add carrot and celery; season with salt and pepper.  Saute for another six to eight minutes until the vegetables are tender.  Add tomatoes and bay leaves and reduce heat to low, allowing to simmer uncovered for one hour.


While you wait, chop up the mushrooms and thaw and drain the spinach.  You can also get your egg wash and other supplies ready for the next step--mise en place is very helpful in this recipe since you have quite a bit of assembling and cooking to do.

You will also want to give yourself some time to bring a medium stockpot of salted water to boil.

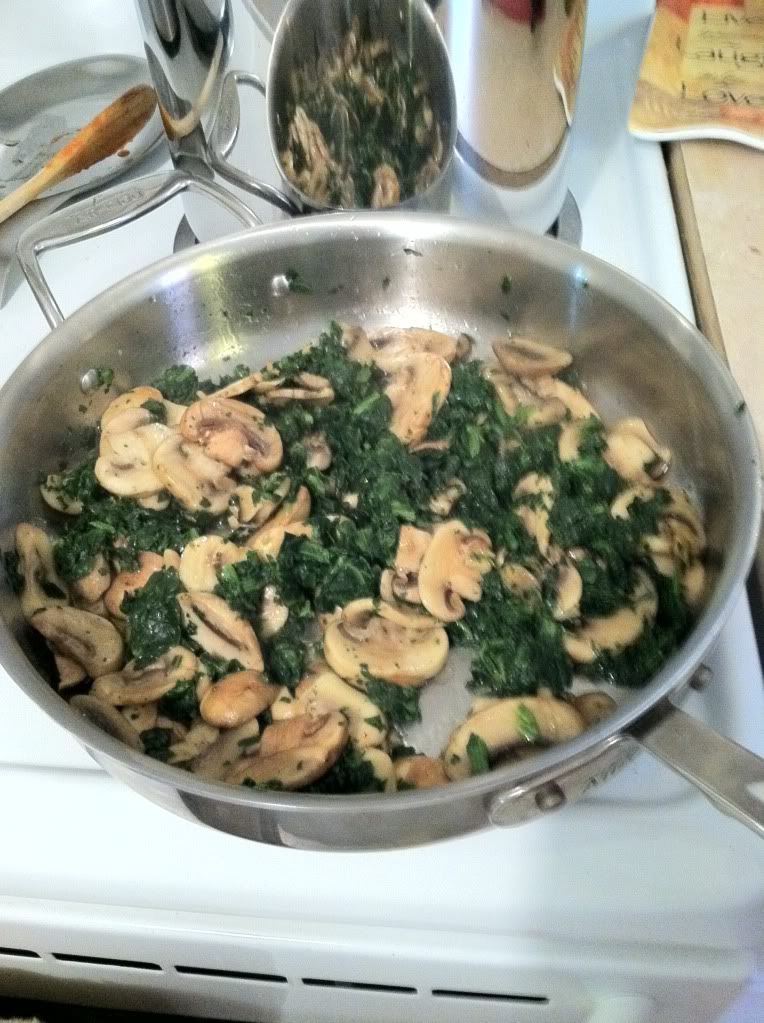
When there is approximately 25 minutes of cook time remaining (you could do this earlier if you want but we watched an episode of Weeds in between steps), heat 1/4 cup olive oil in a large skillet over medium heat.  When the oil is almost smoking, add the sliced mushrooms and season with salt and pepper.  Cook until all the liquid has evaporated from the mushrooms, about six minutes.  Add spinach and cook for an additional two minutes.


Remove from heat and pour contents into a food processor.  Pulse until you get a course texture.  Remove from base and carefully remove blade.  Stir in mascapone and Parmesan cheeses.  Giada recommends pouring contents into a bowl but because we already had quite a few dishes dirty, I mixed it in the food processor bowl without problems.

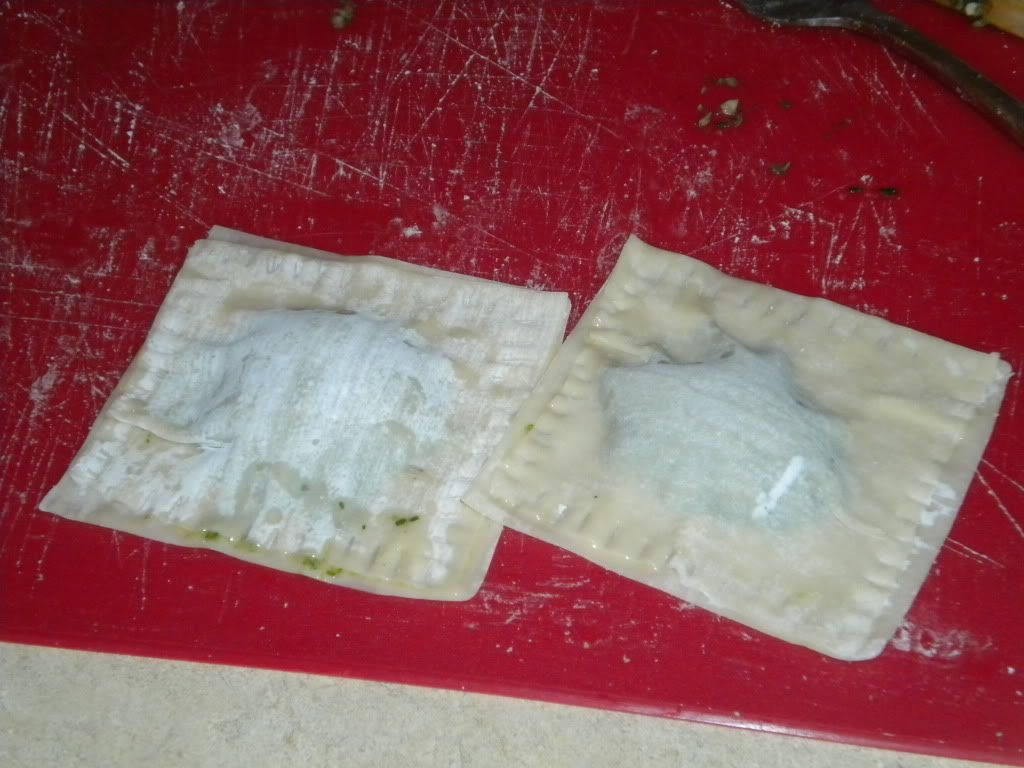
Line up 6 wonton wrappers (you will use two for each ravioli) and brush with a light coat of egg wash.  Place a heaping tablespoon of mixture on three of the six ravioli.  Place the other ravioli, egg wash side down (the wash helps the ravioli stick together and prevents them from coming apart in the boiling water) on top of the mixture.  Press the two wrappers together, starting in the middle and working your way to the edges.  I tried to create a seal around the mixture to again prevent them from falling apart and this seemed to work great!  Crimp edges with the edge of the fork or if you have one (we didn't) a fluted ravioli cutter.


Add 2 tablespoons of olive oil to the boiling water (avoiding sticky ravioli is the name of the game!) and then carefully place the ravioli in the water using a spider strainer or similar kitchen utensil.  You will only want to cook three or four ravioli at a time to prevent them from clumping or sticking to the bottom of the pan and ripping when you remove them.  Cook for three to four minutes; remove with spider strainer and place in a serving dish, covering with aluminum foil to keep warm.  Continue with the process until you use up all of the wonton wrappers and/or filling.  We double the recipe because we had more wontons than the recipe made but still ended up with extra filling! 

The ravioli did stick together once we took them out of the water and put them in the serving dish.  I would recommend you serve up each guest as the ravioli come out of the water and cover each dish with foil.  You will use more foil but the presentation will be much better.

Giada's recipe also calls for you to blend the tomato sauce once finished cooking.  Because I had chopped the vegetables finely and the chopped tomatoes were likewise fine, we skipped this step (can you tell we were trying to avoid extra cleanup?).

While the last batch of ravioli cooks, heat remaining 1/4 cup of olive oil in the large skillet (the one you cooked the mushrooms in will work great).  Add 1/2 cup of specialty mushrooms (Baby Bella, Shiitake, Cremini) and saute for three minutes.

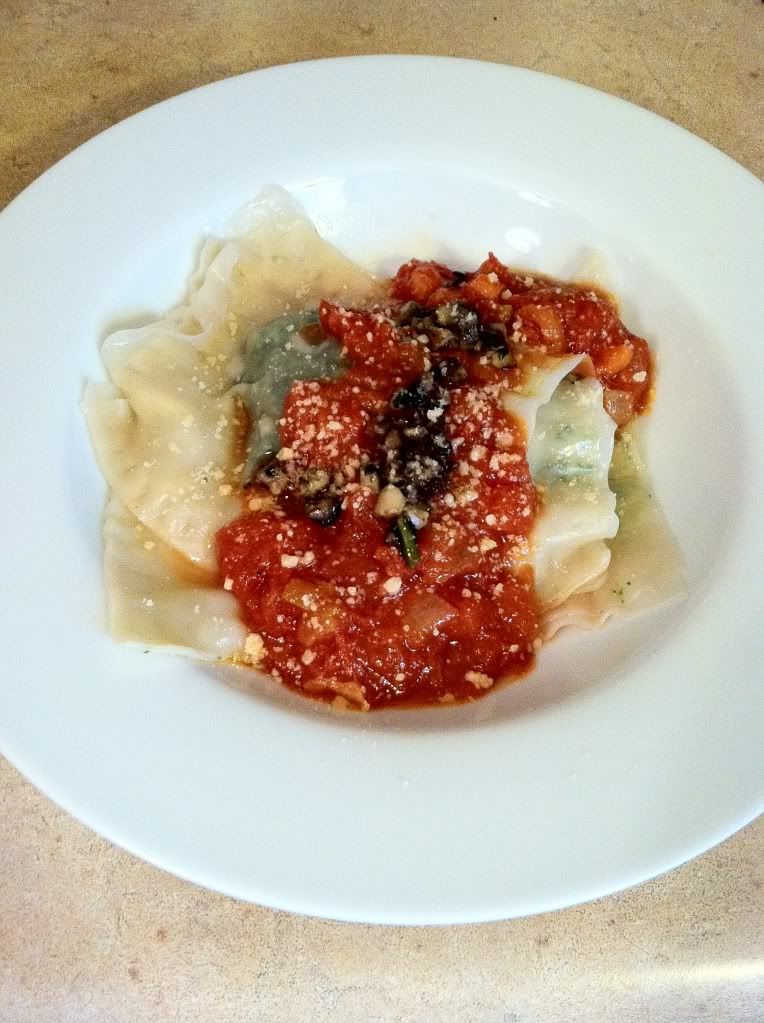
Top each bowl with some of the tomato sauce and a tablespoon or so of the chopped mushrooms plus some Parmesan cheese for garnish.

Taken with J's new iPhone--it is sad that his phone takes better pictures than my camera.  Time for a new camera!
Serves: 4

This recipe makes six cups of tomato sauce.  You will use approximately two cups in the recipe.  The rest can be refrigerated or frozen to use later.  We are using it in our Eggplant-Sausage Roll-ups later this week!

Are you a fan of mise en place?  Have you ever made homemade ravioli?  Now that I know how easy it is, we will be making all kinds of ravioli and tortellini at home.  Is there anything a wonton wrapper can't make better?!?

Wednesday, May 11, 2011

Recipe: Garlic and Greens Pasta

Last night we made what may become a new favorite in our house, garlic and greens pasta.  Another winner from our new favorite cookbook Great Easy Meals from the Food Network Magazine, we modified this recipe slightly to use up some more of the Napa cabbage from this weekend but any leafy green will do! 


Ingredients:
16 garlic cloves, thinly sliced--about 1 large head of garlic
1/3 cup extra-virgin olive oil
2 medium onions, halved and sliced
1/8 teaspoon red pepper flakes
Kosher salt
12 cups torn winter greens such as kale, chard, escarole or mustard greens about 2 1/2 pounds--we used Napa cabbage from our Farmer's Market trip this weekend!
1 lb. whole wheat pasta
1/4 cup grated pecorino romano cheese


Kitchen supplies:
Large stockpot
Large skillet
Slotted spoon
Paper towel or part of a brown paper bag
Tongs

Garlic peels
Bring a large pot of salted water to a boil.  Meanwhile, cook the garlic in the olive oil in a large skillet over medium-high heat, stirring occasionally, until golden brown and crisp, about 3 minutes.  Be careful not to overbrown the garlic or it will taste bitter.  Using a slotted spoon, transfer the garlic chips to a paper towel (or brown paper bag) lined plate.  Add the onions and red pepper flakes to the oil in the pan; cook, stirring, until the onions are light brown, about 10 minutes.  Season with 1 1/2 teaspoons salt.

Garlic chips
When the onions are almost done, add the greens to the boiling water and cook, uncovered, until just tender about 2 minutes.  Using tongs, remove the greens, shaking off the excess water; add them to the skillet with the onions (set the pot of water aside).  Cook, stirring occasionally, until tender, about 5 minutes.  If you are using napa cabbage or a slightly less dark green, you can skip this blanching step.  We did and 5 minutes in the skillet with the onions was enough to wilt the greens.


Return the cooking water to a boil.  Add the spaghetti and cook until al dente, 8 to 10 minutes.  Remove and reserve about 1 cup cooking water; drain the pasta and return to stockpot.  Add the cheese and toss.  Add the greens and some of the reserved pasta water and toss, adding more water as necessary to keep the pasta from clumping.  Top with garlic chips.


Serves: 4

This is a simple yet delicious recipe and one where you won't miss meat at all!  The original recipe called for regular pasta but we substituted whole wheat so that we could eat more of it guilt-free.   I have leftovers with the chips stored separately to prevent them from getting soggy waiting in my fridge for lunch today for WIAW with Jenn at Peas and Crayons and I'd be willing to bet that the leftovers will be just as good as dinner last night!


What are you eating this Wednesday?  Are you a garlic fan like me or do you tend to stay away from its pungent flavor?

Wednesday, April 27, 2011

Croque Monsiuer Mac and Cheese

Last night J and I made our first recipe out of our new cookbook, Food Network Magazine's Great Easy Meals, using some of the hot ham left over from our Easter dinner.

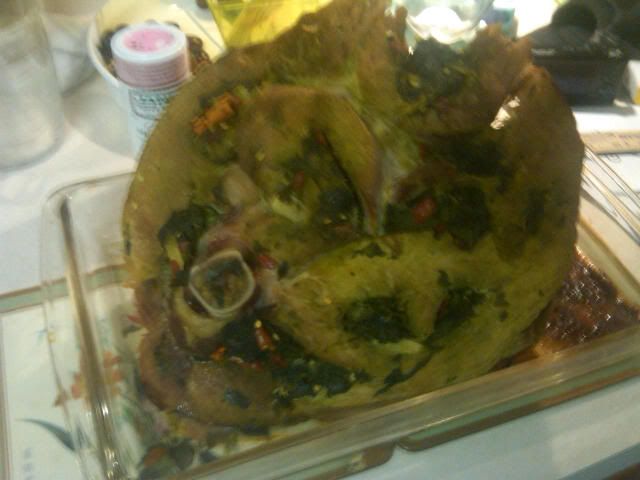
Hot ham is our signature dish come Easter time.  The recipe has been in my maternal grandfather's family for over one hundred years and dates back to the days they lived in Kentucky in the mid to late 1800s.  Basically, you create slits in the top of a fully baked, bone in ham (spiral cut would not work) which you then stuff with dried red chili peppers (also called chili de arbol--hence the "hot" in hot ham), fresh spinach and the white tips of green onions.  After you stuff the ham, you wrap it in cheese cloth to keep the stuffing inside and boil it for a few hours to cook the spinach and green onion.  Right before serving you bake it for about an hour to reheat the ham and crisp the skin.  When it comes time to serve, people can opt for some of the stuffing if they like things spicy or leave it off to enjoy a flavorful ham with just a little kick.

I apologize for the quality of this photo--J took it from his phone because I left my camera at home!
The hot ham is perfect for this recipe although any type of ham would suffice.  We also used smoked Gruyere cheese to bring out the smokiness of the entire dish. 

Croque Monsiuer Mac and Cheese, modified from Food Network Magazine's Great Easy Meals cookbook

Ingredients:
1/2 pound ziti--we used elbow macaroni because that's what we had on hand
2 cups fat free milk
2 cups coarsely grated Gruyere cheese (about 6 ounces)--because we were using smoked Gruyere, we used one cup of Gruyere and one cup of plain Swiss cheese.  This is also a cheaper option since Swiss is such an inexpensive cheese
1 cup finely grated Parmesan cheese (about 4 ounces)
2 large eggs
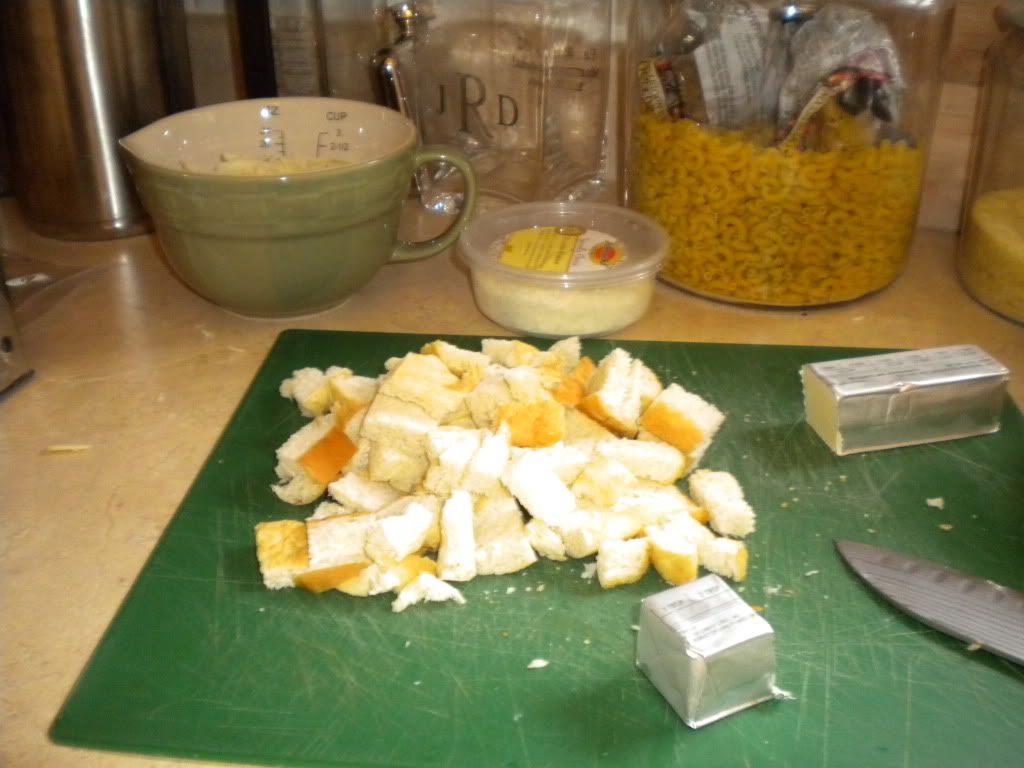
3 slices white sandwich bread, coarsely chopped
2 tablespoons butter, plus more for greasing
1 medium onion, diced
1 garlic clove, minced
3 tablespoons all-purpose flour
1/8 teaspoon nutmeg
1/8 teaspoon cayenne pepper
1 teaspoon salt
8 ounces cooked ham
3 cups fresh spinach--we added this to the recipe for a little green and to use up what we had on hand before it went bad!


Kitchen Supplies:
Large stockpot for pasta
Cutting board
Box or hand grater for cheese
Small saucepan
Whisk
Measuring cups
One large bowl
One medium bowl
2 quart glass baking dish


Preheat oven to 425 degrees.  Bring a large pot of water to boil, add salt and pasta cooking until al dente (six minutes for ziti, eleven minutes for elbow macaroni).  Drain and transfer back to stockpot, tossing with 1/4 cup of milk to keep it from gumming up.

Meanwhile combine cheeses in a bowl.   Beat 1/4 cup of milk and 2 eggs in another bowl; fold in bread and toss with half of the cheese mixture.

Next, melt 2 tablespoons of butter in the saucepan over high heat and saute garlic and onion for two to three minutes until they start to brown.  Add flour, cayenne pepper, nutmeg and salt; cook, stirring about 2 minutes.  Slowly add 3/4 cup of water and the remaining 1 1/2 cups of milk; bring to a boil, stirring until thickened.  Remove from heat and whisk slightly to cool.  Whisk in remaining cheese then add the mixture to the pasta in the stockpot, tossing to combine.


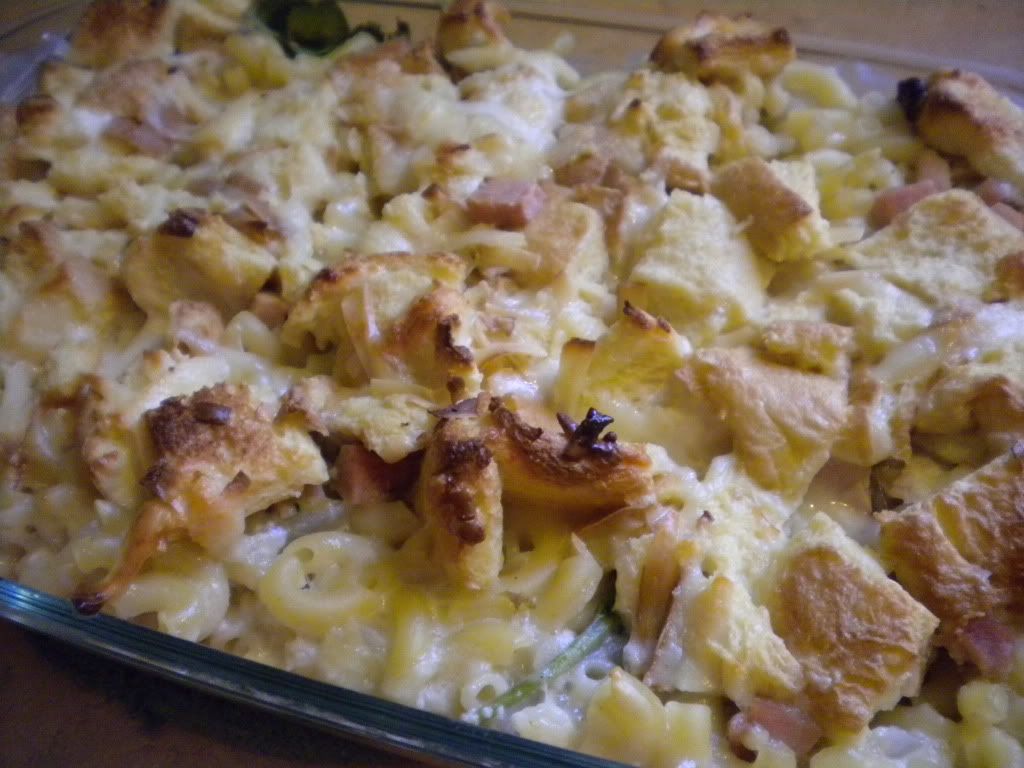
In a buttered glass baking dish, pour half of the pasta mixture followed by half of the ham and all of the spinach.  Top this with the remaining pasta before pouring the bread and cheese mixture on top of it all.  Bake for 20 minutes until golden brown and bubbly.  Let rest a few minutes before serving.


 Serves: 4

This was a delicious recipe and I am looking forward to eating the leftovers for lunch today!


Also because I haven't shared any Woods' photos in a while, here are a few I snapped yesterday.  The first is a picture of his new "bed" next to ours.  I like to think of it as a trundle bed of sorts, one that allows J, Woods and I to sleep better because Woods is no longer hogging half of our full size bed.  We will see how long this phase lasts!


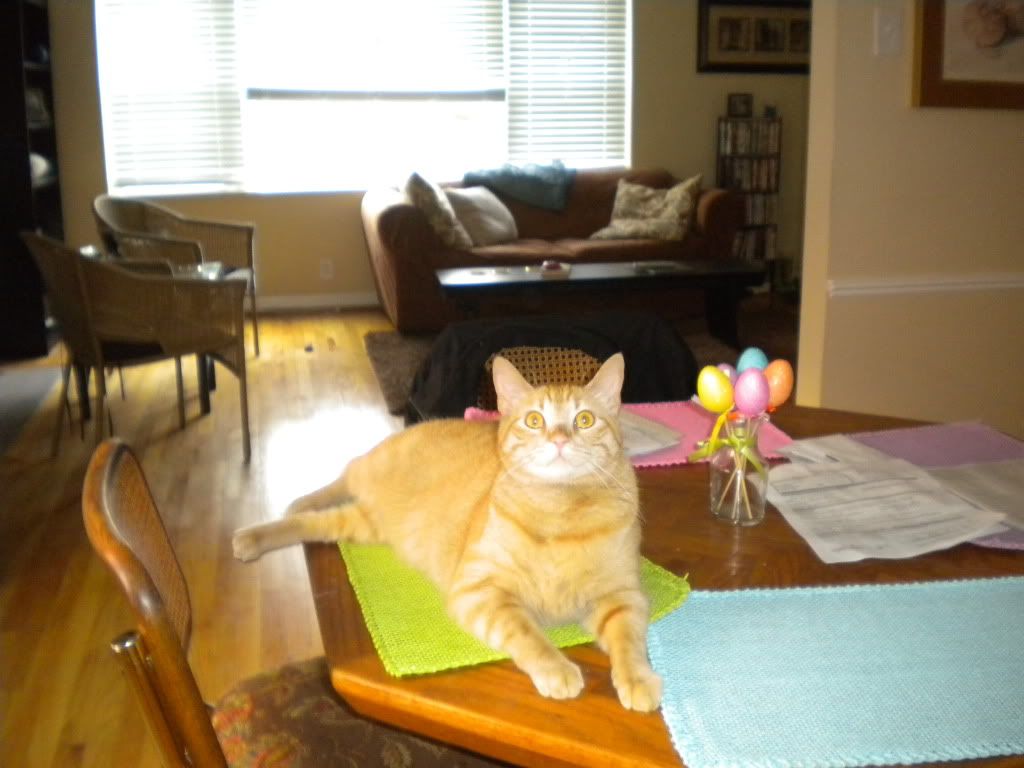
The next is of Woods while we were making dinner.  He is not allowed on our table and he knows it, hence the guilty look on his face when I caught him in the act!


Let's talk holiday food!  What type of protein do you usually have for holiday meals?  Ham? Turkey? Roast beef? 

Tuesday, April 26, 2011

Menu Tuesday, Homemade Gnocchi and Where I've Been

My sincere apologies that I've been MIA around here for another week.  I took an unexpected break to spend time with family in Peoria for Easter and boy did I need it!  As much as I love this blog and all of you, it felt great to spend a few days not constantly thinking about what I will blog about next or scrambling to get my camera so that I can document everything for the blog.  I guess I'm finding that balance I talked about with my New Years resolutions back in January.  I am now rested, refreshed and ready to jump back into blogging!

I normally share our weekly menu on Mondays but I ran out of time yesterday between work and errands that couldn't wait after the long weekend.  I am sharing it today because I am really excited about our menu this week, especially because it uses some of the turkey and hot ham leftovers from Easter dinner on Sunday and includes some recipes from our new cookbook which was our gift from the Easter Bunny.

Monday: Homemade Turkey Pot Pies, similar to this recipe but this time we used leftover creamed potatoes and a splash of fat free milk instead of cream!

Tuesday: Croque Monsiuer Mac and Cheese--photos and recipe to follow!

Wednesday: Ham and Bean soup--photos and recipe to follow!

Thursday: Tangerine Beef with Scallions and Veggie Stirfy--photos and recipe to follow!

Now as promised, a recipe for homemade gnocchi I made last week.  Inspired by this lovely lady, I decided to try my hand at it and in the process, crossed off another item on my 130 Before I'm Thirty list.


18.  Make homemade gnocci

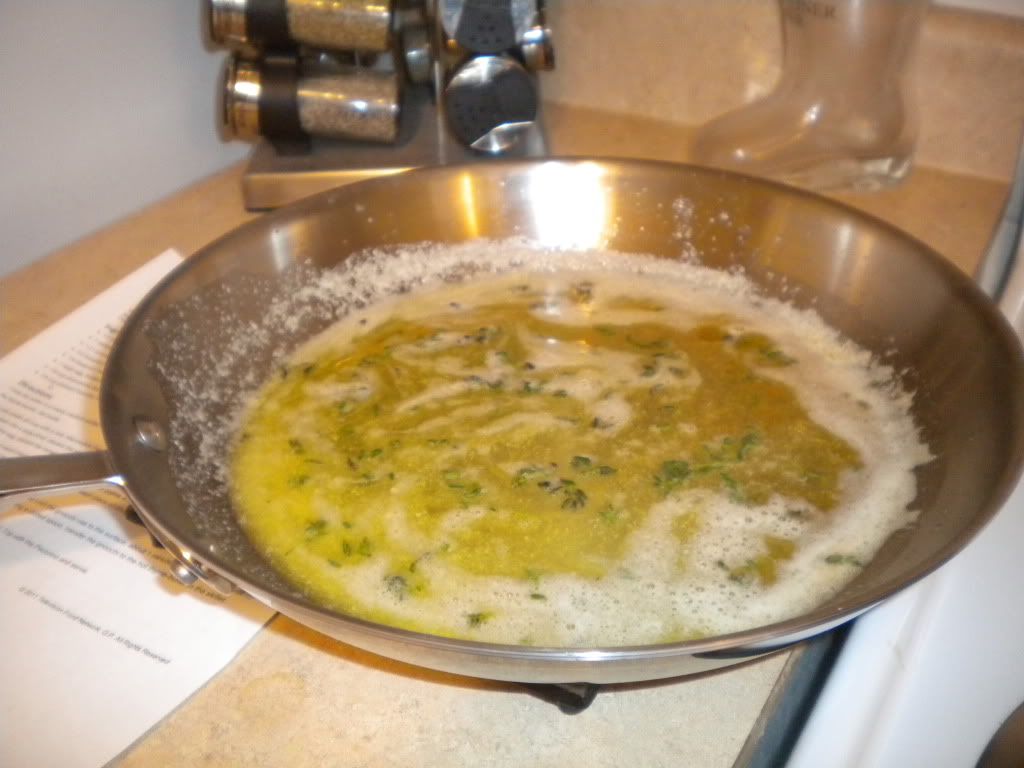
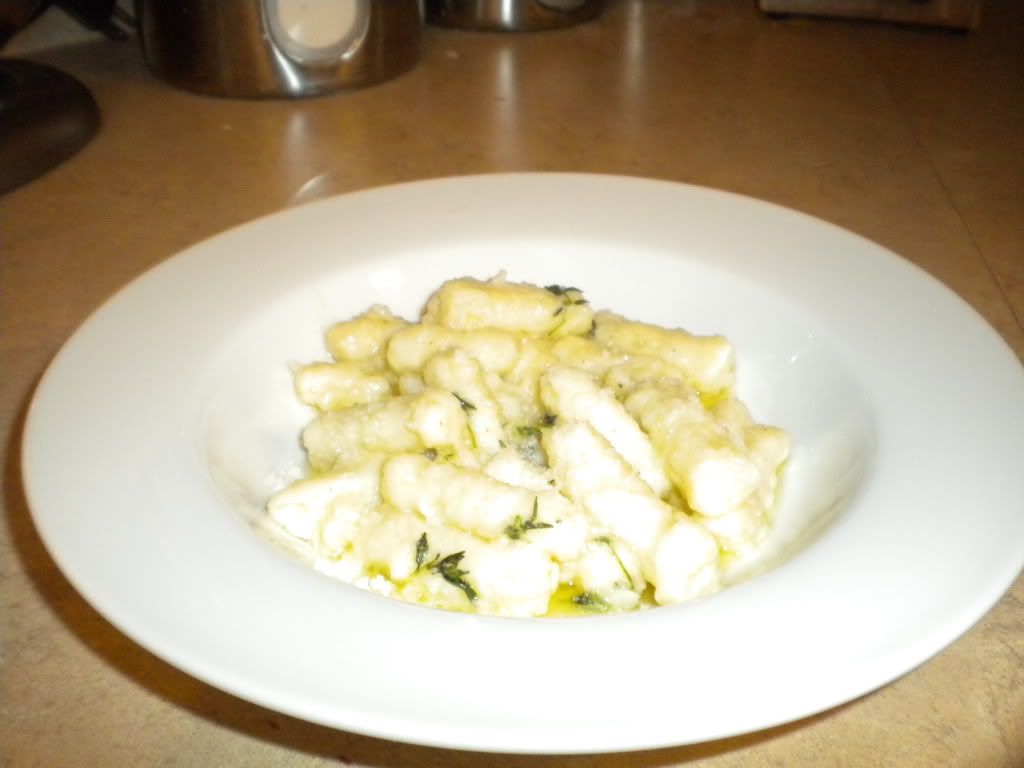
Gnocchi with Butter Thyme Sauce, taken from Giada De Laurentiis

Ingredients:
1/2 cup unsalted butter
1 tablespoon fresh thyme leaves
1 (1 pound) russet potato
1/2 teaspoon salt
1/4 teaspoon freshly ground black pepper
1 large egg, beaten to blend
1/4 cup all purpose flour
1/4 cup shaved Pecorino Romano--I used grated cheese


Kitchen Supplies:
Heavy medium skillet
Large bowl
Fork
Medium stockpot

Cook the butter in a heavy medium skillet over medium heat until it begins to brown, about 2 minutes.  Remove from heat.  Add the thyme leaves and set aside.


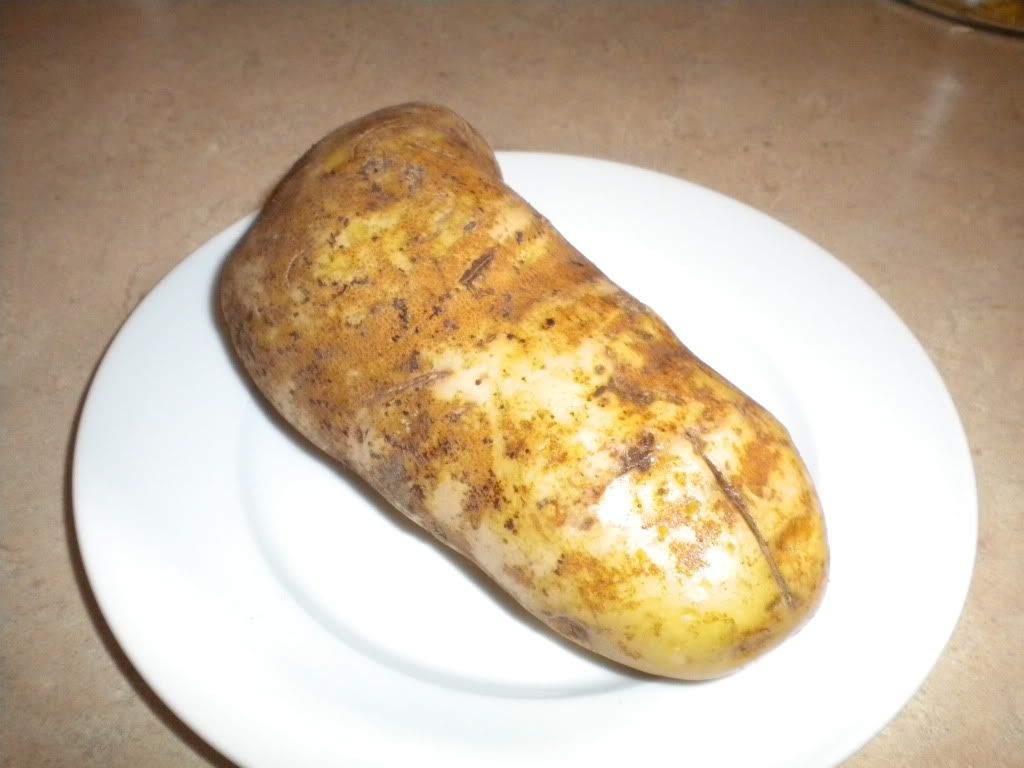
Pierce the potato all over with a fork.  Microwave the potato until tender, turning once, about 12 minutes.  Using a hot pad, cut the potato in half and scoop the flesh into a large bowl; discard the skin. 


Using a fork, mash the potato well.  Mash in the salt and pepper.  Mix in 3 tablespoons of the egg, discarding the remaining egg.  Sift in the flour and knead until just blended.

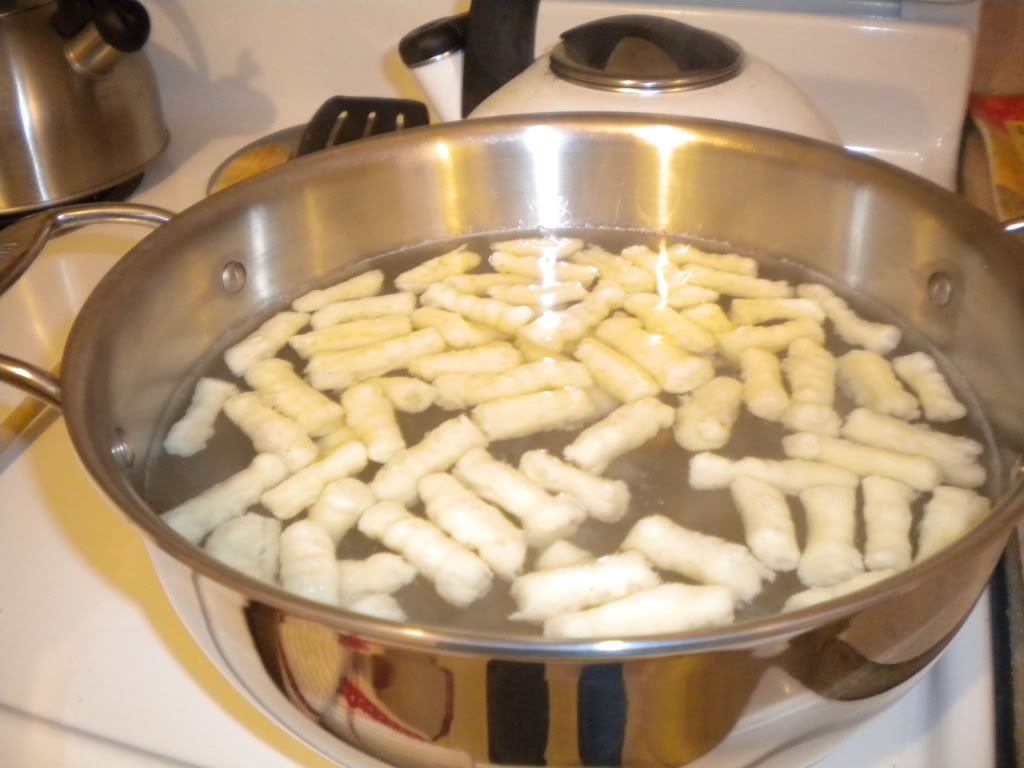
Divide the dough into 4 equal pieces.  Roll each piece between your plams and the work surface into 1/2 inch diameter rope (about 20 inches long).  Cut the dough into 1-inch pieces.  Roll each piece of dough over the tines of the fork to form grooves in the dough.  If you have a wooden paddle with ridges, you are welcome to use this instead.


Cook the gnocchi in a large pot of boiling salted water until the gnocchi rise to the surface, about 1 minute.  Continue cooking until the gnocchi are tender, about 4 minutes longer.  Using a slotted spoon, transfer the gnocchi to the hot thyme-butter in the skillet.  Toss to coat.  Spoon the gnocchi and butter sauce into shallow bowls.  Top with Pecorino and serve.


Serves: 4 to 6

This was a tasty recipe but my gnocchi was quite dense and potatoey, not at all like the pillowy taste and texture I was expecting.  I wonder if a ricer from this wish list would have helped with the airiness.  Traditional gnocchi uses semolina flour as potatoes were not introduced to Italy until the 16th century, which would also be something to try.  Overall it was tasty and better yet, I get to cross another item off my list!

What's on your menu this week?  Any new recipes that didn't turn out quite as you expected?  Do tell!

Wednesday, March 16, 2011

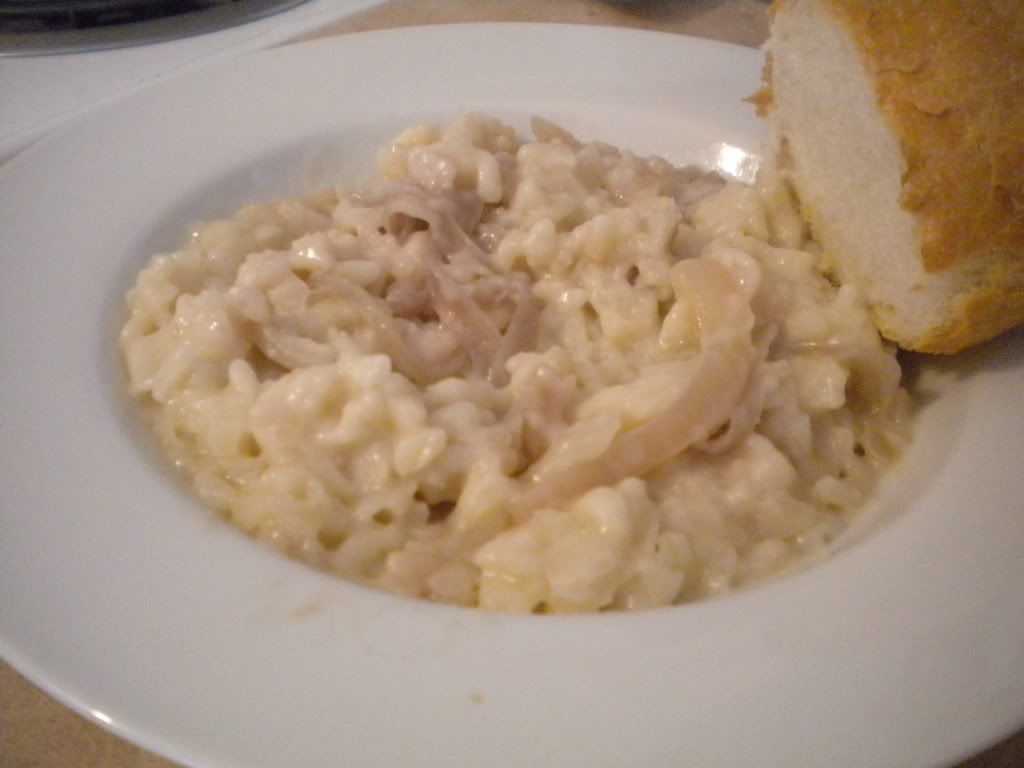
Blue Cheese-Caramelized Onion Risotto

It's funny, when I made this I didn't ever expect to share the recipe as I was just using up leftovers from the night before (we had these blue cheese stuffed burgers from Emeril that we topped with caramelized onions) but since quite a few people have asked for it, here it is!

Blue Cheese-Caramelized Onion Risotto


Ingredients:
4 cups chicken stock, I used cans of chicken broth we bought in bulk at Sam's a while back
4 tablespoons butter, divided1/2 medium white or yellow onion, chopped
1 cup uncooked Arborio rice or other short grain rice
1/2 cup white wine
1/2 red onion, sliced
2 tablespoons brown sugar
1/2 cup crumbled blue cheese
2 tablespoons half and half


Kitchen Supplies:
Small skillet
Wooden spoon
6 cup measuring bowl (for stock)
Medium stockpot
Measuring cups, assorted sizes


Melt two tablespoons of butter in small saucepan over medium-medium low heat.  Once melted, add red onions and saute.  Salt liberally to draw out some of the liquids in the onions which will start the caramelization process.  Sprinkle brown sugar and toss well to combine.  Reduce to medium-low heat and let cook while you prepare the risotto, stirring occasionally.


In a medium stockpot, melt remaining two tablespoons and add onions.  Saute for three minutes. Add rice, sauteing for two minutes until the ends of the rice start to become translucent. Stir in white wine to deglaze the pan. Stir constantly until liquid is absorbed, approximately one minute. Stir in 1 cup of broth mixture and cook for five minutes or until liquid is nearly absorbed, stirring constantly. Reduce heat to medium. Add remaining broth mixture, 1/2 cup at a time, stirring constantly until each portion of broth is absorbed before adding the next. This will take approximately 25 minutes in total.  Reduce heat and stir in blue cheese, caramelized onions and half and half.  Remove from heat and serve.


Previous times I've made risotto, I've kept the stock warm in a small saucepan on the stove and added the warmed stock to the pan.  The last two times we've made it we did not warm the stock and it turned out just as creamy and delicious as ever--so why dirty another pan if you don't have to?


The resulting flavors are a bit sweet from the onions, tangy from the blue cheese and creamy from the risotto grains that you lovingly stirred and tended to for the last half hour.  Delicious!


Do you ever make risotto?  What are your favorite add-ins?  We keep a two pound bag of arborio rice in our pantry at all times so I am always looking for new recipes!


P.S.  Since I'm eating leftovers of this for lunch today and have been for the past few days (that's where the photo came from) and it's Jenn's birthday, I will be linking up with her for What I Ate Wednesday again this week!


Tuesday, February 22, 2011

Fresh Pasta Rollatini with Spinach and Prosciutto

On weekend mornings, J and I like to watch the Food Network.  It often gives us great ideas for our menu for the week and is just a relaxing way to wake up and get moving.

This Sunday, I was watching Giada at Home while J got ready to head to school for his weekend class that he was taking.  He watched about five minutes of the episode but I was able to watch the whole thing.  The episode was hilarious.  Giada's aunt Raffy came to visit and make her family's recipe for pasta rollatini.  The only problem was that Giada had changed the recipe and Raffy, being a strong Italian woman, would have none of it.  I have never seen Giada come so unglued before; it was hilarious!

However, once they made the "new" rollatini, Raffy came around and both ended up very pleased with the dish.  It looked so delicious I had to try it myself.  Giada warned that it took a bit of effort to make the dish, which it did, so I am glad I attempted it on a day when I could take my time in the kitchen as opposed to trying to make it after work during the week.  The payoff is really great and if you have the time (1-2 hours total) I definitely recommend it!

The homemade pasta is made in a food processor, which makes pulling that part of the meal together in a snap.  I am making all of my homemade pasta in my processor from now on!


Ingredients:
For the dough:
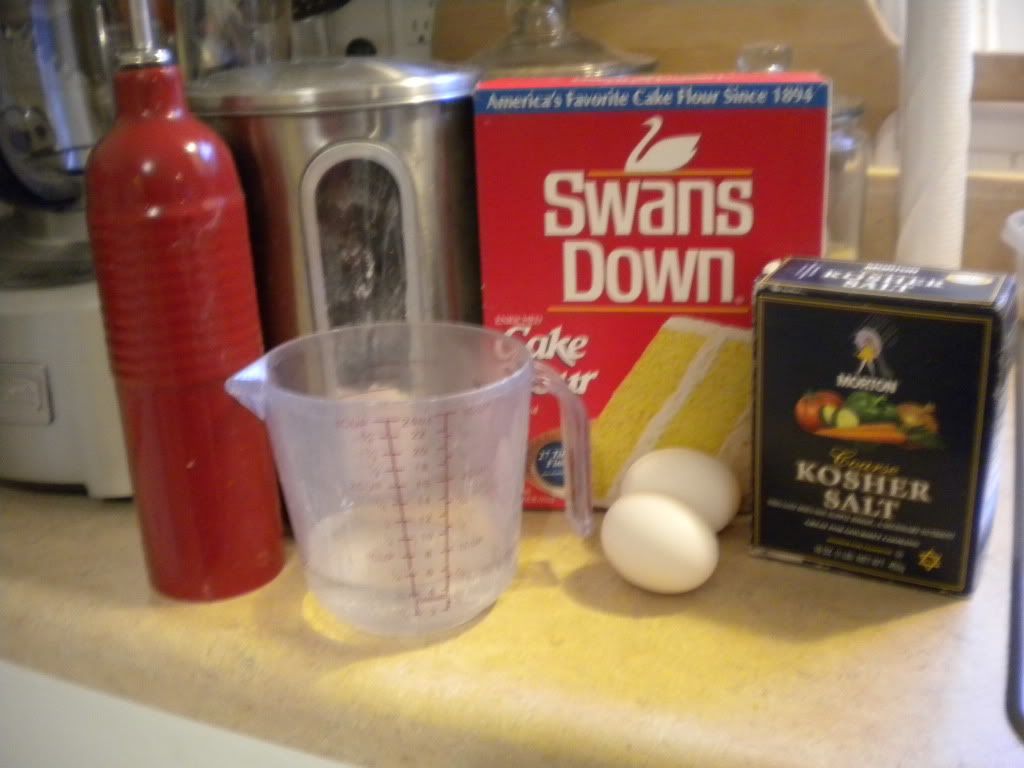
1 cup cake flour
1/2 cup all purpose flour, plus extra for dusting
1 egg yolk--you will use two egg yolks throughout this recipe.  I saved mine in a tupperware, labeled it with the date and will be using it to make an egg whites omelet later this week!
2 tablespoons extra virgin olive oil
1/2 teaspoon kosher salt
1/4 cup of cold water


For the filling:
(1) 10 ounce package of frozen spinach, thawed and drained thoroughly--I usually thaw my spinach in the microwave then either squeeze it dry in a clean kitchen towel or else push the liquid through a fine mesh sieve with a spoon
3 ounces (3 slices) sliced prosciutto, diced
1/2 cup whole milk ricotta cheese
1/3 cup grated Parmesan
1 egg yolk
2 tablespoons olive oil
1 tablespoon unsalted butter, chopped, room temperature
1/4 teaspoon kosher salt
1/4 teaspoon black pepper
1/2 teaspoon ground nutmeg--I added this because I love the flavor combination of spinach and nutmeg!


For the rest:
1 egg
1 tablespoon of water
Butter, for greasing glass dish
3 tablespoons softened butter, cut into small pieces
3 tablespoons Parmesan cheese
2 cups warm marinara sauce--this recipe is so labor intensive, you will want to use pre-made sauce (store bought or canned if you canned some over the summer)


Kitchen Supplies:
Food processor--you could mix the ingredients for the dough by hand (similar to this) but if you have a food processor, I recommend you use that instead.  Much easier and less time intensive!
Plastic wrap
Kitchen towel or fine mesh sieve for draining spinach
Pastry brush
Rolling pin
1 piece of cheese cloth, cut in half
4 pieces of twine
Large pot for boiling pasta logs
Mixing bowl for filling
Rectangular glass dish for baking rollatini
Sharp knife

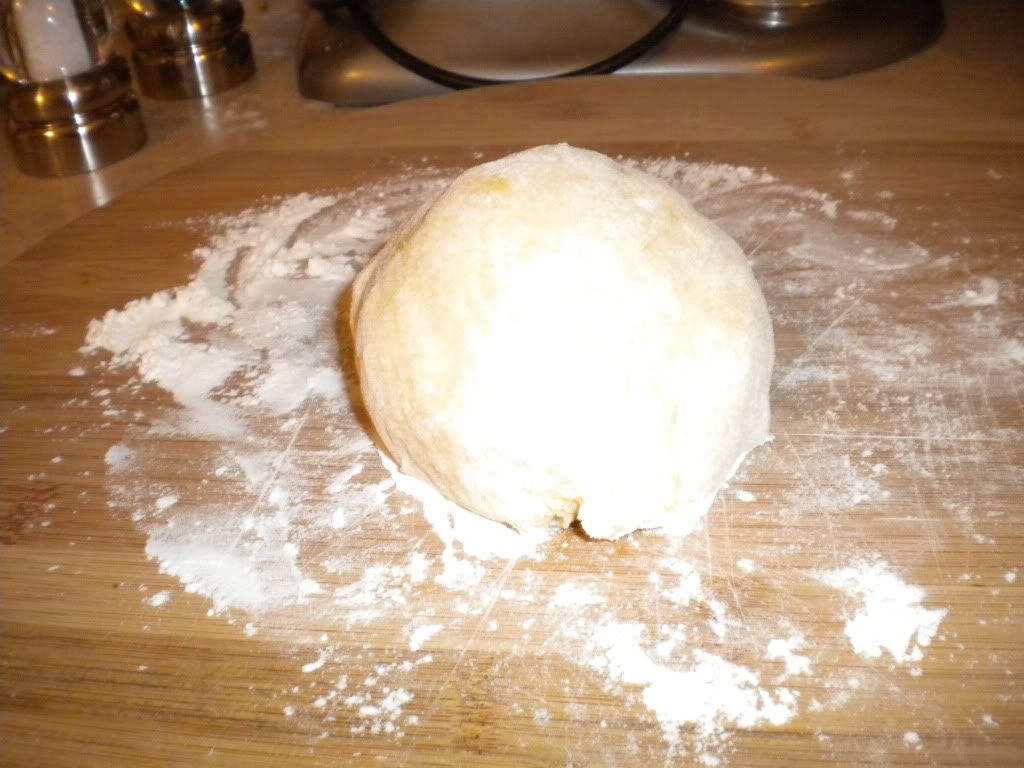
In a food processor, quickly pulse together flours, egg yolk, salt and olive oil.  With the food processor running, slowly stream in the water until the mixture comes together in a large ball.  Remove blade and turn ball of dough onto a floured surface.  Work with it lightly as you would if you were kneading a pizza dough for a minute or so.  Cover with plastic wrap and let chill in the fridge for 30 minutes.


While the dough chills, mix the drained spinach, chopped prosciutto, egg yolk, ricotta, Parmesan cheese, butter, salt, pepper, and if desired, nutmeg together using a fork.

After thirty minutes, remove ball of dough from the fridge and return to floured surface.  Cut dough in half and set aside one half.  Press other half into a small disc then roll out into a circle to approximately 8 inches in diameter.  Spread one half of the spinach mixture over the pasta, leaving a 1/4 to 1/2 inch clearance around all edges.

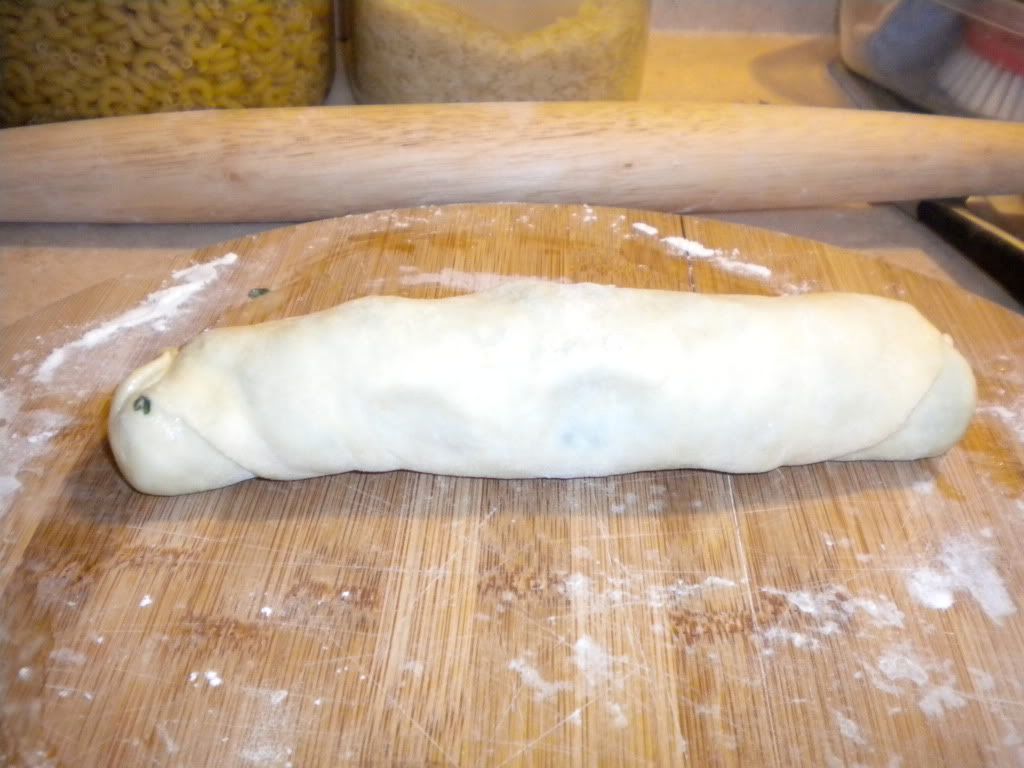
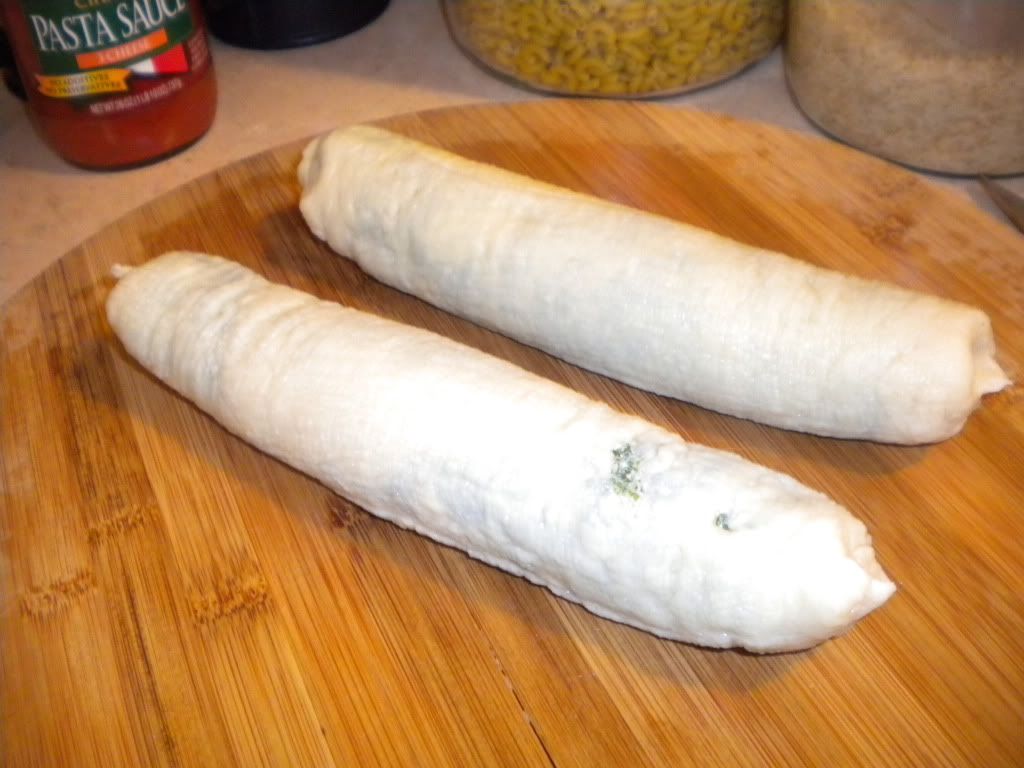
Brush edges with egg wash mixture and carefully roll the pasta as you would a jelly roll.  Pinch the ends together to seal the log.


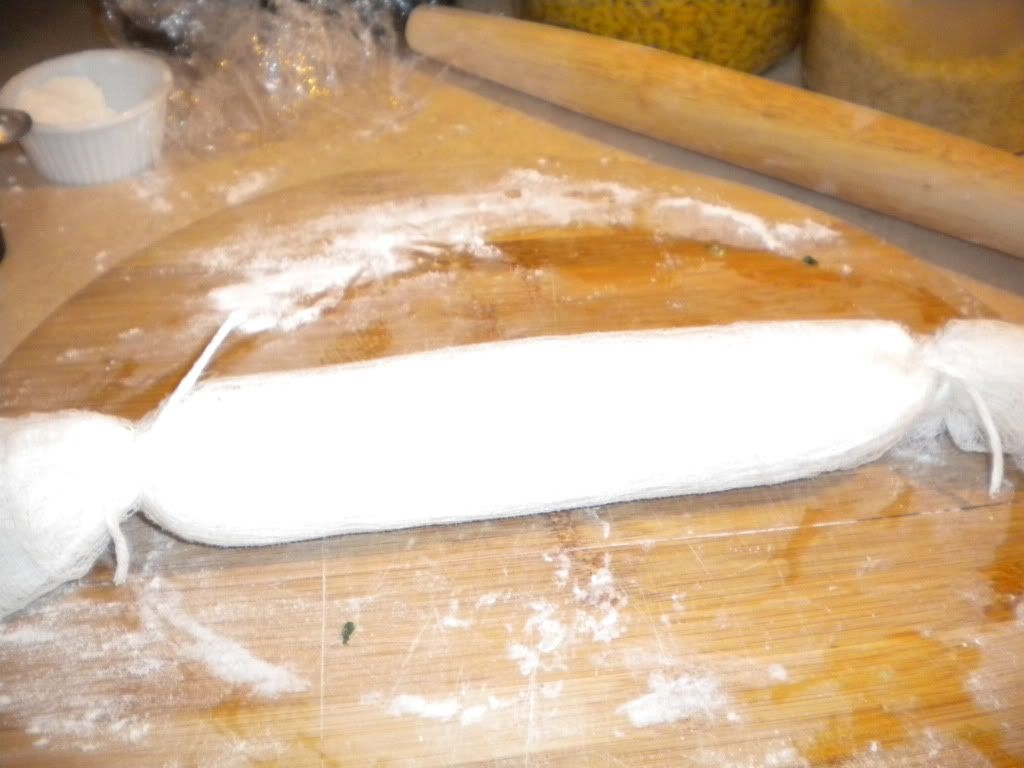
Place roll on a piece of cheese cloth.  Roll up the log, leaving the ends loose (the  cheese cloth log will have a tootsie roll like appearance at the end)  Tie ends with a piece of kitchen string.  Repeat with other half of dough.


The cheese cloth will help the fragile pasta stay together until it cooks and generally keeps all of the ingredients together.  If you have a clean white kitchen towel you don't mind parting with, you can use this too--this is what Raffy grew up doing.  In fact, during the episode she criticized Giada for using cheese cloth because it leaves tiny waffle patterns on the dough (I found that they become indistinguishable when you cut the pasta roll into its slices).

In a large stockpot, bring water to a boil and using the two "tootsie roll" ends to hold onto the roll, carefully lower them into the boiling water.  If you are debating between using a wider, more shallower pot and a taller, narrower pot, I recommend using a shallower one so that the pasta doesn't get too bent--a complaint Raffy made during Giada's episode.  Boil for fifteen minutes then remove with 2 sets of tongs, again removing the pasta by the two ends as opposed to the middle, which could cause the pasta roll to crack and break.

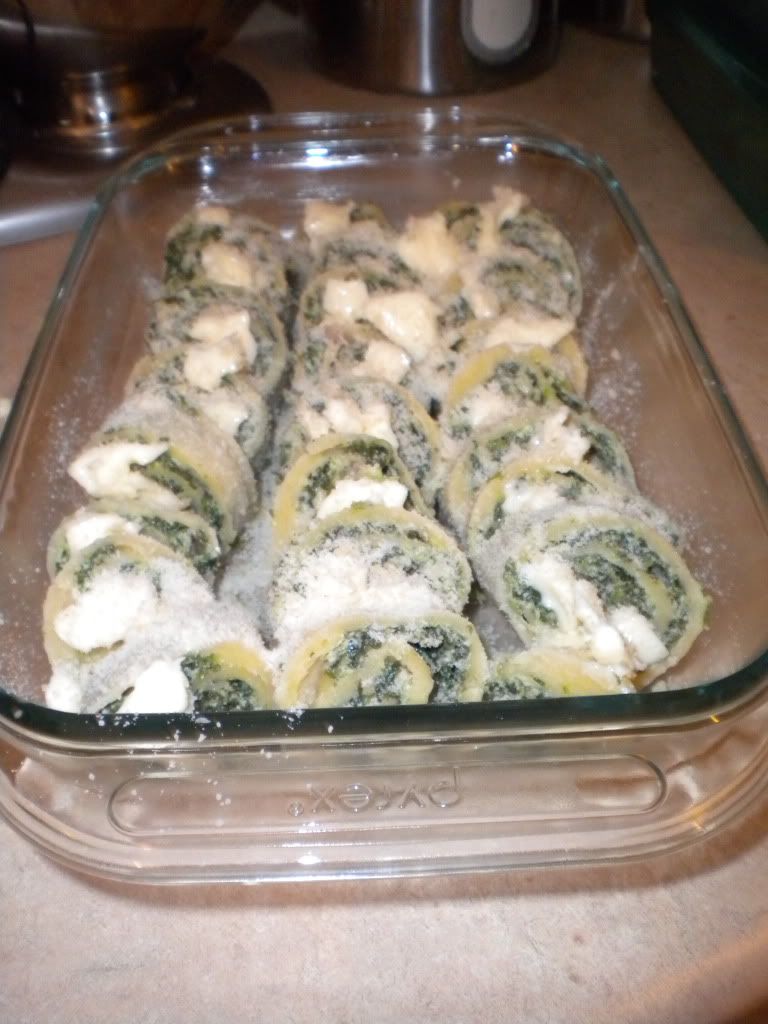
Let cool on a counter for ten minutes.  Once cool enough to handle, cut off the ties and slowly unwrap the pasta rolls.  Using a sharp knife, cut the rolls into slices and then place in a greased glass baking dish.  You will get twelve slices out each roll and will end up with three overlapping rows of pasta.  My secret to getting even cuts is to cut each piece in half, then half again so that the area you are working with is a lot smaller.  I've found it's easier to get three equal cuts out of one piece than trying to eyeball twelve equal cuts out of a larger roll!


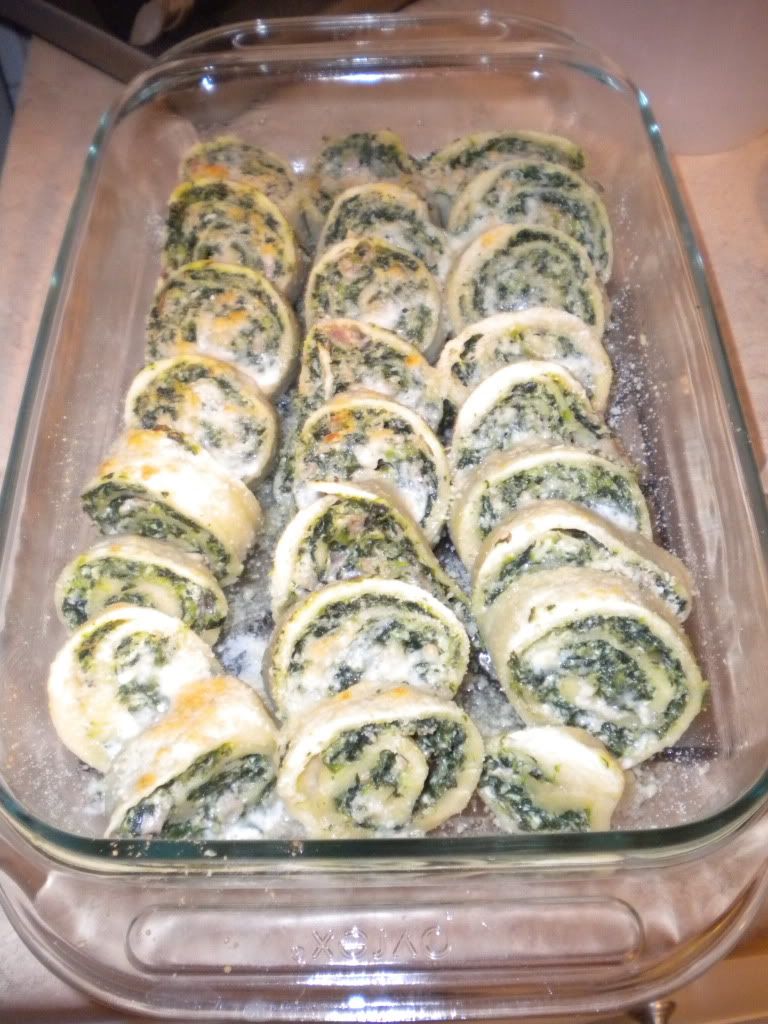
Scatter pieces of butter across the tops of the rolls as well as the additional Parmesan cheese.  Place under a broil for a few minutes to melt the cheese and brown the butter.  This part takes a bit of attention so you don't burn it and ruin all of your hard work!


Serve with a small dish of marinara for dipping and devour enjoy!  The ends, while small, are the best part because they get a little crispier and taste more like a delicious bread so you may have to fight your hubby over them :)


I probably could have let our dish go a little longer under the broiler to get further browning but I was worried about burning it and starving at that point!


Note: this could easily be turned into a fancy appetizer by dividing the dough (and filing) into fourths to create more bite sized rolls with could be served with toothpicks and sauce for dipping.

This is what Woods did while I slaved away in the kitchen.


Since he didn't help, he didn't get any of the food!

Has anyone else made rollatini before?  Now that I know how simple it is to make the dough, I'd like to make this again with different fillings.  Any suggestions?


Linking this up to Tasty Tuesdays.

Tuesday, February 1, 2011

Almost French Onion Soup Risotto

Sunday night when J and I returned from our weekend away, the last thing we wanted to do was battle crowds at the grocery store which would have been even more crowded than usual for a Sunday night due to the bad weather in the forecast.  

Instead, we took stock of what we had available to us (white wine, Gruyere cheese left over from this recipe, arugula, onions and risotto) and decided to make our old faithful: risotto.


We followed the same basic steps (and used the same basic ingredients) as outlined in these risotto recipes but made a few changes.
  1. We used four cups of water for three bouillon cubes to cut down on the salt in the dish, which really worked!
  2. We used grated Gruyere as the cheese of choice
  3. We caramelized half of an onion in the following manner:  Melt 2 tablespoons of butter in a small skillet.  Add onions and salt and pepper.  The salt will help draw out the moisture in the onions, which is good for caramelization.  Once they start to turn golden brown, add one to two tablespoons of brown sugar.  Stir occasionally until the onions brown and caramelize.  Remove from heat and top risotto with onions.
We made a simple oil and vinegar dressing, using a dijon mustard dressing as the base, and tossed our arugula with some grated Parmesan cheese.

It was delicious and something we'd like to make again, but using beef stock instead of chicken stock in the hopes of creating a French Onion soup like risotto, hence the title of this post.

Oh, and for those of you who have not tried to make risotto, I really encourage you to try it.  I know I was intimidated the first time I made it but really once you get the hang of it (and even that's not that hard) you will love it!  It takes a lot of constant stirring but it also guarantees you that dinner will be on the table in 35 minutes or less.  How about that?!

Update:  This post is linked up to Tasty Tuesday on For the Love of Blogs and Delectable Tuesday on Home Sweet Farm

Thursday, January 13, 2011

Fettuccine with Gorgonzola Sauce

After I made the homemade pasta, I boiled water and added a generous amount of salt--salting your water is your only chance to add flavor to the pasta itself!  Fresh pasta takes approximately half the time that dried pasta does, so it was done in four to five minutes (smaller pieces will float to the top).  I also tossed in some of the smaller "reject" pieces as not to waste them.

Meanwhile, I made this sauce:

Fettuccine with Gorgonzola Sauce, as modified from Williams-Sonoma Pasta cookbook


Ingredients:
3 tablespoons unsalted butter
3 shallots, minced--I used 1/4 of a red onion because the flavors are very similar and it was cheaper!
1 lb of fresh or dried pasta
1/2 cup chicken stock
1/2 lb Gorgonzola cheese, rind removed and cut into small pieces--I used a little less cheese, simply because it was all that we had in the house and it turned out just fine
3/4 cup heavy cream--I used half and half to cut down on some of the calories
Grated zest of 1 lemon
Salt and pepper
6 fresh sage leaves, coarsely chopped
Handful of fresh flat-leaf parsley, coarsely chopped

Kitchen Supplies:
Large stock pot
Large skillet
Microplane for zesting
Knife
Cutting Board

Bring a large pot of water to a boil.  Meanwhile, in a large frying pan over medium heat, melt the butter.  Add the shallots and saute until soft, about 4 minutes. 

Generously salt the water ad pasta and cook until al dente (10 to 11 minutes for dry, 3 to 4 minutes for fresh).

Reduce the heat under the frying pan to low and add stock, cheese, cream and lemon zest.  Season with salt and pepper to taste and stir until all ingredients are smooth and melted, about 4 minutes.

If you are making this with fresh pasta, it can be a bit more tricky to time it all so it's done at the same time.  Here's what I did that seemed to help: I melted and sauted the onions and then set aside until I was ready to boil the pasta.   That way, I had four minutes for the pasta to cook and four minutes for the sauce to come together.

Drain the pasta and add it to the frying pan.  Remove from the heat, add the sage and parsley, and toss briefly until the pasta is well coated with the sauce.  If the sauce seems too thick, add a bit more chicken stock or a splash of hot water.  Serve immediately.


Serves: 4 main course servings or 6 first course servings

While on the topic of pasta, what is your favorite pasta shape?  What about sauce?  My favorite shape is Farfalle (or bowtie) and my favorite sauces are white sauces.  What about you?!

Monday, December 6, 2010

Spring Onion Risotto

As I've mentioned before, J and I like to make Sunday night dinners together.  This was something my parents began doing when I was growing up and a tradition we've continued with our little family.  No matter where people were all weekend or what activities they were involved in, we all tried to eat a nice meal together as a family on Sunday night.  Because I usually have a bit more time to devote to cooking on the weekends, J and I usually try to not only eat dinner together (okay with just the two of us we usually eat together almost every night) but we also try to make it special in some way.

For our Sunday night dinner this week, we made spring onion risotto with sauteed garlic shrimp and a fresh green salad.  The salad was tossed simply with good olive oil and vinegar, salt, pepper and a little citrus by way of some abiding clementines.  We paired this with a crisp glass of white wine and it was as if we were instantly transported to an Italian coastal town, sitting in a small cafe together.

Unfortunately, my camera died as I tried to take pictures of the meal which is so sad because it was beautiful and delicious!  J tried his hand at the risotto, making the whole thing himself while I served as sous chef and peeled and de-veined our shrimp.  J's risotto was more creamy and delicious than when I have ever made it, so I think he may be the new risotto chef in our house!  Here's the recipe:

Spring Onion Risotto, borrowed from Epicurious

Ingredients:
1 bunch spring (green) onions: white parts finely chopped, green parts thinly sliced
2 tablespoons (1/4 stick) butter
1 cup arborio rice
4 cups stock--we used half homemade to finish up what we had on hand!
1/2 cup dry white wine
1/4 cup grated Parmesan cheese
2 tablespoons whipping cream (or mascarpone cheese)
1 teaspoon grated orange peel--we used clementine peel because that's what we had on hand

Kitchen Supplies:
Wooden spoon
Small stockpot or pasta pot
Small saucepan
Grater
Microplane or other zester

Heat stock over low heat in small saucepan.  Melt butter in stockpot and add the chopped white tops of the green onions until soft, stirring often for approximately six minutes.  Stir in rice.  Add wine and cook until most of the liquid is absorbed, about two minutes.  Ladle 1 cup of broth into pan, stirring constantly until almost absorb.  Continue process, adding stock 1/2 cup at a time, again stirring constantly as you go.  This process takes approximately 20 to 25 minutes.  Stir in orange peel, whipping cream, the green parts of the onions and parmesan cheese.  Remove from heat, serve and season to taste with salt and pepper.

Serves: 4

Try it for your Sunday night dinner or any time you want something a little special!

Thursday, October 21, 2010

Two Peas in a Pod Risotto

Some of you may be curious about the title of this post. It is so called because Tuesday marked two years since J asked me to be his wife. Remembering back to that time and reflecting on all that has come between then and now (our cat Woods, our first apartment together, our wedding, marriage), I decided I wanted to make something special to commemorate the occasion. On my way home from work I went over the ingredients I had in my pantry:
  • White wine from a few weeks ago when we hosted the officiant at our wedding
  • Prosciutto from pizzas we made on Sunday night
  • Onion from said pizza
  • Peas from our Sunday Afternoon pasta
  • Gruyere cheese, again from our pizza
Then the light bulb went off. Risotto, my old friend! My dad gave us a five pound bag of Arborio rice a few months ago and since then, we have made many risotto dishes. Risotto can be intimidating because of the time and care involved in making it, but once you learn the system it is quite easy.

My favorite way to make it involves opening a bottle of white wine and pouring glasses for J and myself before cooking with some of it. While I stir the rice, J and I talk about our days and catch up with each other before sitting down with big bowls of steaming rice and more wine. It was a great way to celebrate the anniversary of our engagement!

Two Peas in a Pod Risotto, adapted from Best of Cooking Light's Champagne-Feta Risotto

Ingredients:
1/2 cup of water
1/2 teaspoon dried basil
2 (15.75 ounce) cans fat-free, less-sodium chicken broth
1 tablespoon olive oil
1 cup chopped onion
1 cup uncooked Arborio rice or other short grain rice
1/2 cup white wine
4 ounces prosciutto, sliced
2/3 cup grated Gruyere cheese
1/3 cup peas--I used frozen
2 tablespoons grated fresh Parmesan cheese


Kitchen Supplies:
Medium stock pot or pasta pot
Wooden spoon--because you will be doing a lot of stirring at some high temperatures
Cheese grater
Wine opener
Small strainer, if using frozen peas

Combine first three ingredients in a medium sauce pan and bring to a simmer (do not allow it to boil). Keep warm over low heat. Note: I have made this with the cans as suggested above and with chicken bouillon cubes and hot water. Both work fine. If you are looking to limit your salt intake, I recommend the canned broth.

Heat oil over medium to high heat and add prosciutto. Stir for two to three minutes until the prosciutto is crispy and golden brown. Remove prosciutto and set aside. Add onions and saute for three minutes. Add rice, sauteing for two minutes until the ends of the rice start to become translucent. Stir in white wine to deglaze the pan. Stir constantly until liquid is absorbed, approximately one minute. Stir in 1 cup of broth mixture and cook for five minutes or until liquid is nearly absorbed, stirring constantly. Reduce heat to medium. Add remaining broth mixture, 1/2 cup at a time, stirring constantly until each portion of broth is absorbed before adding the next. This will take approximately 25 minutes in total.

Rinse and drain peas with a strainer to take the chill off of them and to ensure you do not add extra liquid to the dish. Add prosciutto, peas, and Gruyere cheese, stirring to combine. Spoon into bowls and top each with half of the Parmesan cheese.

Pour yourself another glass of wine and enjoy!

Sunday, October 3, 2010

Sunday Afternoon Pasta

Today, after watching some of my favorite Food Network shows including Giada At Home, Nigella Kitchen and Alex's Day Off, I was inspired to cook.  Normally I would harness this energy to make our Sunday night dinner, but because we are heading to our neighbors' wedding and reception in a few hours, I made a very nice lunch for us instead.

I still had cream and prosciutto left over from last Sunday's Pasta Primavera, which inspired an idea: Fettuccine alla Carbonara.  I consulted my BHG New Cookbook and made a few changes and additions.  The result was warm, inviting and delicious.  I hope you try it and enjoy some Sunday afternoon, or anytime!

Penne alla Carbonara, adapted from BHG New Cookbook

Ingredients:
3 slices prosciutto, cut into 1 inch strips
 1/2 cup chopped onion
1/3 cup frozen peas
4 cups penne pasta, or whatever you have on hand
1 tablespoon olive oil
1 cup half and half or heavy cream--I had cream on hand from last week's recipe so I used that
1 egg, beaten
2 tablespoons butter
1/2 cup grated Parmesan
Coarsely ground black pepper


Kitchen Supplies:
Pasta pot
Small saucepan

Put a pot of water onto boil.  In a small saucepan, saute prosciutto and olive oil over medium heat until the prosciutto turns crispy and golden brown.  Remove prosciutto from pan and set aside.  Add onions and saute in the brown bits from the prosciutto for 1 to 2 minutes until translucent.  Remove from pan.  Salt pasta water and add pasta.  When six minutes remain in cooking time for the pasta (our Penne took 11 minutes) add the butter and allow to melt slightly.  Add cream and egg, stirring constantly with a wooden spoon until the consistency is such that the sauce just coats a metal spoon.  Strain pasta, reserving some of the cooking liquid.  Add peas to the strainer you used for the pasta.  Run cool water over them briefly to remove any frost and take the chill off the peas.  Return pasta to the pot, then add sauce, Parmesan, peas, onions and prosciutto.  Toss and if the sauce is too thick, add some of the reserved pasta water to loosen.  Serve with pepper to taste. 

The original recipe called for bacon which you browned up in a separate pan.  When reading it over, I realized I could use one saucepan (less cleanup) and take advantage of the brown bits at the bottom of the pan in the rest of the recipe (more flavor).  It was totally worth it.  Hints of the salty, smokiness of the prosciutto were in every part of the dish, including the creamy sauce.

Traditional Carbonara is served with fettucine, but thanks to our Sam's Club membership, we always have several pounds of Penne on hand, so that's what I used.  The small lines on Penne actually worked quite well with this dish, as the creamy sauce really clung to the pasta.

I also added onions and peas, because to me, Carbonara is not the same without them!  Enjoy!