Thursday, April 28, 2011

Spring Has Sprung, Right?

Despite the fact that we are two days away from May, it still feels very cold, wet and rainy around here.  So much so that I've been contemplating rain boots (these yellow beauties are my favorite so far)!

There is one event on the horizon though that definitely lets me know that summer is on its way and that is the Ferguson Farmer's Market.

J and I found this market last year thanks to Ashlee and JY and absolutely love it.  All of the produce is guaranteed local and fresh, many of which is picked just hours before they are available for purchase.  The same vendors come back week after week and it is wonderful to watch different fruits and vegetables come into season as new items appear every week!

In addition to fresh produce, they also have local eggs, meat, pasta, bread, herbs and crafts.  If what you are looking for is fresh and local, chances are you can find it at the market.  Opening day for this year's market is this Satuday and J and I plan on being there right when it opens!

Here is a selection of some fresh produce we purchased last year:


Peaches we hand-picked at Eckert's Family Farm last summer


Michigan blueberries from a farmer's market in South Haven, MI as part of our family vacation


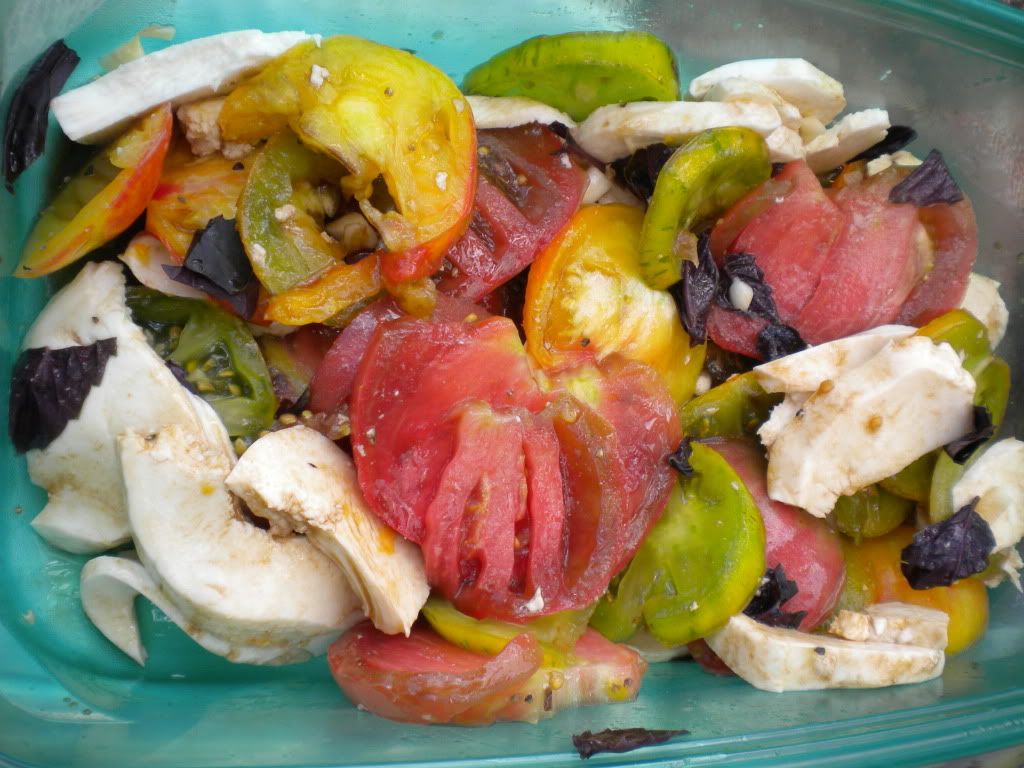
Fresh tomatoes and basil from the Ferguson Farmer's Market for a summer time picnic--look at those colors!


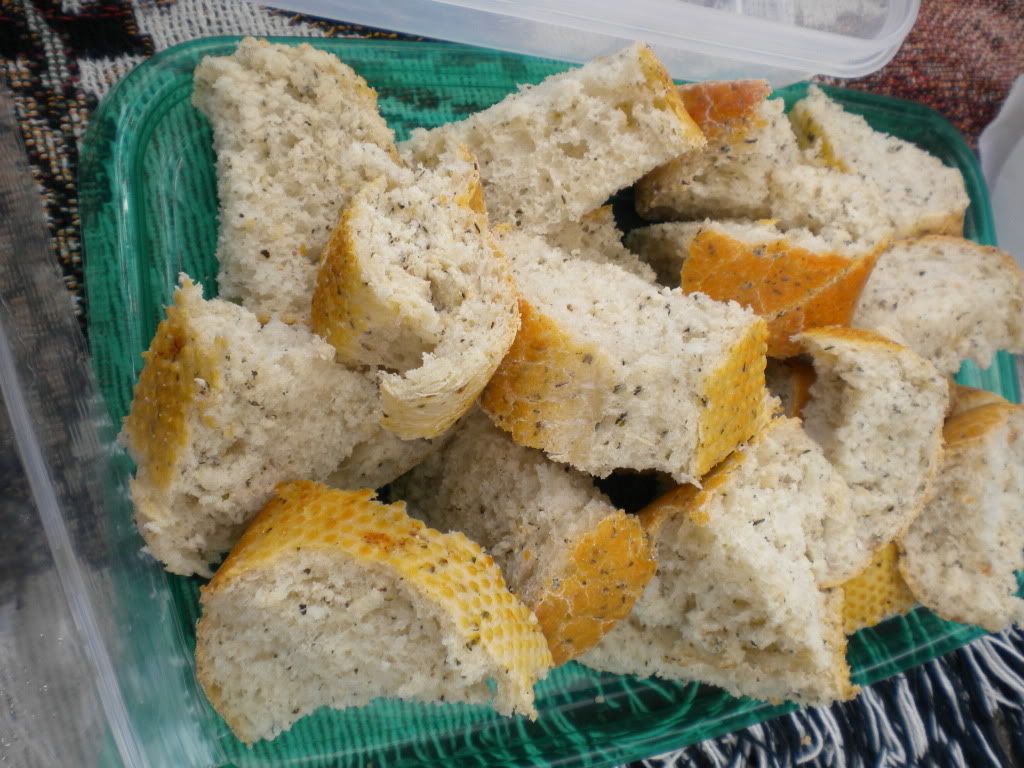
Herb bread, again from Ferguson Farmer's Market, to dip in the tomatoes which we tossed with balsamic vinegar and fresh mozzarella


Summer can't come soon enough!  

Do you frequent a farmer's market in your area?  If so, is yours open for business yet?

Wednesday, April 27, 2011

Croque Monsiuer Mac and Cheese

Last night J and I made our first recipe out of our new cookbook, Food Network Magazine's Great Easy Meals, using some of the hot ham left over from our Easter dinner.

Hot ham is our signature dish come Easter time.  The recipe has been in my maternal grandfather's family for over one hundred years and dates back to the days they lived in Kentucky in the mid to late 1800s.  Basically, you create slits in the top of a fully baked, bone in ham (spiral cut would not work) which you then stuff with dried red chili peppers (also called chili de arbol--hence the "hot" in hot ham), fresh spinach and the white tips of green onions.  After you stuff the ham, you wrap it in cheese cloth to keep the stuffing inside and boil it for a few hours to cook the spinach and green onion.  Right before serving you bake it for about an hour to reheat the ham and crisp the skin.  When it comes time to serve, people can opt for some of the stuffing if they like things spicy or leave it off to enjoy a flavorful ham with just a little kick.

I apologize for the quality of this photo--J took it from his phone because I left my camera at home!
The hot ham is perfect for this recipe although any type of ham would suffice.  We also used smoked Gruyere cheese to bring out the smokiness of the entire dish. 

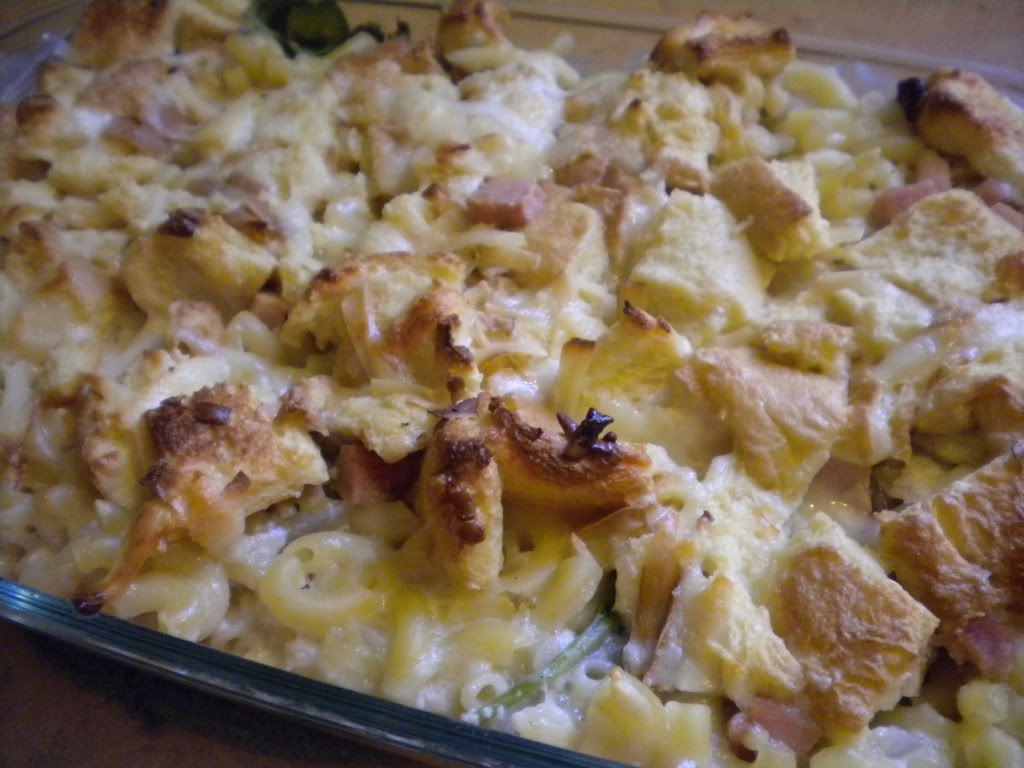
Croque Monsiuer Mac and Cheese, modified from Food Network Magazine's Great Easy Meals cookbook

Ingredients:
1/2 pound ziti--we used elbow macaroni because that's what we had on hand
2 cups fat free milk
2 cups coarsely grated Gruyere cheese (about 6 ounces)--because we were using smoked Gruyere, we used one cup of Gruyere and one cup of plain Swiss cheese.  This is also a cheaper option since Swiss is such an inexpensive cheese
1 cup finely grated Parmesan cheese (about 4 ounces)
2 large eggs
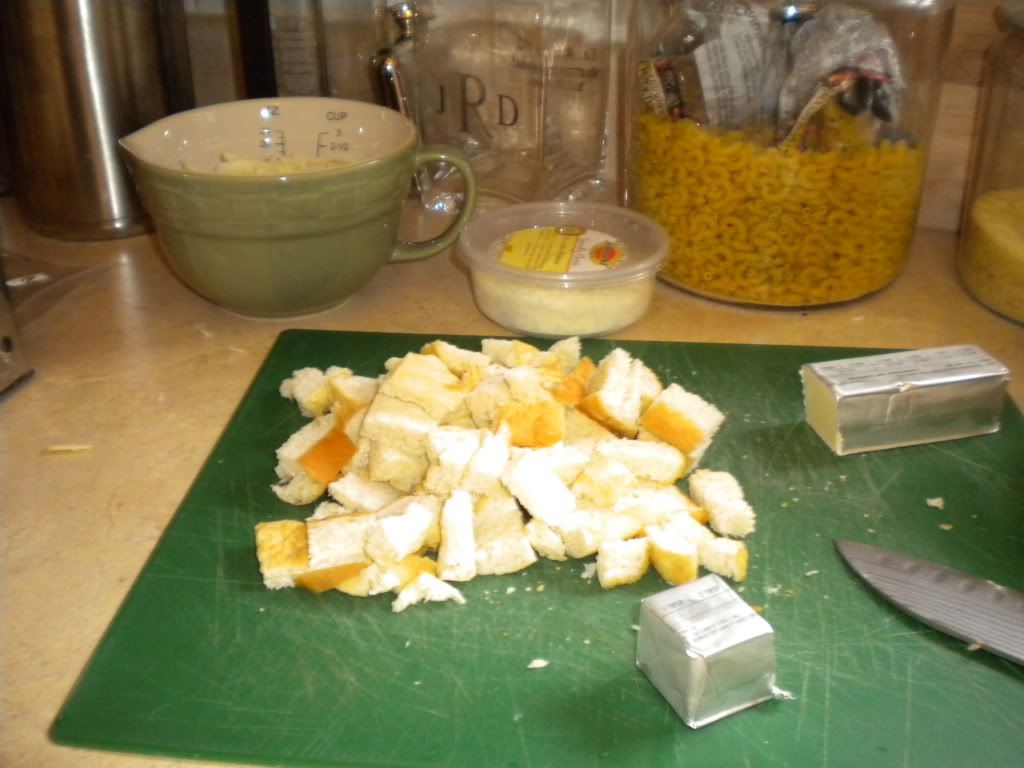
3 slices white sandwich bread, coarsely chopped
2 tablespoons butter, plus more for greasing
1 medium onion, diced
1 garlic clove, minced
3 tablespoons all-purpose flour
1/8 teaspoon nutmeg
1/8 teaspoon cayenne pepper
1 teaspoon salt
8 ounces cooked ham
3 cups fresh spinach--we added this to the recipe for a little green and to use up what we had on hand before it went bad!


Kitchen Supplies:
Large stockpot for pasta
Cutting board
Box or hand grater for cheese
Small saucepan
Whisk
Measuring cups
One large bowl
One medium bowl
2 quart glass baking dish


Preheat oven to 425 degrees.  Bring a large pot of water to boil, add salt and pasta cooking until al dente (six minutes for ziti, eleven minutes for elbow macaroni).  Drain and transfer back to stockpot, tossing with 1/4 cup of milk to keep it from gumming up.

Meanwhile combine cheeses in a bowl.   Beat 1/4 cup of milk and 2 eggs in another bowl; fold in bread and toss with half of the cheese mixture.

Next, melt 2 tablespoons of butter in the saucepan over high heat and saute garlic and onion for two to three minutes until they start to brown.  Add flour, cayenne pepper, nutmeg and salt; cook, stirring about 2 minutes.  Slowly add 3/4 cup of water and the remaining 1 1/2 cups of milk; bring to a boil, stirring until thickened.  Remove from heat and whisk slightly to cool.  Whisk in remaining cheese then add the mixture to the pasta in the stockpot, tossing to combine.


In a buttered glass baking dish, pour half of the pasta mixture followed by half of the ham and all of the spinach.  Top this with the remaining pasta before pouring the bread and cheese mixture on top of it all.  Bake for 20 minutes until golden brown and bubbly.  Let rest a few minutes before serving.


 Serves: 4

This was a delicious recipe and I am looking forward to eating the leftovers for lunch today!


Also because I haven't shared any Woods' photos in a while, here are a few I snapped yesterday.  The first is a picture of his new "bed" next to ours.  I like to think of it as a trundle bed of sorts, one that allows J, Woods and I to sleep better because Woods is no longer hogging half of our full size bed.  We will see how long this phase lasts!


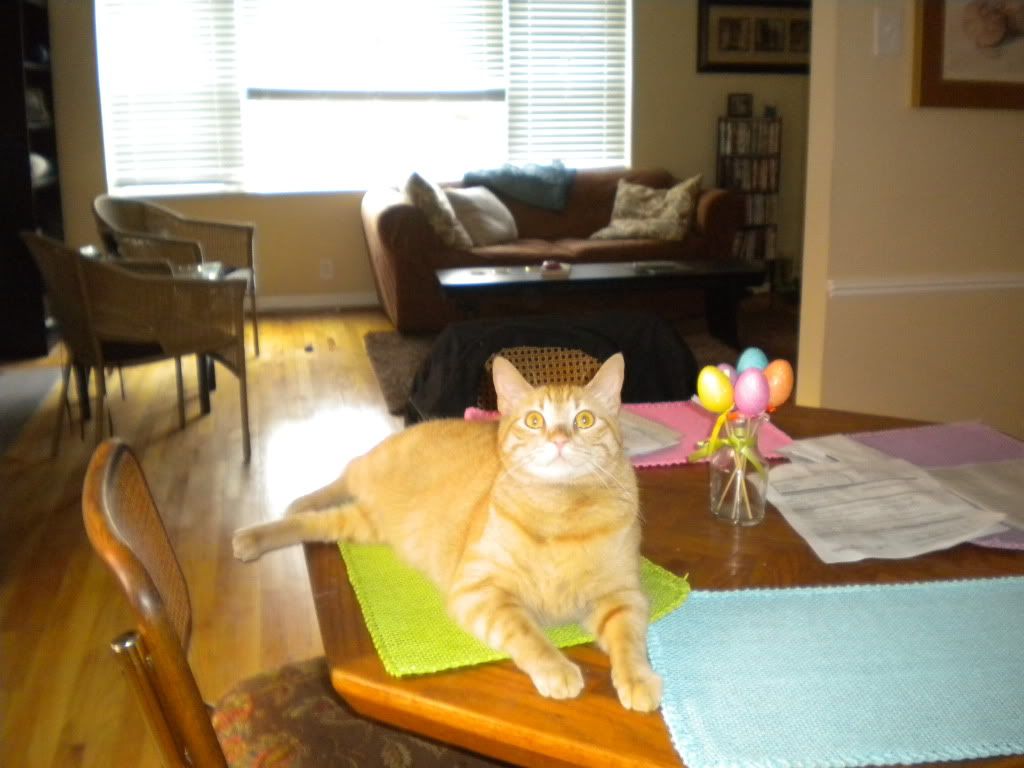
The next is of Woods while we were making dinner.  He is not allowed on our table and he knows it, hence the guilty look on his face when I caught him in the act!


Let's talk holiday food!  What type of protein do you usually have for holiday meals?  Ham? Turkey? Roast beef? 

Tuesday, April 26, 2011

Menu Tuesday, Homemade Gnocchi and Where I've Been

My sincere apologies that I've been MIA around here for another week.  I took an unexpected break to spend time with family in Peoria for Easter and boy did I need it!  As much as I love this blog and all of you, it felt great to spend a few days not constantly thinking about what I will blog about next or scrambling to get my camera so that I can document everything for the blog.  I guess I'm finding that balance I talked about with my New Years resolutions back in January.  I am now rested, refreshed and ready to jump back into blogging!

I normally share our weekly menu on Mondays but I ran out of time yesterday between work and errands that couldn't wait after the long weekend.  I am sharing it today because I am really excited about our menu this week, especially because it uses some of the turkey and hot ham leftovers from Easter dinner on Sunday and includes some recipes from our new cookbook which was our gift from the Easter Bunny.

Monday: Homemade Turkey Pot Pies, similar to this recipe but this time we used leftover creamed potatoes and a splash of fat free milk instead of cream!

Tuesday: Croque Monsiuer Mac and Cheese--photos and recipe to follow!

Wednesday: Ham and Bean soup--photos and recipe to follow!

Thursday: Tangerine Beef with Scallions and Veggie Stirfy--photos and recipe to follow!

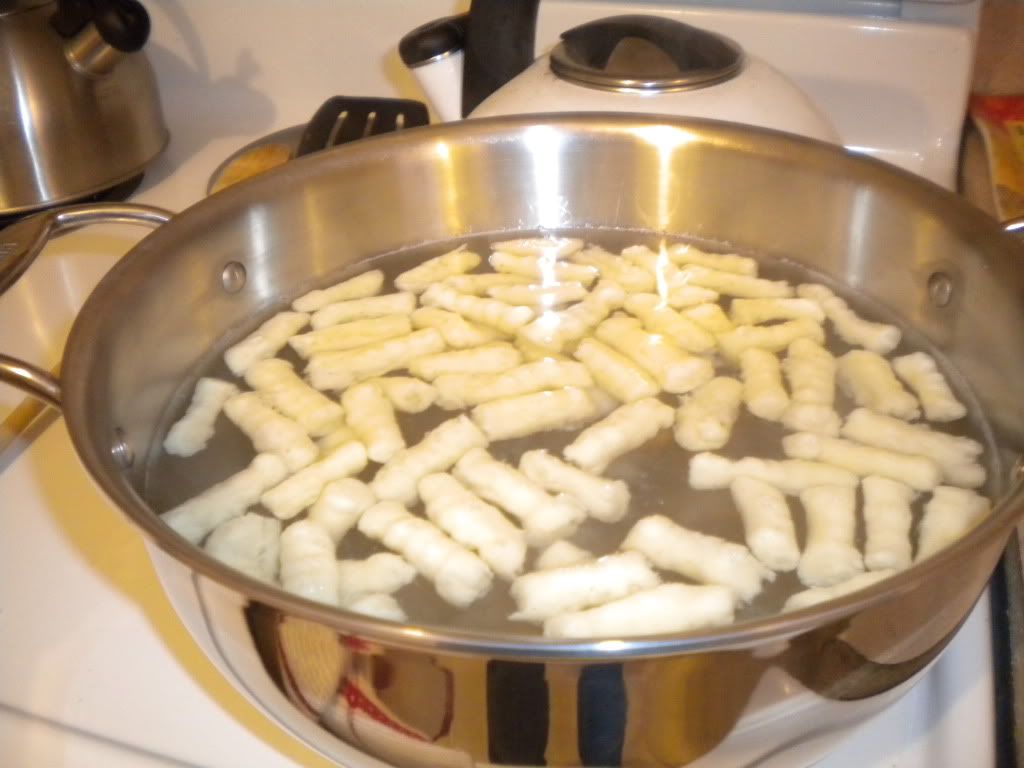
Now as promised, a recipe for homemade gnocchi I made last week.  Inspired by this lovely lady, I decided to try my hand at it and in the process, crossed off another item on my 130 Before I'm Thirty list.


18.  Make homemade gnocci

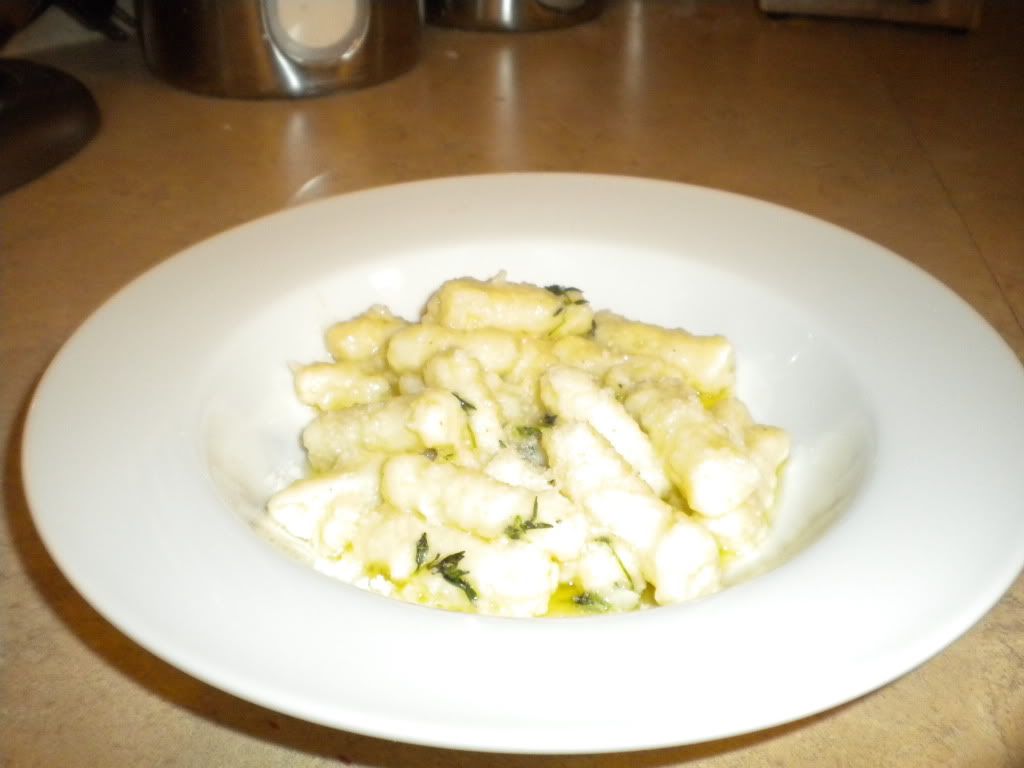
Gnocchi with Butter Thyme Sauce, taken from Giada De Laurentiis

Ingredients:
1/2 cup unsalted butter
1 tablespoon fresh thyme leaves
1 (1 pound) russet potato
1/2 teaspoon salt
1/4 teaspoon freshly ground black pepper
1 large egg, beaten to blend
1/4 cup all purpose flour
1/4 cup shaved Pecorino Romano--I used grated cheese


Kitchen Supplies:
Heavy medium skillet
Large bowl
Fork
Medium stockpot

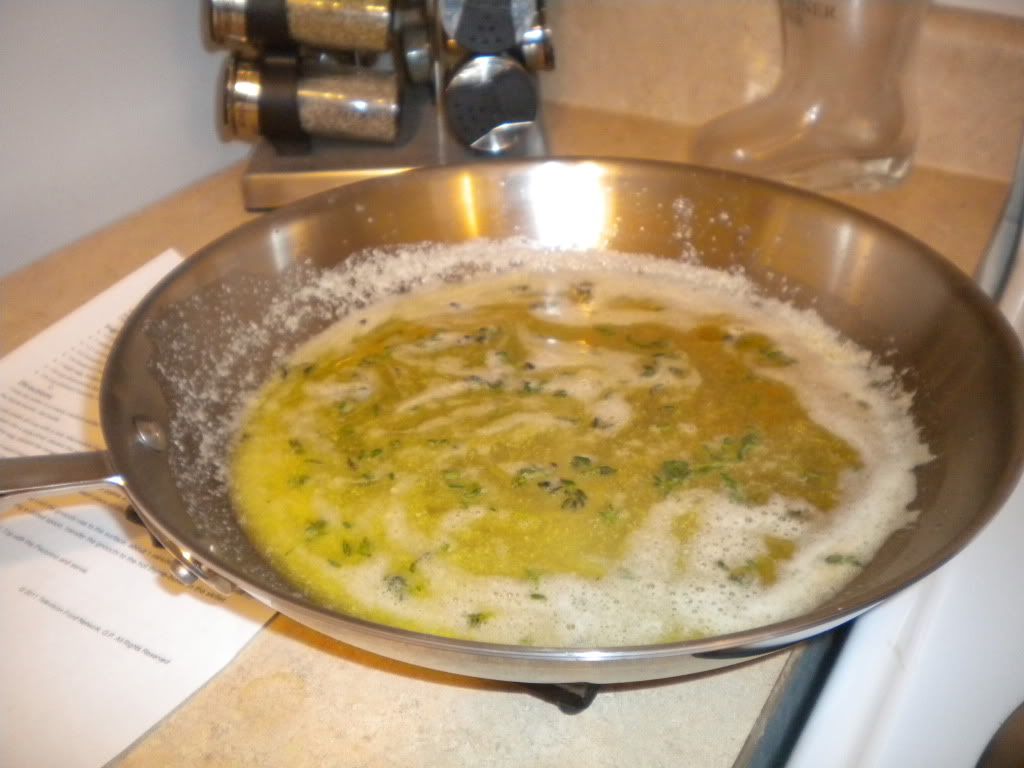
Cook the butter in a heavy medium skillet over medium heat until it begins to brown, about 2 minutes.  Remove from heat.  Add the thyme leaves and set aside.


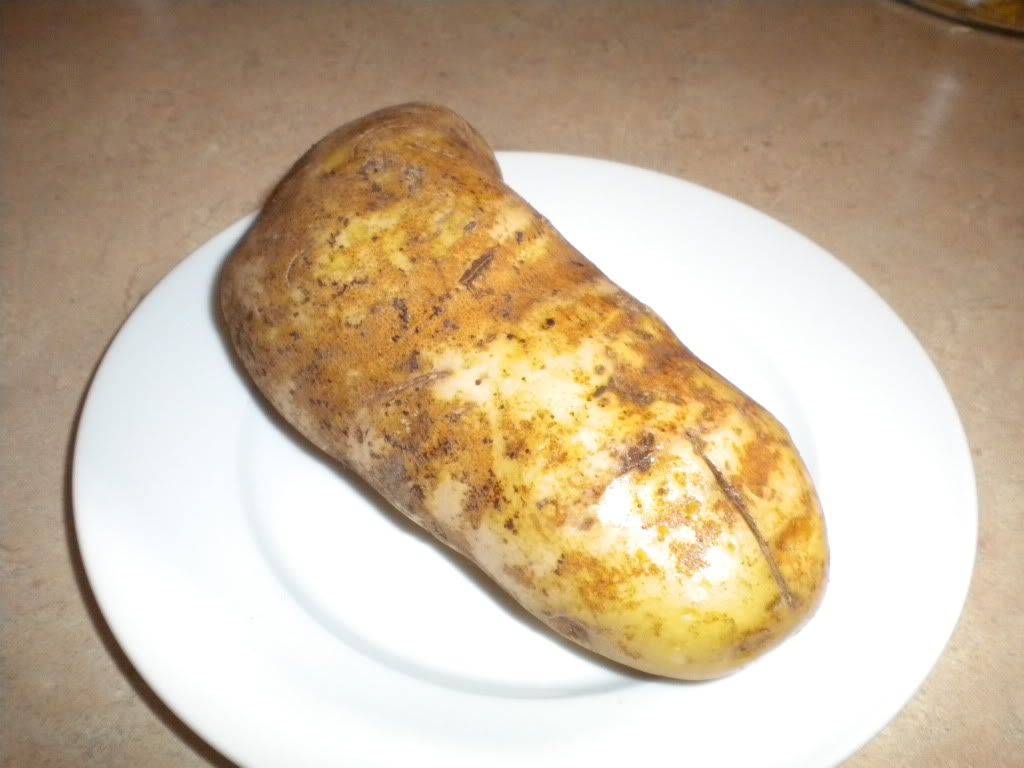
Pierce the potato all over with a fork.  Microwave the potato until tender, turning once, about 12 minutes.  Using a hot pad, cut the potato in half and scoop the flesh into a large bowl; discard the skin. 


Using a fork, mash the potato well.  Mash in the salt and pepper.  Mix in 3 tablespoons of the egg, discarding the remaining egg.  Sift in the flour and knead until just blended.

Divide the dough into 4 equal pieces.  Roll each piece between your plams and the work surface into 1/2 inch diameter rope (about 20 inches long).  Cut the dough into 1-inch pieces.  Roll each piece of dough over the tines of the fork to form grooves in the dough.  If you have a wooden paddle with ridges, you are welcome to use this instead.


Cook the gnocchi in a large pot of boiling salted water until the gnocchi rise to the surface, about 1 minute.  Continue cooking until the gnocchi are tender, about 4 minutes longer.  Using a slotted spoon, transfer the gnocchi to the hot thyme-butter in the skillet.  Toss to coat.  Spoon the gnocchi and butter sauce into shallow bowls.  Top with Pecorino and serve.


Serves: 4 to 6

This was a tasty recipe but my gnocchi was quite dense and potatoey, not at all like the pillowy taste and texture I was expecting.  I wonder if a ricer from this wish list would have helped with the airiness.  Traditional gnocchi uses semolina flour as potatoes were not introduced to Italy until the 16th century, which would also be something to try.  Overall it was tasty and better yet, I get to cross another item off my list!

What's on your menu this week?  Any new recipes that didn't turn out quite as you expected?  Do tell!

Tuesday, April 19, 2011

Vanilla Dutch Baby, A Recipe

When I first heard the term Dutch Baby while watching Ten Dollar Dinners on Food Network, I didn't know exactly what to expect.  It definitely doesn't sound like what it is which is a large puffed pancake that you bake in the oven.  However once I saw how easy and cheap yet elegant this meal was, I knew I had to try it for myself.

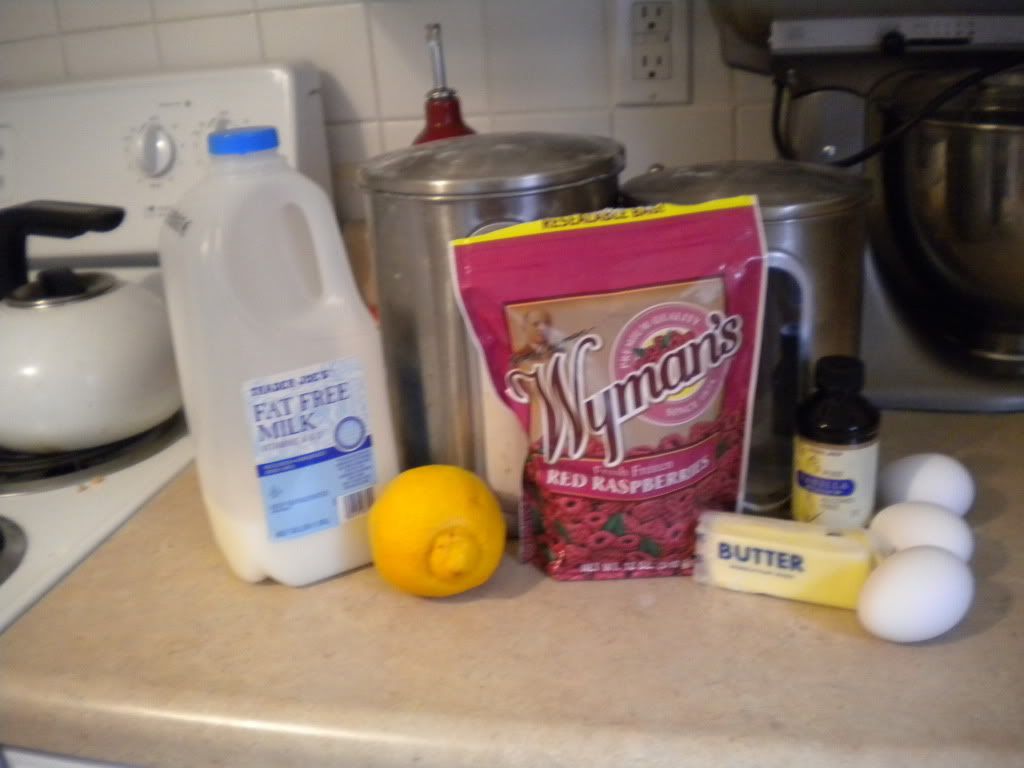
I padded into the kitchen Saturday morning, got out my ingredients--all of which were in my pantry--and got to work.  25 minutes and a few burnt fingers later (I grabbed the hot pan which I had placed in the sink barehanded like a rookie) I was in puffed pancake paradise.  The vanilla was a surprisingly great addition, one that I might add to all of my pancakes from now on, puffed or otherwise.

Vanilla Dutch Baby, modified from Melissa d'Arabian


Ingredients:
3 tablespoons of butter
3 eggs
3/4 cup all purpose flour
3/4 cup milk, warmed up in the microwave for 20 to 30 seconds
1 tablespoon plus 1 teaspoon granulated sugar
2 teaspoons vanilla extract
Pinch of salt
1/2 teaspoon lemon zest
1 cup frozen raspberries, thawed
Dusting of powdered sugar 

Kitchen Supplies:
Large ovenproof skillet (note if you have a skillet with a rubber or plastic handle, simply wrap with aluminum foil and you will be all set!)
Blender or food processor
Lemon zester
Measuring cups
Measuring spoons
Small bowl for raspberry topping


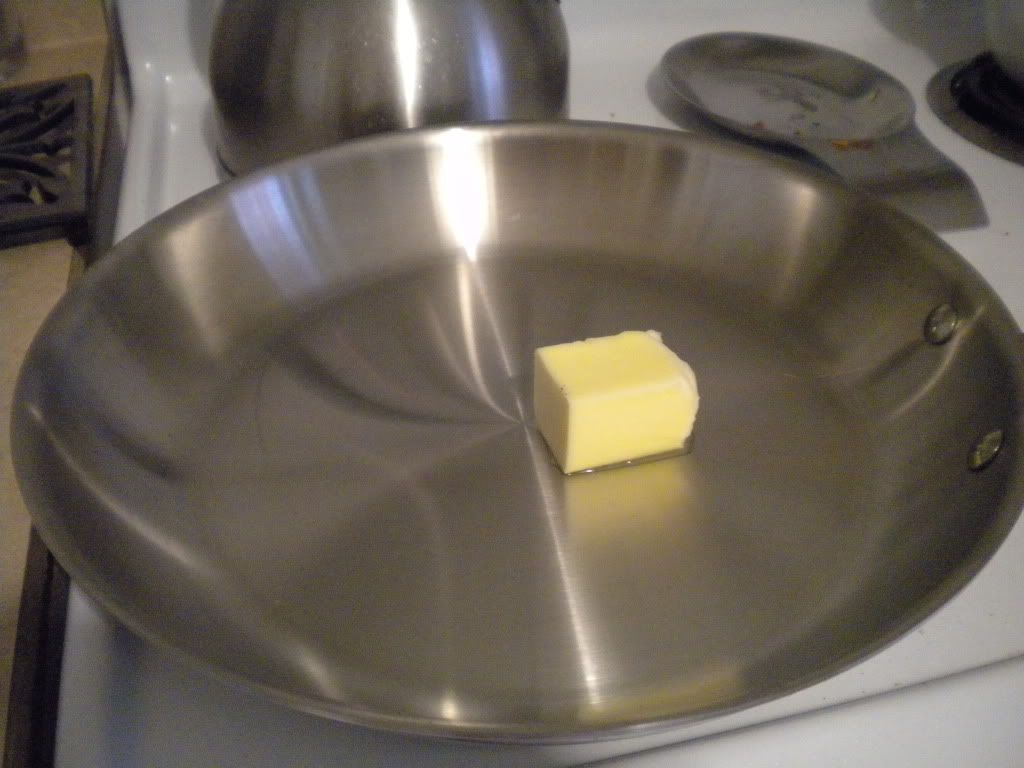
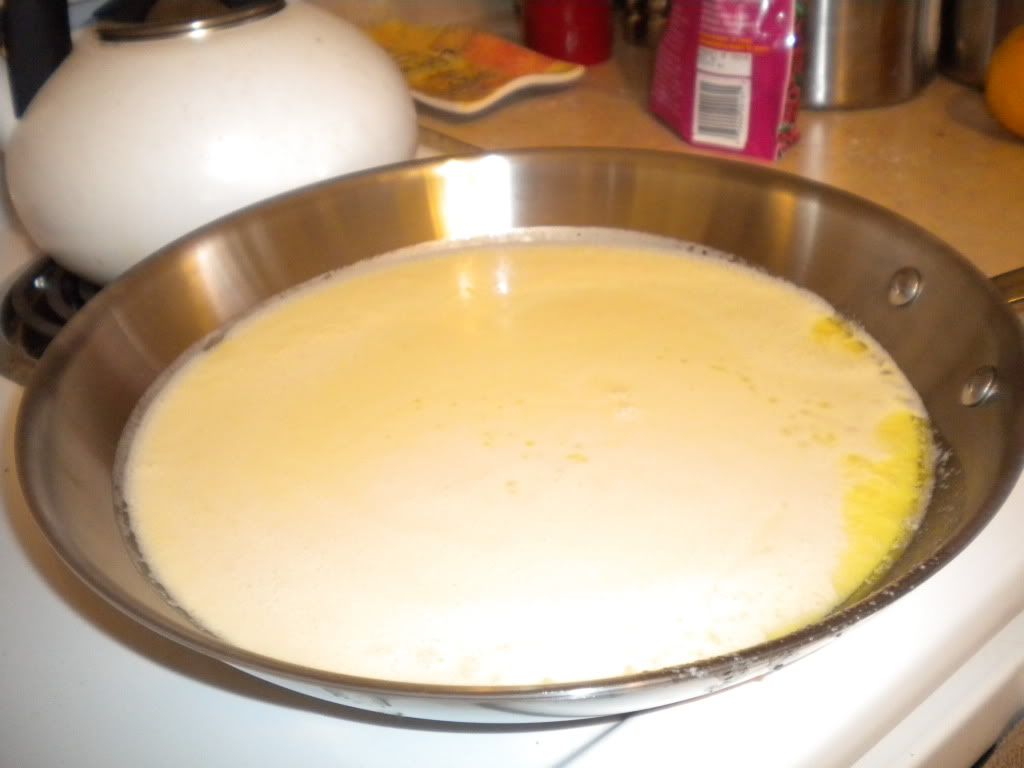
Preheat oven to 400 degrees.  Place large skillet and butter in the oven to melt.


Meanwhile, place eggs, flour, milk, vanilla extract, salt, and 1 tablespoon of sugar in blender and blend on medium-high speed until mixed thoroughly.


Swirl butter around the bottom of the skillet to coat and pour remaining butter into the blended mixture.  Blend again briefly to combine and then pour into the skillet. 


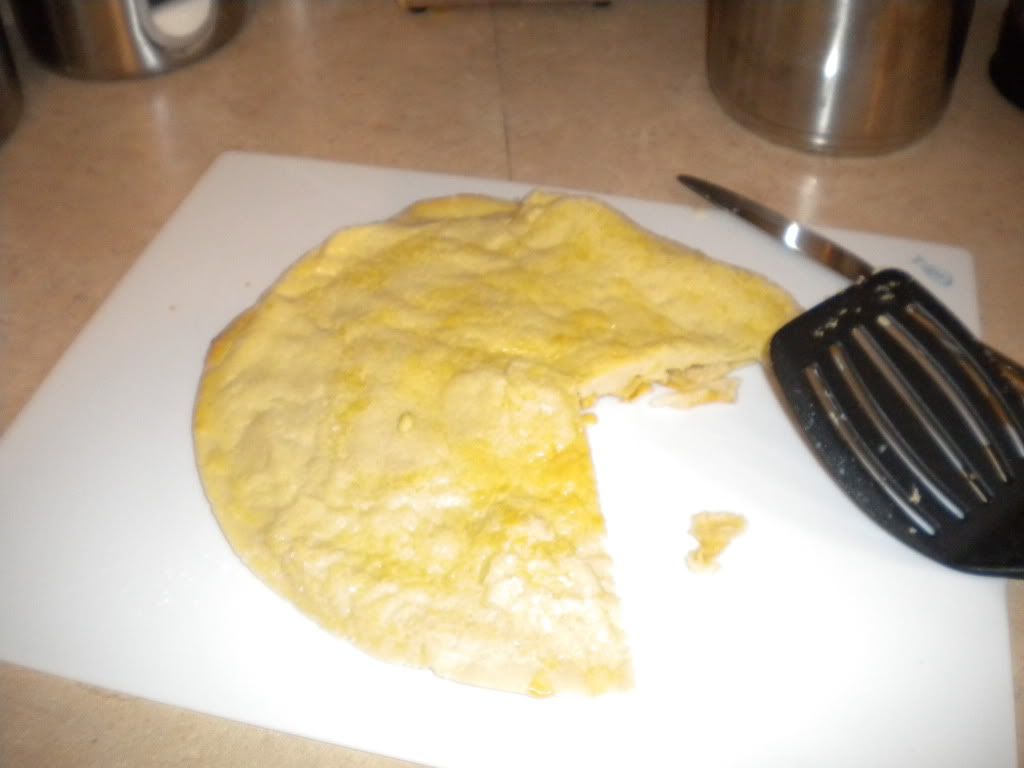
Place skillet in the oven and bake for 20 to 25 minutes until the middle has puffed and the edges are golden brown.

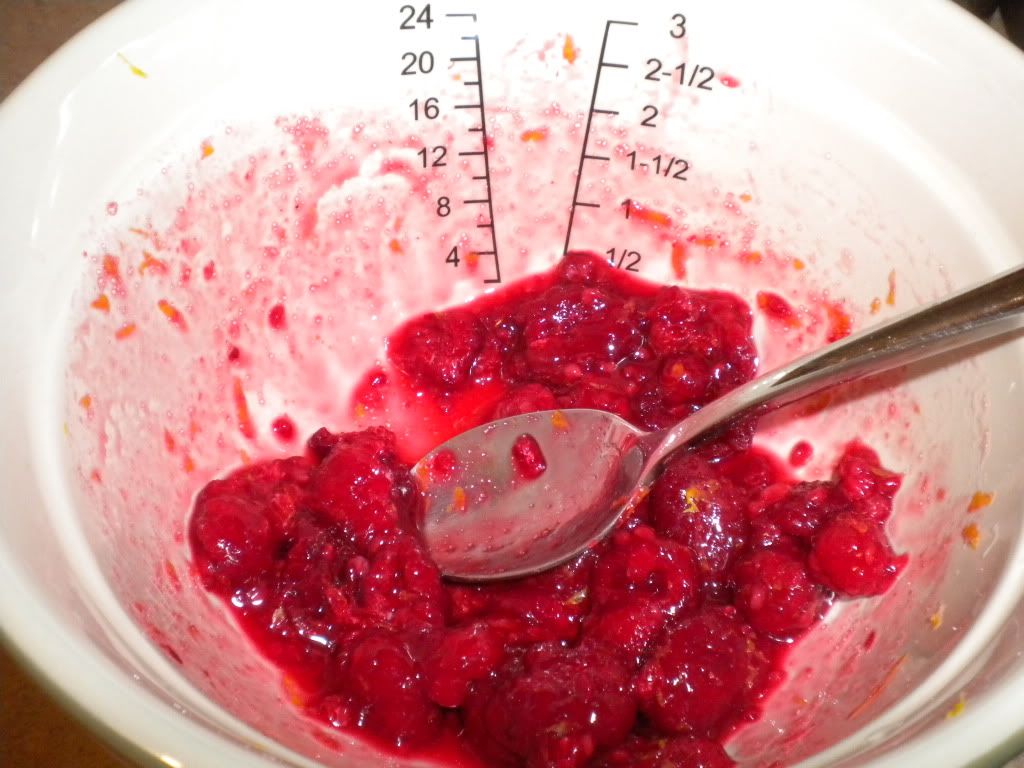
While the Dutch Baby bakes, combine raspberries, lemon zest and remaining 1 teaspoon of sugar, tossing to coat.  Set aside to allow it to break down and marinate.


Once the Dutch Baby is done cooking, remove from oven and carefully transfer the Dutch Baby to a cooling rack (I used a spatula to loosen up the edges) and allow to cool for 2 to 3 minutes.  This allows it to cool slightly without getting soggy. 


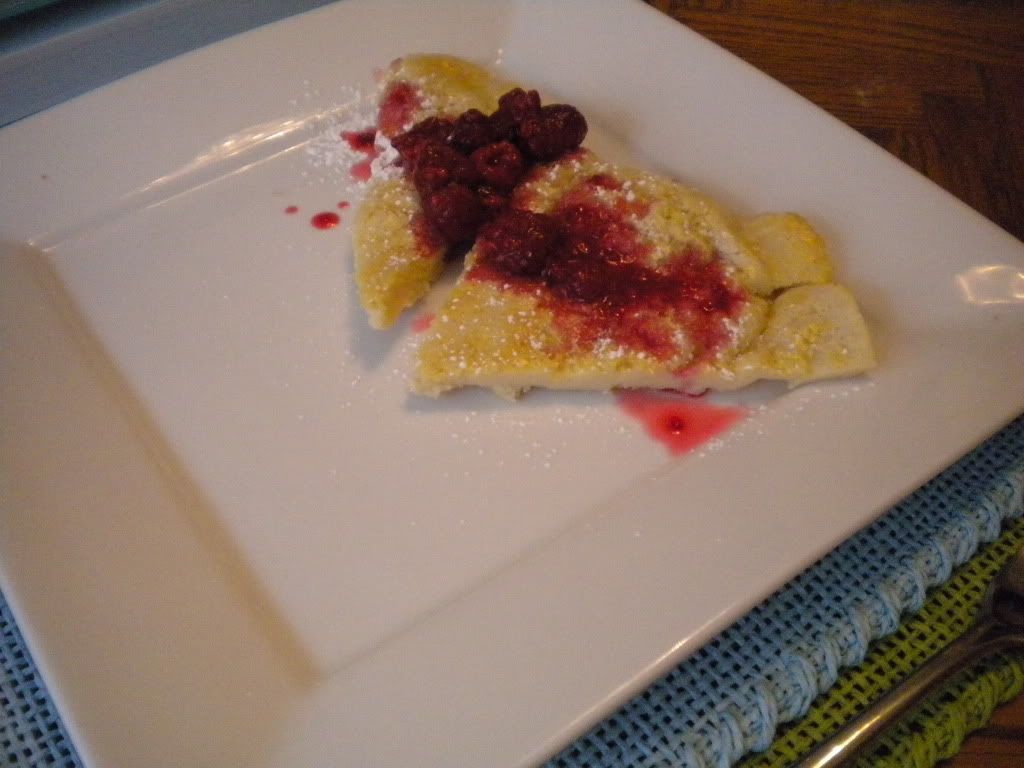
Cut into wedges, topping each one with some of the raspberry topping and a dusting of powdered sugar.

Yields: 4 servings


Have you ever made a Dutch Baby before?  If so, what do you serve yours with?  Now that I know how easy (and delicious) Dutch Babies are, I am looking for new recipes!

Monday, April 18, 2011

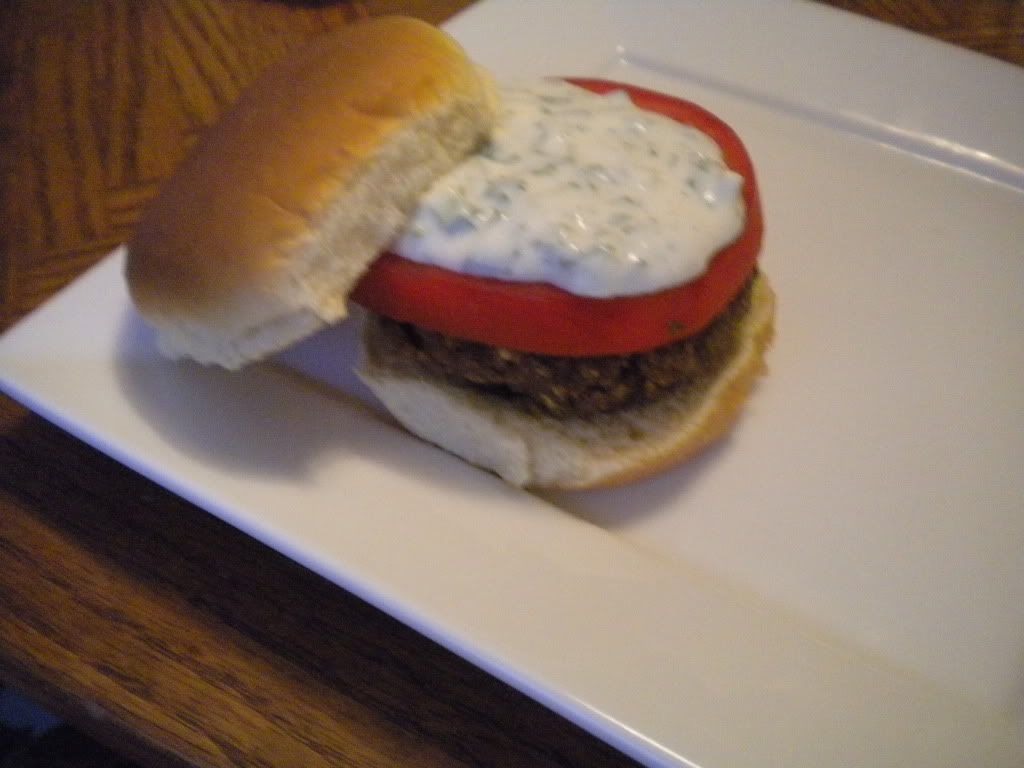
Lentil-Walnut Burgers with Cilantro-Cucumber Yogurt Sauce

Another great weekend has come and gone, one in which we cooked some delicious food, I finished this month's BBC book and we celebrated Spring with our friends.  You can expect several delicious new recipes over the next several days as well as photos of my new vintage salt and pepper shaker collection courtesy of my dad's mom!

First up are lentil walnut burgers, perfect for a Spring (or Summer) night.  J was a bit skeptical at first because he is quite the carnivore, being from Nebraska and all, but these delicious burgers quickly won him over and he exclaimed while eating them that he did not miss the meat at all! 

In our house, we have renamed them Falafel burgers because the taste and consistency is very close to that of a falafel. This will be a recipe we will come back to often because it is easy and cheap (much cheaper than buying ground beef or another meat protein)!

Lentil-Walnut Burgers with Cilantro-Cucumber Yogurt Sauce, adapted from Every Day Food: Great Food Fast cookbook

Ingredients:
3/4 cup lentils, picked over and rinsed
3/4 cup walnuts
1/4 cup plain dried breadcrumbs--we used panko because that is what we had on hand
3 garlic cloves, coarsely chopped
2 teaspoons ground cumin
2 teaspoons ground coriander--we used whole coriander because the spice and walnut mixture is placed in a food processor.
1/4 to 1/2 teaspoon red pepper flakes
Coarse salt and fresh ground pepper
4 tablespoons olive oil
1 large egg


For yogurt-cilantro-cucumber sauce
1 small container Greek yogurt
2 tablespoons chopped fresh cilantro--we used our new herb plant!
1/4 cup finely chopped cucumber
Coarse salt and freshly ground pepper

Kitchen Supplies:
Small saucepan with lid
Baking sheet
Colander, for draining lentils
Food processor or spice grinder
Whisk
Small mixing bowl, for creating sauce
Large mixing bowl, for mixing together the patties
Nonstick skillet
Plastic spatula


Preheat the oven to 350 degrees.  Place lentils in a small saucepan and cover with water by 1 inch.  Bring to a boil; reduce to simmer.  Cover and cook until the lentils are tender but still hold their shape, about 20-22 minutes.  Drain well and cool.

Meanwhile, spread the walnuts on a baking sheet and toast in the oven until fragrant and darkened, abut ten minutes.  Let cool.

Note: I let the walnuts and lentils cool about ten minutes before proceeding to the next step.

In a food processor, combine the walnuts, breadcrumbs, garlic, cumin, coriander, red pepper flakes, 1 1/2 teaspoons salt and 1/4 teaspoon pepper; process until finely ground.  Add the lentils and 1 tablespoon of the oil; pulse until coarsely chopped--some lentils should remain whole.

In a large bowl, whisk the egg. Add the lentil mixture; mix well.  Divide into 4 equal size parts, roll into balls and flatten with the palm of your hand into 3/4 inch thick patties.  The lentils can be somewhat crumbly so you will want to pack these patties as tightly as you are able to.

Heat the remaining 3 tablespoons of oil in a large nonstick skillet.  Add the burgers; cook over medium-low heat until crisp and browned, turning gently with a spatula 8 to 10 minutes per side.  Transfer to a paper towel or brown paper bag lined plate to drain.

Toast hamburger buns and serve with freshly sliced tomatoes, lentil-walnut burger and yogurt sauce.  Enjoy!


Serves: 4

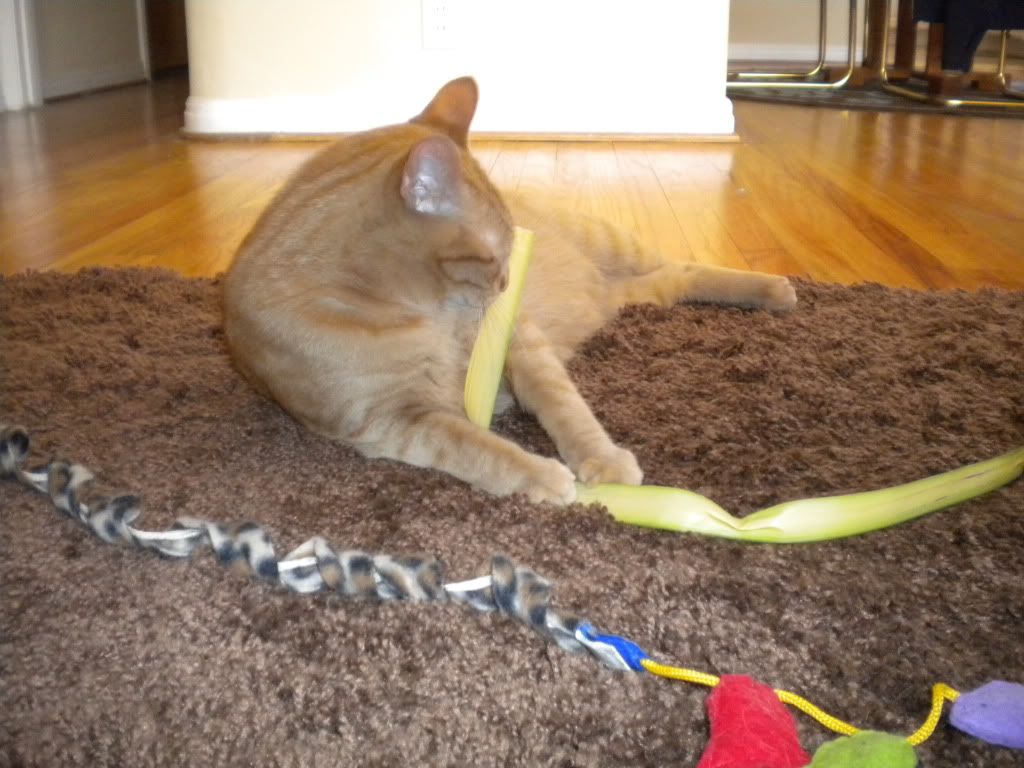
And because I haven't shown a picture of Woods on the blog in a while and he was being so cute while doing it, here is a picture of Woods who was very amused with my palm from Palm Sunday mass yesterday.


It's not sacrilegious to let him play with it, right?!  That snake looking thing in the foreground is his other favorite toy which he obviously could care less about now that he has a palm reed.

Happy Monday everyone!

Friday, April 15, 2011

Friday Friday Friday

I don't think I've been so excited for a Friday in a long time.  After working all weekend, our boss gave us today off which means I will be spending the day doing whatever I feel like doing!  I have already had some delicious coffee at this lovely establishment and will be spending the rest of my day doing the following:
  • Shopping for groceries
  • Making a vanilla dutch baby for breakfast topped with fresh fruit--pictures and recipe to follow!
  • Shopping for some spring-time accessories at the Mall
  • Making a crisp goat cheese salad for lunch--pictures and recipe to follow!
  • Catching up on some of my favorite shows (and blogs!)
  • Spending an hour or so at Barnes and Noble reading more of this month's BBC book
  • Attending a cake and cocktails 1st birthday party this afternoon
  • Making lentil and cilantro-cucumber yogurt burgers for dinner
  • Watching a few more episodes of Mad Men
What's on your agenda today? 

Happy Friday everyone!

P.S. I just realized that the title of my post closely mirrors that annoying Rebecca Black song Friday.  That was purely by accident and my apologies if the song is now stuck in your head!

P.P.S. This post has no pictures because my Photobucket account (which I use to host my photos) is down.  On the bright side, I get three months of Photobucket Pro free for the trouble!

Wednesday, April 13, 2011

I'm Back--Kind of

Last Friday when I said I'd be back on Monday I think I seriously underestimated how tired and wiped out I would feel after working 14+ hour days all weekend for our biggest event of the year--which explains why I haven't posted anything for the last two days. 

Last night I cooked a real home cooked meal for the first time in over two weeks (lots of frozen Trader Joe's meals and take out got us through) and actually had a night where we could do whatever we wanted because I wasn't working late into the night.

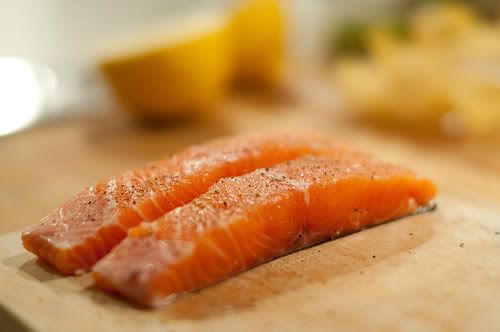
We celebrated by having our friend JDP over for dinner.  I made a very Spring meal:  poached salmon with fresh dill (from our new dill plant!), roasted cauliflower and wild rice which we paired with ice water with cucumber slices.  If you have never put cucumbers in your iced water before, you should really try it!  It flavors your water without overpowering it and adds a very clean, crisp taste to it that keeps you going back for more and more.

Image taken via weheartit
We finished off the night with some frozen yogurt before watching two more episodes of Mad Men (for those keeping track at home we are now at the beginning of season three and loving the show)!

I also have approximately 746 unread items in my Google Reader that I am slowly working through.  I promise I will be back to a regular posting (and commenting) schedule very soon.  I can't wait to see what you all have been up to!

Happy Wednesday everyone!

Friday, April 8, 2011

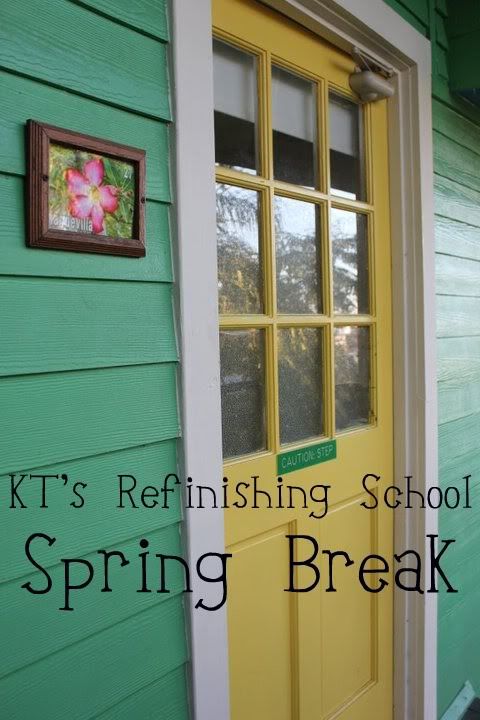
KT's Refinishing School Spring Break: Temporary Nest

Thank goodness it's Friday and my busiest two weeks of work all year are almost ALMOST over!  To finish off a great two weeks with ten amazing bloggers, the creative and talented Gina of Temporary Nest is here to share a beautiful spring time craft that is perfect for the weeks before Easter.

Actually, Gina's blog was one of the first I started reading when I began the whole process of reading and creating a blog over a year and a half ago.  Granted I didn't write on a consistent basis until after J's and my wedding last June, but all the while I was reading and loving Gina's blog!  Gina has recently taken up upholstery in the form of weekly classes and just finished her first piece Satine.  I have enjoyed living vicariously through following Gina through this process.  If you are not already a Nester like me, what are you waiting for?!?


Hi Everyone!  I'm Gina from Temporary Nest.  Nice to meet you guys!  KT was sweet enough to ask me to wrap up her Spring Break guest post line up.  What a sweetie pie, right?  I write about temporary upgrades for my sweet little rental to make someone elses' property and to make it feel like my home.

Today I thought I'd share with you guys something somewhat unusual for me...  I like to decorate my house for the Christmas holidays, and maybe a smidge for Halloween or Fall. But the rest of the year my house is just plain, my house.  No added shamrocks or hearts.  I guess I'm just so busy getting it to the pretty for the everyday, that I forget about decorating for all the other holidays!  But this time 'round I'm going to try to be a little better about it.  With Winter behind us now, I decided to join the Spring Wreath bandwagon and make my very own.


The supplies I used {which you could use anything you want} were:
  • burlap {left over from another project}  $0
  • foam wreath $4.99
  • assorted sprigs of "berries" $1.99/ea {and I bought WAYYY too many.  More for the next project!}
  • nest $1.99
  • deer moss {left over from another project} $0
  • bird eggs {left over from another project} $0
  • hot glue gun and glue sticks $2.99 + $1.99 {Can you believe I have never owned one!?}
  • fabric flower that I made from scrap fabric and an old button $0
  • brown satin ribbon $2.99
  • D-ring {left over from another project} $0
Total for this project: about $25  


First I made this fabric flower from folding circles of fabric in half then into thirds and hot gluing them onto a small circle of felt. To finish off the inside, I used a small circle of the same yellow fabric, and glued a pearlized button in the center.  Next up, the nest that I bought {Kind of a cop-out, I know. I totally should have made one myself but *shrug* I bought it anyway.}  was attached to a branch which was just too stinkin' big for the wreath.  Luckily, the nest was only held on to the branch by some small wires that I just clipped right off!


It only took a smidge of deer moss glued into the bottom of the nest and the addition of the little eggs to make it really come to life! What is it about nests that are so precious? They make my heart flutter!


I glued the burlap on in varying width strips to give it a bit of a fairly simple, modern yet raw, cottage-y feel. Then I just stuck single branches of the assorted colored berries straight through the burlap and into the foam.  Any of them that seem a little unstable I put a drop of glue under it just to make sure it wasn't goin' anywhere.  Then of course you can see, I glued the flower into the middle of the sprigs.  At the last minute I found a little swatch of leather left over from another project. I cut the shape of a little leaf and popped that on too!


But we're not done yet! What about the nest? I had originally wanted to put the nest and the flower asymmetrically on the wreath.  But it was way too much.  So, I decided to "float" the nest in the center of the wreath.


I hot glued the nest to the ribbon and pinned the ribbon to the wreath, cutting pieces to wrap around the frame of the wreath as well. Then I also pinned a loop of ribbon from which to hang the wreath. Inside the loop, I put a D-ring.  Odd choice, right? Well, seeing as though I wanted this to be kind of a more modern wreath, instead of going with a bow at the top, I rocked the metal D-ring. Why not? Gang way, folks! I'm breaking all the wreath-making rules!  


Originally, I was going to keep 'er all for myself, hanging it on the inside of my apartment door.  In thinking about the fun colors in the hallway, I went for adding some Springy-character to my door for all the world building to see!


Pardon the heinous flash photography, but it was entirely necessary considering the equally heinous lighting in the hall way. But aren't the colors perfect? The yellow flower unintentionally matches my door perfectly!  And there you have it! A pretty, yet simple, Spring wreath!

Thank you for bearing with me on this hap-hazard tutorial, guys! And I hope to see you guys all over at Temporary Nest some time! Thank you so much to KT for having me here and let's all welcome her back on Monday!  Have a nice weekend, guys!


Amazing, right?!  I especially love the mustard yellow ribbon Gina chose and the way it matches the door perfectly--oh my!  This project is a perfect example of why wreathes aren't just for Christmas.   I can't wait to make one of my own!

And now a special word to my guest bloggers:  You all have been absolutely wonderful and I am so grateful for the time and effort you put into these posts.  I have had such a great time working with you all and you have definitely made this extremely hectic time a little less so!  Thank you from the bottom of my heart for sharing yourselves and your blogs with me.  I feel privileged to know you and am honored that you agreed to be a part of this series!  Basically, you rock.

Happy weekend everyone!  I can't wait to be back in full force on Monday--I have missed you all and have a lot of catching up and commenting to do on my Google Reader next week (only 467 posts or so).

Thursday, April 7, 2011

KT's Refinishing School Spring Break: Mrs. Z(ed), A Crafty Librarian

I hope your Thursday is off to a good start.  Today my neighbor and friend Lesley of Mrs. Z(ed), A Crafty Librarian will be sharing her recipe for homemade chicken taquitos which look delicious!  Lesley and Dr. Z(ed) are wonderful neighbors with whom we share many a great meal, who watch Woods when we go out of town and let us use their washer and dryer because ours is broken, saving us a trip to the laundry mat.  Lesley is so creative, having worked as a costume designer before pursuing her MA in Library Science, and you should definitely check out her blog!


Hello! Howdy! Nice to meet you all!  I'm so happy to be guest posting on my dear neighbor KT's blog. Since it's spring break time (mine was last week-and was divine) I thought I would share one of our new favorite week night meals with you: the best chicken taquitos I've ever eaten.  Like seriously-I could eat them all day long and we have worked them into our rotation about once a week ever since I discovered the original recipe.

I'm not sure what makes them so good.  Maybe it's the little bit of salty-ness on the outside, maybe its because this is the first recipe in which I have conquered the corn tortilla (I usually have trouble getting them crisp or not tearing them, or even getting them to roll up prettily), or maybe it's just because they are mad, mad, tasty.  The first time we had them for dinner I ate at least 8 and Dr. Z(ed) (my partner in crime) ate at least 10.  We would have eaten more... but we ran out.  This time when I made them we had guests so we kept things a little more respectable: I only ate 5.  I also threw together a delightful corn salad which really topped off the meal and made it very spring-y.  Can't go anywhere exotic for spring break?  Have a fiesta at home!

I was worried the rotisserie chicken would be too greasy-but it was delicious!
 Ingredients I used:

1 pkg. corn tortillas
1 rotisserie chicken (you can also cook and shred your own chicken, but I had to work late this day and allowed the grocery store to help me cheat a bit)
1 small yellow onion, minced
1/2 c. reduced fat cream cheese, softened
1/2 c. tomatillo salsa
1 lime (you will only use the juice)
1 Tbsp. chili powder
1-2 pinches red pepper flakes
1 tsp. cumin
3 cloves of garlic
1 Tbsp. Cilantro (you can also chop up about 1/4 c. of fresh cilantro-I just couldn't find any at our grocery store recently)
1 small batch of green onions, chopped
1/2 c. shredded sharp cheddar cheese
1/2 c. shredded monterey jack cheese (we had swiss in the fridge once and that made them v. creamy-yum!)
kosher salt
black pepper
cooking spray

For the corn salad:
1 small bag of frozen corn
1 pkg. cherry tomatoes
1/2 c. edamame, shelled
5 basil leaves, chopped
salt
pepper
lime juice to taste

This step takes the longest, but it is totally worth it!
Steps I did:

Preheat the oven to 425 degrees and spray a large cookie sheet with non-stick spray. Shred the chicken and throw it into a medium sized bowl.  (I find it easiest to just pick the meat off the carcass and tear it by hand.)  Throw in the onion, green onion, chili powder, red pepper flakes, and cumin and toss around.  Add the salsa, cream cheese, and lime juice and mix well.  Salt and pepper the mixture to taste and fold in the cheeses.  Take the corn tortillas three at a time and place them on a plate in the microwave for about 30 seconds.  (It is important to microwave them long enough that they become nice and pliable.) Spoon the chicken mixture on the bottom half of each tortilla-I use about 2 Tbsp.  Then gently roll the tortilla up and place on a cookie sheet with the seam facing down. Repeat until you are out of filling, and don't be afraid to make them nice and meaty.  Once you have all of your taquitos nicely arranged, lightly spray them with cooking spray and sprinkle them with salt.  Bake for 20 minutes and let rest for 5 so you don't burn your mouth if you are impatient with food like I am.  Serve with more salsa, guacamole, and sour cream for dipping.

So colorful and so summer-y!
For the corn salad:

Steam the corn on the stove-top for about 7 minutes, drain off any excess water and let cool.  Toss into a mixing bowl.  Slice the cherry tomatoes lengthwise and toss them in along with the chopped basil and edamame.  Salt and pepper to taste, squirt in a bit of lime juice and mix well.  Oh so refreshing!

Start by eating 4 or 5, then graze on the rest through-out the evening.  Even cold they are yummy!
Just writing this has made me hungry for these, in fact my mouth is actually watering.  Guess chicken taquitos will be on the menu this weekend.  It's a good thing Dr. Z(ed) and I just got new bikes for the summer, otherwise we would be getting fat off of chicken taquitos in no time!  Thanks for letting me visit and I hope you enjoy the spring and this meal, heartily.


Those look so, so good.  I love taquitos but never would have thought to make them at home--genius!  I can't wait for this busy work week to be over so I can try some of these great recipes I've been seeing all week.  Thank you Lesley for sharing the recipe with us all and for being such a great neighbor!

Tomorrow Gina from Temporary Nest will be sharing a gorgeous spring time craft you won't want to miss so stay tuned!

Wednesday, April 6, 2011

KT's Refinishing School Spring Break: Every Little Thing

Thank goodness it's Wednesday--half way through the week everybody!

Today I have a fellow St. Louis-area blogger who will be sharing another delicious spring time recipe, this time one for dinner.  Stacy at Every Little Thing shares recipes, advice and personal experiences when it comes to living an all-natural life.  I have learned so much about organics, local foods and other all natural products from Stacy in a way that makes it fun, not intimidating.  Anyone who wants to take more care with what and how they eat should definitely check out her blog!

Hello! My name is Stacy and I write a Beginner’s Guide to All Natural Living over at Every Little Thing. My blog is very much a combination of all natural and organic recipes, making the right choices at the grocery store, the newest brews and wines, and whatever else happens to go up! Check it out, or shoot me an email at everylittlethingblog at gmail dot com. Thanks to KT for making this guest post possible!

I hope everyone got to celebrate Spring Break this month, even if that meant 5 minutes on the porch, soaking up the sun! You definitely don’t have to travel to celebrate the beginning of Spring; in fact, you can do so right in your own kitchen, with a few natural ingredients!

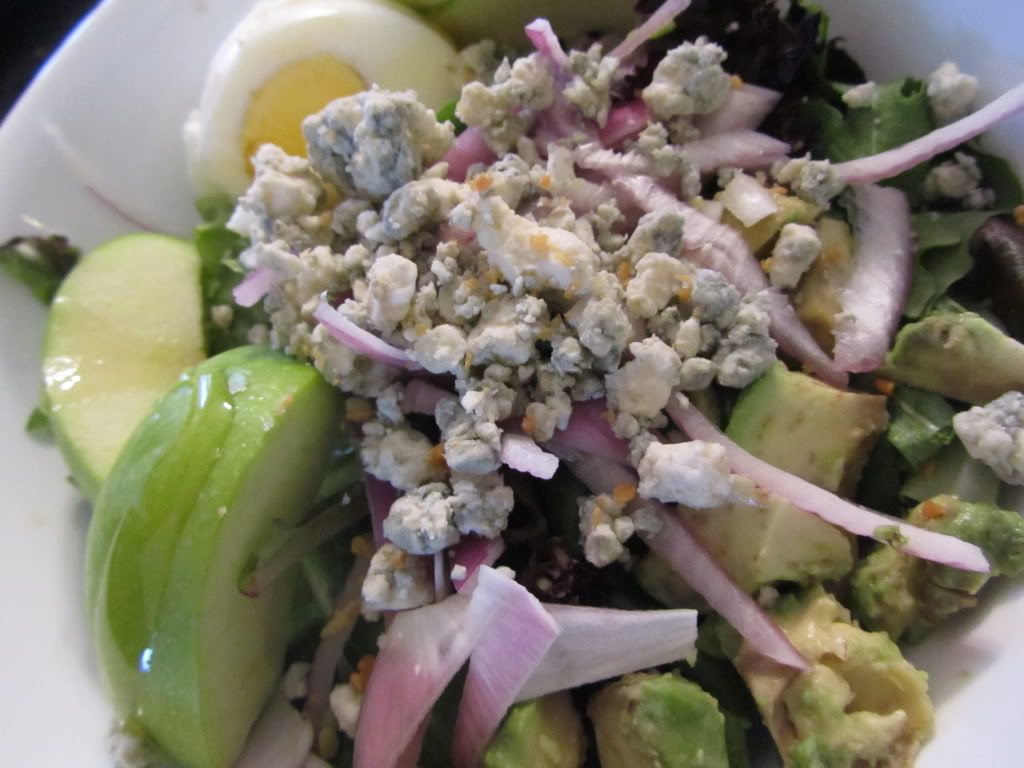
I’ve been craving huge salads lately (and seafood, but that’s a whole ‘nother post), especially with sweet and salty combinations. I had a long day at work earlier this week and decided to throw some things together with a homemade dressing.


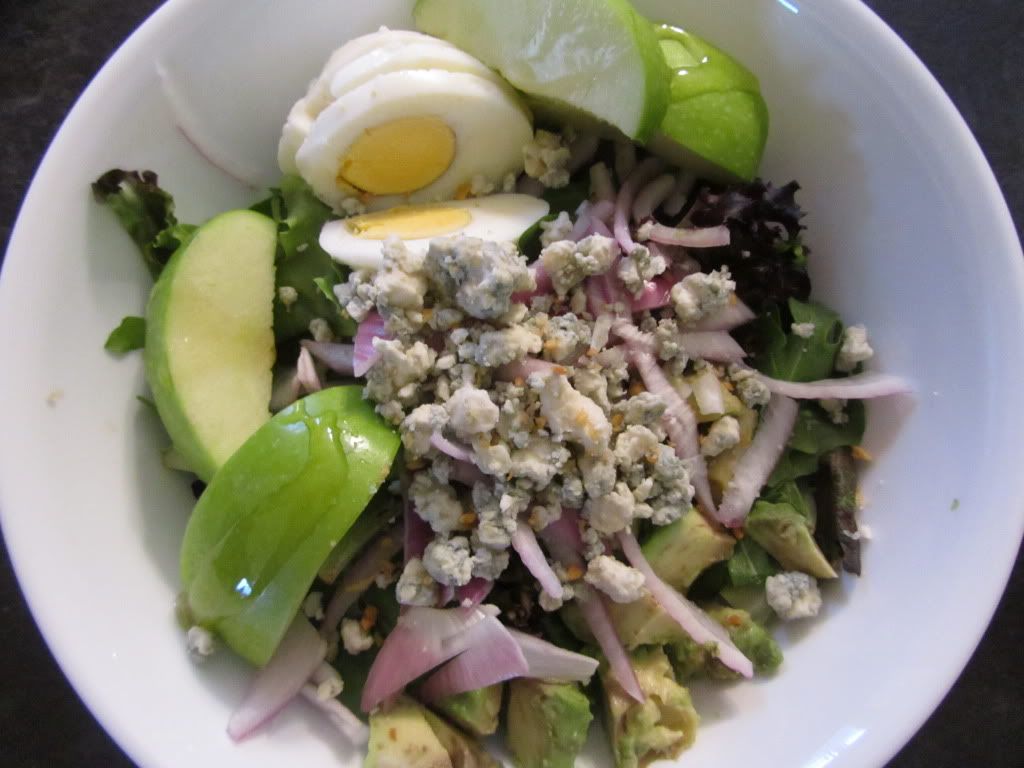
In my salad:
      Mixed organic baby greens
      Hard-boiled organic egg
      Granny Smith organic apple
      Red onion
      Bleu cheese crumbles
      Avocado
      Honey
      Garlic Gold organic sea salt nuggets
      Honey Balsamic dressing


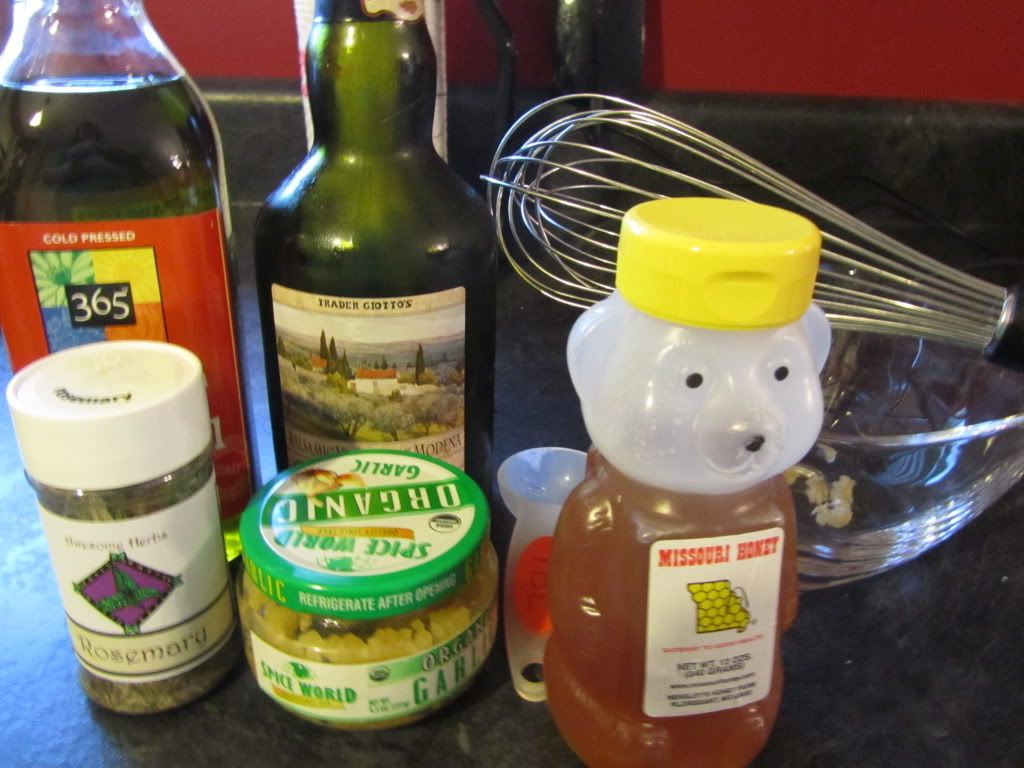
What a delicious salad!  I didn't want it to end.  I may or may not have overdone it with the honey but really? Doesn't matter :) The honey balsamic dressing consisted of: 


      Olive oil
      Balsamic vinegar
      Garlic
      Honey
      Rosemary


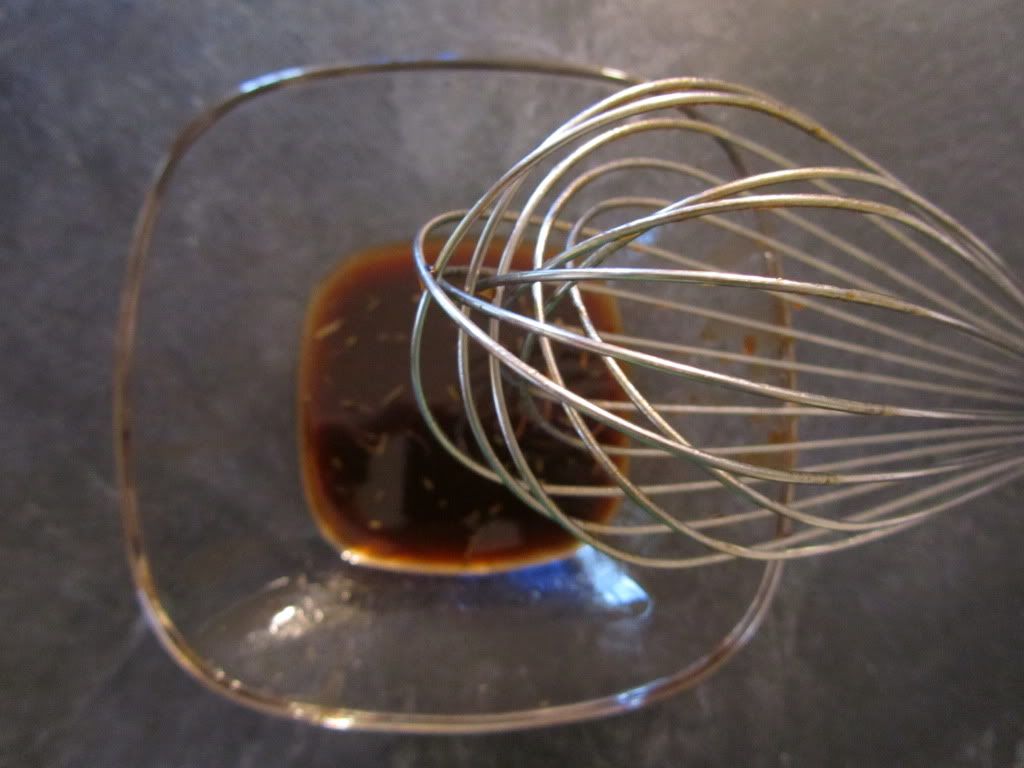
Whisk together about ¼ cup balsamic with 2 tablespoons honey and 2-3 minced garlic cloves. Slowly pour in about ½ cup olive oil, continuously whisking until mixed. Dash with rosemary and serve!


One awesome way to serve this salad is to combine the dressing in the bottom of a large bowl, then toss the greens to coat, then add your toppings! 


I hope you all enjoyed a big bowl of your favorite Spring food this month :) Hope on over to Every Little Thing for more all natural and organic recipes, info and chatter!


That salad looks amazing and oh so hearty!  Hard boiled eggs, bleu cheese and balsamic vinaigrette? Sign me up.  Thank you Stacy for being a part of the series and sharing this delicious recipe.  Happy Wednesday, everyone!

Tuesday, April 5, 2011

KT's Refinishing School Spring Break: The Granola Chronicles

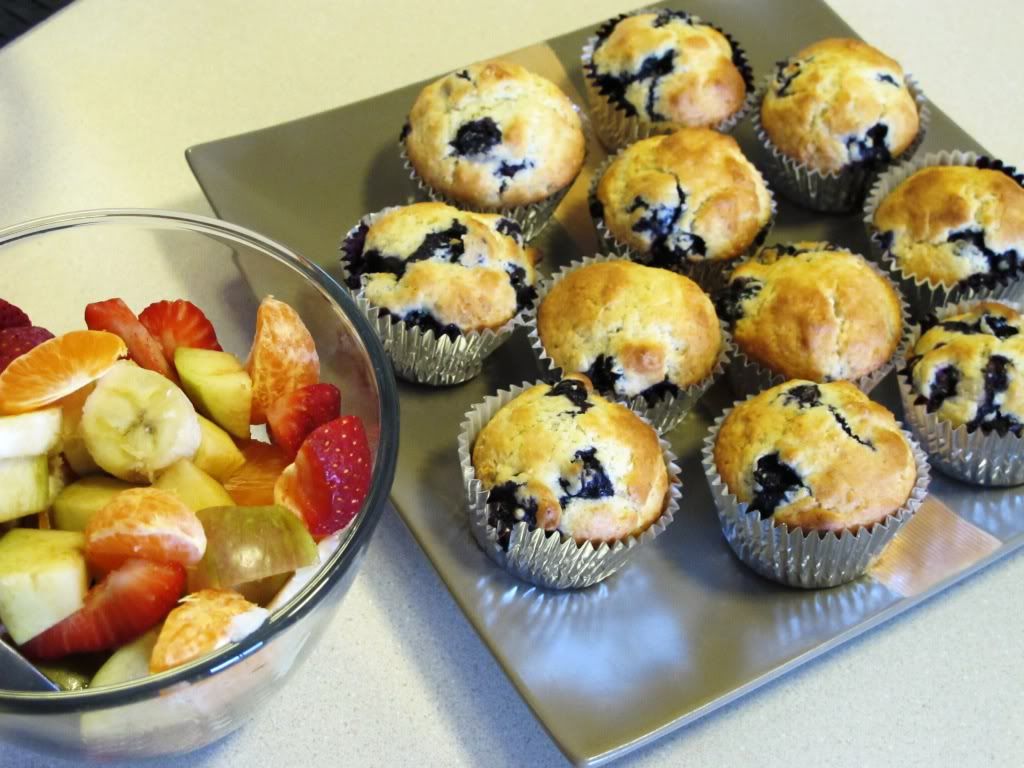
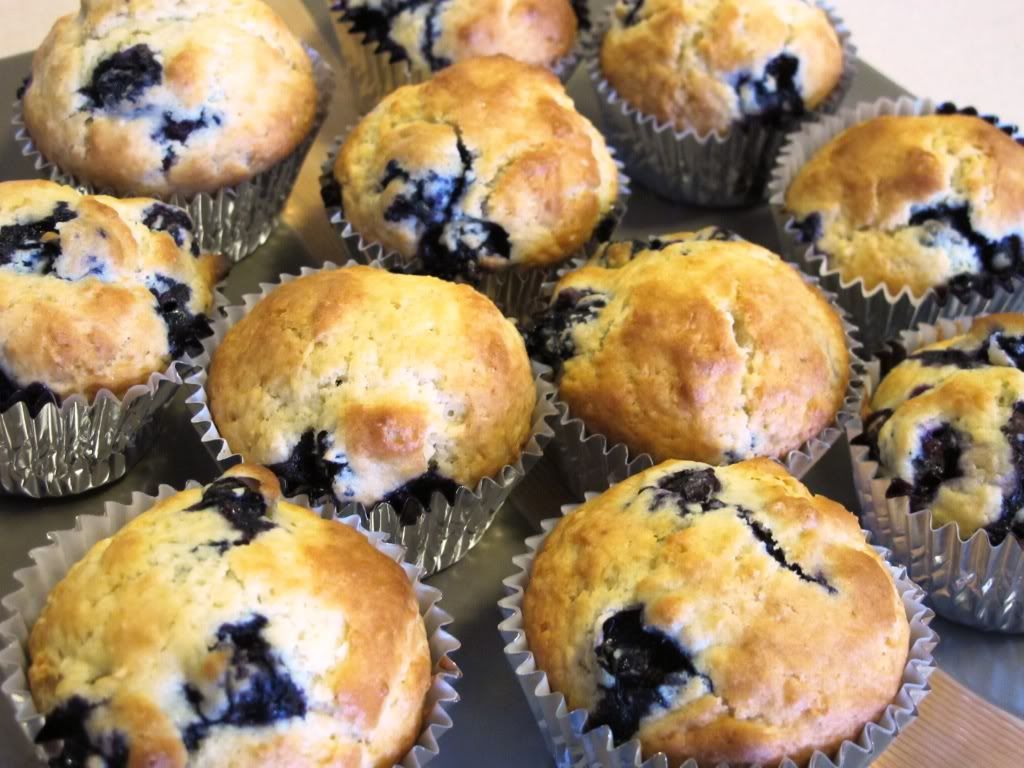
Today Courtney from The Granola Chronicles will be sharing with us a yummy spring time recipe, one I could gobble up just about now--blueberry muffins!

I "met" Courtney through Ashlee because they went to college together in Nebraska back in the day.  Courtney originally had a strictly food blog but has recently expanded it to include all things "granola" and West Coast as well.  As a California girl myself, I love living vicariously through Courtney and Evan and following them as they discover all that California has to offer for the first time.  Here's more from Courtney:

Hello, all! I'm Courtney, and I blog over at The Granola Chronicles: A Simple Approach to California Living. I focus on healthy recipes (mostly, but not all, vegetarian meals), indulgent treats, Community Supported Agriculture & organic produce, as well as everyday life in northern California. 


Now that it's officially Spring, I want to share a quick & easy seasonal recipe. These blueberry muffins would go well with fresh fruit and an egg & asparagus strata - together they would make the perfect Spring-time brunch.


While I'm partial to blueberries, you can add in any kind of fruit: raspberries, strawberries, peaches - you name it! If you're looking for a healthier version, you can try substituting vanilla Greek yogurt for the melted butter. Enjoy!

Breakfast Muffins

Source: All Recipes 

Ingredients:
1 3/4 cup all-purpose flour
1/3 cup sugar
2 1/2 teaspoons baking powder
1/2 teaspoon salt
3/4 cup milk
1 egg
1/3 cup butter, melted
1 cup fresh blueberries

Directions:
Preheat oven to 400 degrees.

In a large bowl, whisk together flour, sugar, baking powder, and salt. Add milk, egg, and butter; mix until ingredients are moistened, do not over beat. Stir in fresh fruit.

Spoon batter into twelve greased muffin cups. Bake for about 20 to 25 minutes, or until tops spring back when lightly touched. Serve warm. 


Doesn't that look perfect for an April morning like today?  Having spent every August in Michigan since I was a baby, blueberries always remind me of the warmer temperatures and longer nights that come with spring and summer time!  I love them in all sorts of breakfast foods and baked goods, but especially muffins and pancakes :)

I'd like to extend a big, sunny California thank you to Courtney for being here today.  Hope you all are having a great Tuesday!

Monday, April 4, 2011

KT's Refinishing School Spring Break: Aiukli-Because Life is Beautiful

Welcome back to another exciting week of guest bloggers as part of KT's Refinishing School Spring Break!  Mallori of Aiukli-Because Life is Beautiful is here to kick us off and will be sharing new details regarding the Spring Break trip she took a few weeks ago.  

I originally "met" Mallori thanks to her FLTOB feature and boy am I glad I did!  She is a fun and creative blogger and I love following her adventures as she wraps up her senior year of college.  I had the opportunity to participate in Mallori's Tell the World Tuesday a few weeks ago and am thrilled she agreed to be a part of this series!


Hello to all of KT's readers! My name is Mallori and I blog over at aiukli-because life is beautiful. (If you want to know more about my blog, you can find information just under my header in my pages list)

I am so very excited and honored to be guest posting here at KT's Refinishing School! This is my first-ever guest post, so I'm not exactly sure how well it will turn out.

Over at my blog, I shared the very basic of what my entire spring break entailed (spring break was the week of  March 14-18 for me). I kept it simple for many reasons: school immediately got crazy upon my return, I was exhausted, and I knew I needed some content for this guest post.

I would like to share with you my entire Thursday (St. Patrick's Day) in detail because honestly, it's the most exciting day (every other day we just layed around at the beach all day). A little background info: I'm a fifth year senior at The University of Oklahoma, and since I am graduating in May I wanted to treat myself to a fun spring break in a state I've never been to with friends only. We rented a beach house in Treasure Island, Florida.

I woke up from my somewhat coma groggy and with a headache around 9:30 a.m. The guys from our trip had gone out to a club and the four of us girls stayed at home and enjoyed playing drinking games to the movies The Hangover and Step Brothers. Needless to say the four of us really needed to sleep in. My roommate here at college was also up, as her body did not let her sleep in past 9:30 any day of the week. She and I went downstairs and realized that we were both terribly sunburned from the day before.

She and I had breakfast (bowls of cereal) and then talked about what we were going to do that day. Her mom had attended Eckerd College as an undergrad, and she wanted to go see the school. We had also talked about going to eat at Ted Peters' Famous Smoked Fish earlier in the week. After talking for less than five minutes, it was decided that she and I would go visit both the college, and then ask the rest of our spring break roommates if they wanted to join us for lunch at Ted Peters'. Once the other two girl roommates woke up, they told us they also wanted to join us at the college. Neither of the guys were too interested in the college, so the four of us set out to go look at Eckerd College.

Along the way, we saw a really cool resort that was pink, and then we also got stopped at a draw bridge (Treasure Island was completely surround by them):
Don Caesar's resort
one of the many drawbridges surrounding the island
Once we got to Eckerd College, I had the sudden urge to say "We're not in Kansas anymore." The college was SO SMALL in comparison to my large University of Oklahoma. Everyone around was in outfits that were beach ready, and people were walking by and seemed to know everyone. The only buildings that seemed to be more than one story were the library and the dormitories. HUGE difference than here. Also, maintenance men were driving around in their carts, and they got off the sidewalk to move around us! It was so weird to all of us because if you aren't careful on campus, you can get hit by golf carts and bikes.

We continued to explore to the back of the campus, and there was a beach behind it all.  A BEACH, PEOPLE! I would never be able to attend a college like this, because I would never go to class. I would just sit outside in the sun all day. There were lots of people out on a lawn in their bathing suits and tank tops laying out and getting some sun. There also were some hammocks on the beach, and of course me and the girls had to get in :)
my friends Colleen and Caroline

pretty flowers on campus
Once we had toured around the school (on our own) for about an hour, we started to head back home. On the way, we stopped by a souvenir shop to get some goodies to take back home. The one we stopped in happened to be in St. Pete Beach, so we had a difficult time finding anything that said Treasure Island. So I compromised and bought a shot glass that said "St. Pete Beach, Florida" but it had a skull and crossbones as the picture. I also bought a purple flip flop bottle opener key chain to replace the very heave one I currently had on my keys.

We went and picked up the boys from the house, and then made the trip to Ted Peters. By this time it was around 1 or so, so all of us were STARVING. Now, I'm not a big fish person, and I blame that on living in Oklahoma all my life where all of the good fish is never fresh because it has to be shipped from a coast. Because of this, I called my grandma to ask her which fish I was to try. I also wanted to try their German potato salad because my mom has a really good recipe and I wanted to compare. AND on top of that I wanted to try their Manhattan clam chowder because I heart soup, and I knew that I needed to try as much stuff as possible because I have no idea when I'll return.

Mimi (my grandma) convinced me that I needed to get the smoked mahi mahi because it would probably be one of the less fish-y tasting fish. Here is what the food looked like:
cup of Manhattan clam chowder

smoked mahi mahi, German potato salad, and two dipping sauces--horseradish and horseradish with Caribbean Jerk seasoning
It tastes even better than it looks. I'm not a fish eater, but that day I was. I don't know how, but I finished that entire 1-lb piece of fish, and wouldn't have minded going back again to eat it all over again. SO DELICIOUS. The clam chowder wasn't quite what I expected, and the broth was a little sweeter than I had imagined. The German potato salad was good, but my mom's is definitely better. And I've watched her make it enough to know exactly what theirs was missing to make it taste like mom's.
(but I still would recommend everyone trying it if they're ever down in Florida)

Once we all had eaten entirely too much, we headed back to the island to catch what little bit of sun was left before heading out for St. Patrick's Day. Since I was too burned for my taste, I decided to stay in and work on some school stuff that I had been putting off. Once everyone came back, we decided that we needed to find somewhere as soon as possible because one of us was not 21 just yet (I'm 23 so it's not me).

After doing a lot of googling, we decided on a restaurant called Gator's Cafe & Saloon because it advertised a Ladies' Night special and the kitchen was open until 10. Me being the good celebrator that I am got the reuben sandwich with fries. This was one of the top 3 reubens I've ever had, and trust me I've had my fair share. I seriously gobbled it up in probably 7 minutes and was licking my fingers for every last morsel. The kitchen closed at 10 and the bar opened up to replace it. The ladies' night special was phenomenal, free domestic drafts, well drinks, and house wine from 9-midnight. And there was a live cover band called Sunburn that had a good sound.
Gator's Cafe & Saloon

Live band called "Sunburn"

me enjoying the ladies' night special ;-)
Sunburn would play for a little bit, then they would have the DJ play for a little. We danced the night away. We were some of the youngest people there, but we didn't care because we were having a great time. For a minute there, we were afraid we were going to get kicked out because of the under-ager. But somehow  we managed to be able to stay until 1 a.m. when we called the guy who had stayed home to come pick us up. It was kind of scary at times, but we all had agreed that if they asked us to leave we would just leave.
Caroline and my roommate

me, Colleen, Caroline, Max

me, Colleen, my roommate, Max

this is my "I'm so happy that I'm in Florida for St. Patrick's Day" face
Cole came and picked us up, and we all got home and went to bed. As I lay in bed that night just before falling asleep, I had many thoughts. First, I missed my family and I wish they could see the beautiful beach. Second, I'm so blessed to be able to treat myself to the trip of a lifetime. Third, the friends I chose to surround myself with were truly a blessing. Fourth, I was so extremely happy at that point in time that I could have almost cried tears of joy (that might have been alcohol induced).

And that was the most interesting day of the most fantastic spring break trip I have been on to date.

So how did I do? Too wordy? Too many pictures? I hope you enjoyed my first guest post, and I just wanted to say a big THANK YOU to KT for letting me share a day in my spring break!


That looks like a great Spring Break trip!  When I was in college, I mostly traveled home for Spring Break since my family was in Southern California and I was going to school in the Midwest.  I wish I would have gone on a girls' trip like Mallori though!

A big thank you to Mallori for sharing all of her fun photos and memories from her trip.  Up next, a yummy recipe from Courtney at The Granola Chronicles you won't want to miss!