Showing posts with label recipes. Show all posts

Wednesday, July 13, 2011

WIAW and Oh How Pinteresting Wednesday, Food Edition

Last night I made another delicious recipe from my Cooking from the Farmer's Market cookbook.  As I mentioned in this post, I wasn't able to make it to the Farmer's Market on Saturday morning but the folks at Dierberg's (a local grocery store chain here in St. Louis) saved the day.  They had quite a few fruits and vegetables for sale that were locally grown and harvested including eggplant, which was the star of last night's dish, Rolled Eggplant with Sausage and Mozzarella.  This dish was easy-peasy and tasted delicious.  It could very easily be made vegetarian by omitting the sausage from the sauce.

Rolled Eggplant with Sausage and Mozzarella, modified from Cooking from the Farmer's Market cookbook

Ingredients:
1 1/2 pounds Italian or Asian eggplant, trimmed and cut lengthwise into slices approximately 1/4 inch thick--approximately two medium sized eggplant

1/4 cup plus 2 tablespoons olive oil

Salt and freshly ground pepper

5 ounces Italian sausage, casings removed--I browned up a pound and a half and then added the remaining sausage to our leftover tomato sauce from earlier this week to freeze and have for dinner next week!

2 cups tomato sauce--we used homemade, find the recipe here

1 cup whole-milk ricotta--as I got out the ingredients to make dinner, I discovered the ricotta (which I bought over a week ago) had gone bad.  I used 1/2 cup mascarpone cheese and 2 ounces of cream cheese instead which worked great!

4 ounces fresh mozzarella cheese, cut into small pieces--if you have a Trader Joe's nearby, I recommend getting your mozzarella (and other cheeses) there.  I saved two dollars by buying the cheese for this recipe there!

4 tablespoons grated hard cheese, such as Parmesan

1 tablespoon chopped flat-leaf parsley--we used 1 teaspoon dried parsley instead


Kitchen Supplies:
Baking sheet
Ramekin
Pastry Brush
Frying pan
Medium bowl
9 inch baking dish

Preheat the oven to 450 degrees.  Brush both sides of the eggplant with the 1/4 cup of olive oil and season with salt.  Place in an even layer on a baking sheet and bake until lightly browned on the bottom, about ten minutes.  Turn the slices and bake until tender, approximately six minutes.  Remove from the oven and reduce the oven temperature to 350 degrees.
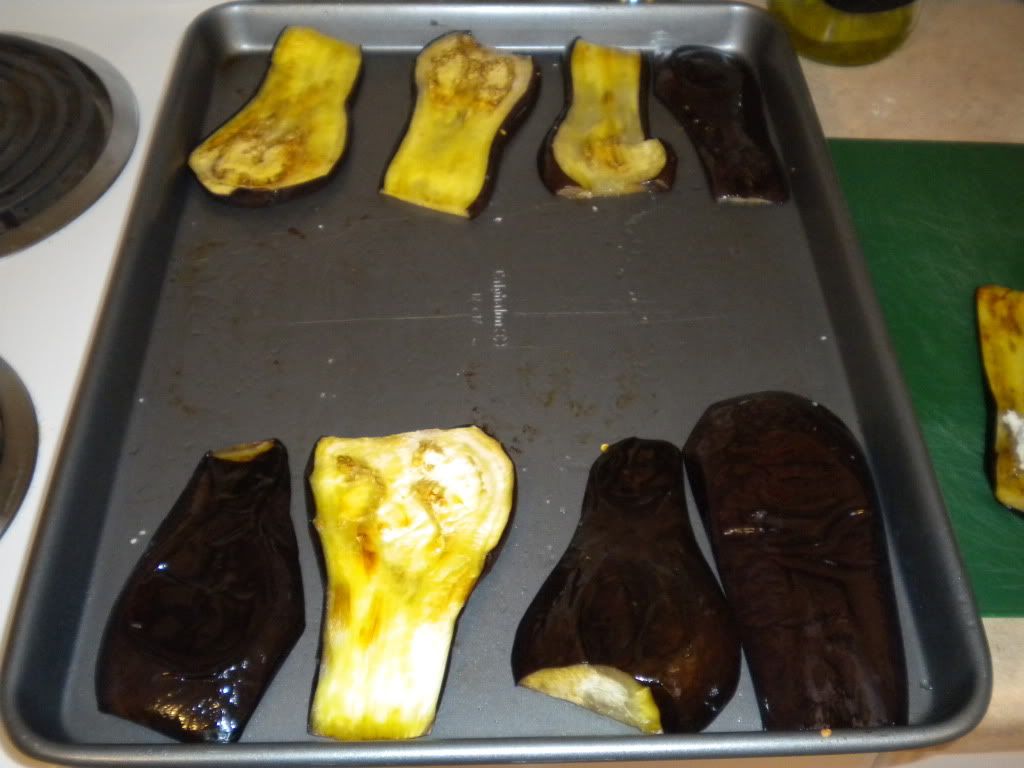

Meanwhile, combine ricotta, mozzarella, 2 tablespoons of the Parmesan and parsley together.  Season with salt and pepper.

In a frying pan over medium-high heat, warm the remaining 2 tablespoons of olive oil.  Saute the sausage until cooked through, about 3 minutes.  Note that it will take longer (about 10 minutes) if you are browning a whole package of sausage as I did.  Stir in the tomato sauce and bring to a boil.  Reduce the heat to low and simmer for 5 minutes.

Spread half of the sauce on the bottom of the baking dish.  Place a spoonful of the cheese mixture near the wide end of each eggplant slice, roll up, and place in dish.  Continue assembling the rolls until all eggplant slices have been filled.

Photobucket

Spoon the remaining sauce between the rolls and sprinkle with remaining 2 tablespoons Parmesan.  Bake until the sauce is bubbling, about 20 minutes.  Serve immediately.

Photobucket
Blogger is being weird and won't let me load photos properly--grr!

Serves: 4

As you can see, there is nothing particularly carnivorous about this dish and with all those great cheeses in each roll-up, a meat-free version might taste even better!  As per usual, I had the leftovers today which is what makes this a WIAW post.


Now onto the Oh How Pinteresting part of the post.


google


I, like many people, have discovered the wonder  that is Pinterest and have been pinning my heart away for several weeks now.  One of my favorite boards is my cooking board, Recipes to Make, especially right now where my creativity in the kitchen is limited to using up ingredients we already have. 

So today, here are some recipes I really hope to make in the near future (perhaps from South Bend!)

Pasta with Prosciutto, Snap Peas, Mint and Cream

Source: food52.com via Kt on Pinterest


Linguine with Sardines, Fennel and Tomato

Source: food52.com via Kt on Pinterest


Chilled Avocado Soup


Kiwi Summer Roll--new things to stuff wonton wrappers with!


Bacon Streusel Maple Cream Cheese Cupcakes


Are you on Pinterest?  If so, let me know so I can follow you!  If you'd like to check out more of my foodie pins (or home decor or any other kind for that matter) I can be found here.

Don't have Pinterest yet but want to get on board?  Leave me a message in the comments with your email address and I'll send you an invite!

What are you eating this Wednesday?  Anything in particular you are pinning pining over this Wednesday evening?

P.S. If you do not already read Jen's (Peas and Crayons) or Michelle's (The Vintage Apple) blogs, you really should.  Click on the links and head on over.  You know you want to!

Monday, July 11, 2011

Spinach and Mushroom Ravioli with Tomato Sauce

With our big move less than three weeks away, we have begun the process of cleaning out our refrigerator and freezer.  This process is definitely going to force us to be more creative in the kitchen and will really kick our meal-planning into overdrive!

We started out with a bang with our dinner last night.  We had approximately 35 wonton wrappers left from our yummy Crab Rangoon last night and after seeing Stacy's post last week, I knew I wanted to use them to make ravioli.  But what kind?

We did not make it to the Farmer's Market on Saturday so I began by checking out the sales ads at our local grocery store.  Low and behold, they had button mushrooms on sale for a dollar a container! Mushroom ravioli it is.  After some googling around, I found another Giada recipe (seriously, that girl never lets me down) that called for mushrooms AND another ingredient we had in the freezer: frozen spinach.  I was sold.  Giada's recipe calls for egg roll wrappers but I knew I could easily substitute this for wonton wrappers.

The recipe took a little while to make but the flavors were absolutely worth it!  Who would have thought that wonton wrappers would taste like the freshest pasta imaginable once you boiled it for a few minutes?!

Spinach and Mushroom Ravioli with Tomato Sauce, modified from Every Day Italian by Giada de Laurentiis

Ingredients:
For the ravioli
1/2 cup extra virgin olive oil, plus 2 tablespoons for boiling water (will keep the ravioli from sticking)
6 ounces button mushrooms, sliced
(1) 10 ounce package frozen chopped spinach, thawed and squeezed dry
1/4 cup Marscapone cheese
1/3 cup grated Parmesan, plus more for serving
12 wonton wrappers
2 large eggs, beaten with 1 teaspoon of water
1/2 cup mushroom (cremini, shittake)--we used Baby Bella mushrooms, finely diced
2 cups homemade tomato sauce (you can of course use store bought but homemade tastes better)
Salt and pepper for seasoning

For the tomato sauce
1/2 cup extra-virgin olive oil
1 small onion, chopped
2 garlic cloves, peeled and minced
1 celery rib, finely chopped
1 carrot, peeled and finely chopped--I used five baby carrots because we never seem to use up a bag of carrots before it goes bad but we don't have that problem with baby carrots!
Salt and freshly ground black pepper
2 (28 ounce) cans of crushed tomatoes
2 dried bay leaves

Kitchen Supplies:
Large stockpot
Cutting board
Large skillet
Food processor 
Medium stockpot (for pasta)
Ramekin for egg wash
Pastry brush
Fork, for crimping edges 
Serving dish
Aluminum foil
Spider strainer

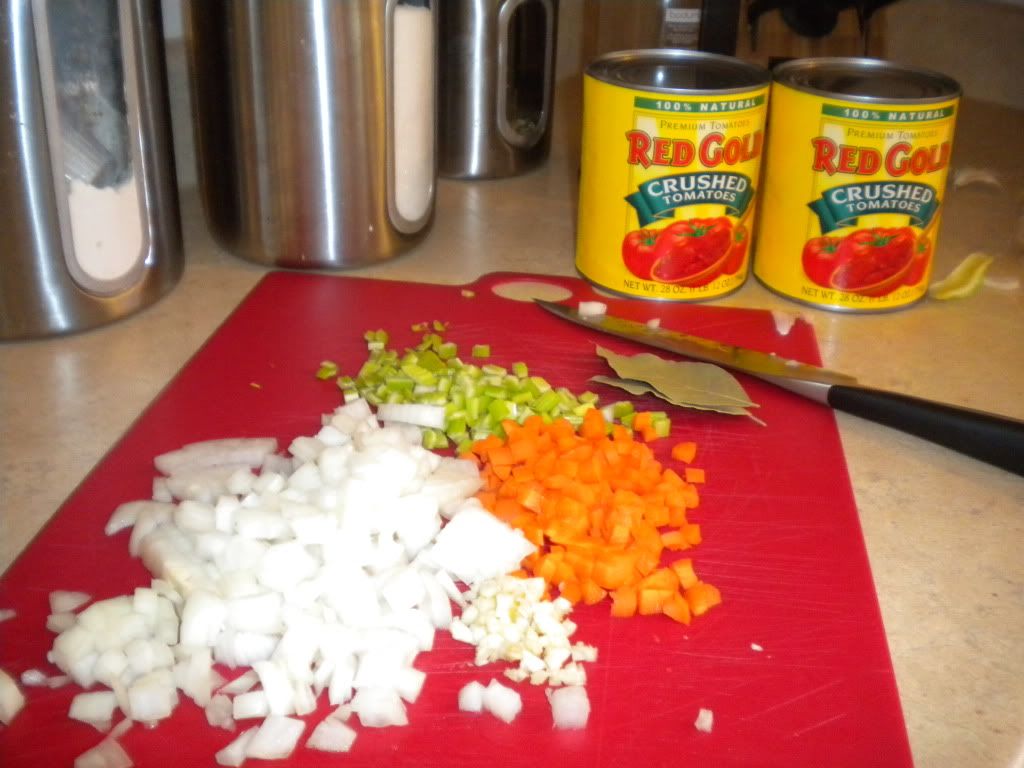
In a large stockpot, heat olive oil over medium-high heat.  Add garlic and onions and saute until soft and translucent, about six minutes.  Add carrot and celery; season with salt and pepper.  Saute for another six to eight minutes until the vegetables are tender.  Add tomatoes and bay leaves and reduce heat to low, allowing to simmer uncovered for one hour.


While you wait, chop up the mushrooms and thaw and drain the spinach.  You can also get your egg wash and other supplies ready for the next step--mise en place is very helpful in this recipe since you have quite a bit of assembling and cooking to do.

You will also want to give yourself some time to bring a medium stockpot of salted water to boil.

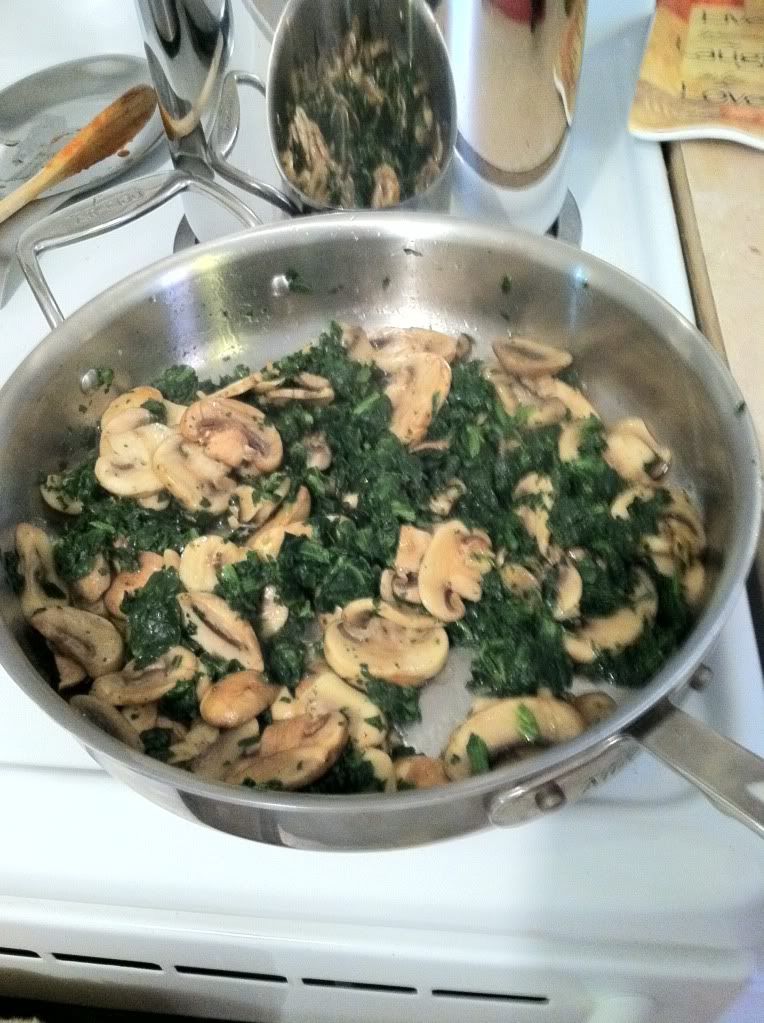
When there is approximately 25 minutes of cook time remaining (you could do this earlier if you want but we watched an episode of Weeds in between steps), heat 1/4 cup olive oil in a large skillet over medium heat.  When the oil is almost smoking, add the sliced mushrooms and season with salt and pepper.  Cook until all the liquid has evaporated from the mushrooms, about six minutes.  Add spinach and cook for an additional two minutes.


Remove from heat and pour contents into a food processor.  Pulse until you get a course texture.  Remove from base and carefully remove blade.  Stir in mascapone and Parmesan cheeses.  Giada recommends pouring contents into a bowl but because we already had quite a few dishes dirty, I mixed it in the food processor bowl without problems.

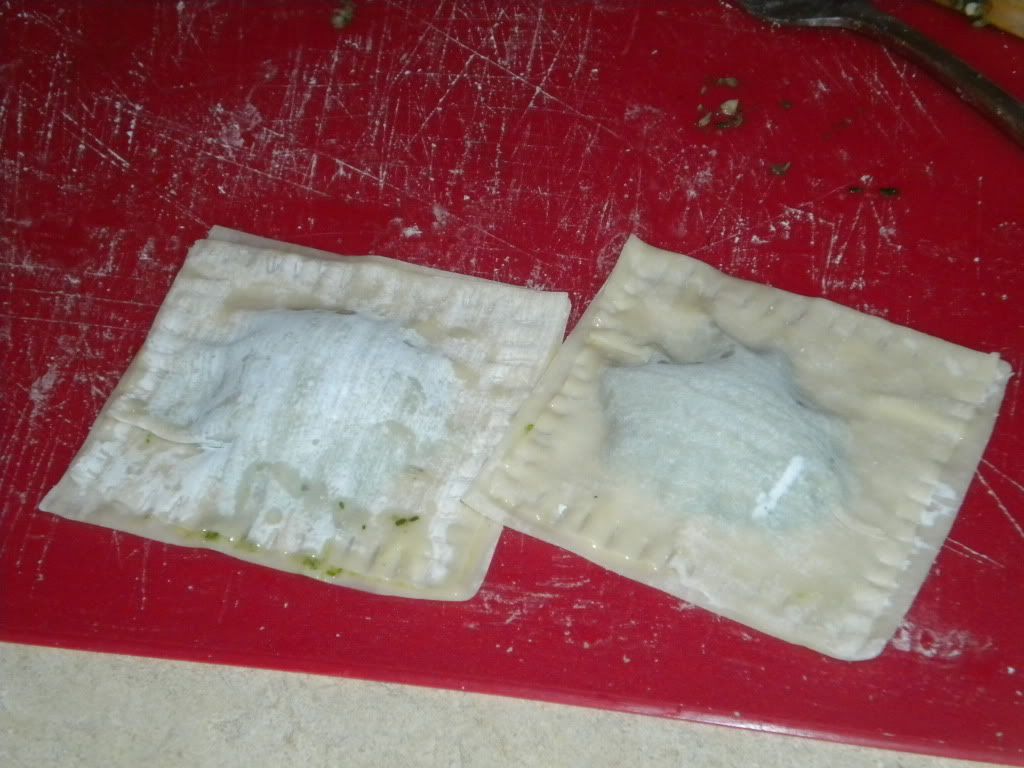
Line up 6 wonton wrappers (you will use two for each ravioli) and brush with a light coat of egg wash.  Place a heaping tablespoon of mixture on three of the six ravioli.  Place the other ravioli, egg wash side down (the wash helps the ravioli stick together and prevents them from coming apart in the boiling water) on top of the mixture.  Press the two wrappers together, starting in the middle and working your way to the edges.  I tried to create a seal around the mixture to again prevent them from falling apart and this seemed to work great!  Crimp edges with the edge of the fork or if you have one (we didn't) a fluted ravioli cutter.


Add 2 tablespoons of olive oil to the boiling water (avoiding sticky ravioli is the name of the game!) and then carefully place the ravioli in the water using a spider strainer or similar kitchen utensil.  You will only want to cook three or four ravioli at a time to prevent them from clumping or sticking to the bottom of the pan and ripping when you remove them.  Cook for three to four minutes; remove with spider strainer and place in a serving dish, covering with aluminum foil to keep warm.  Continue with the process until you use up all of the wonton wrappers and/or filling.  We double the recipe because we had more wontons than the recipe made but still ended up with extra filling! 

The ravioli did stick together once we took them out of the water and put them in the serving dish.  I would recommend you serve up each guest as the ravioli come out of the water and cover each dish with foil.  You will use more foil but the presentation will be much better.

Giada's recipe also calls for you to blend the tomato sauce once finished cooking.  Because I had chopped the vegetables finely and the chopped tomatoes were likewise fine, we skipped this step (can you tell we were trying to avoid extra cleanup?).

While the last batch of ravioli cooks, heat remaining 1/4 cup of olive oil in the large skillet (the one you cooked the mushrooms in will work great).  Add 1/2 cup of specialty mushrooms (Baby Bella, Shiitake, Cremini) and saute for three minutes.

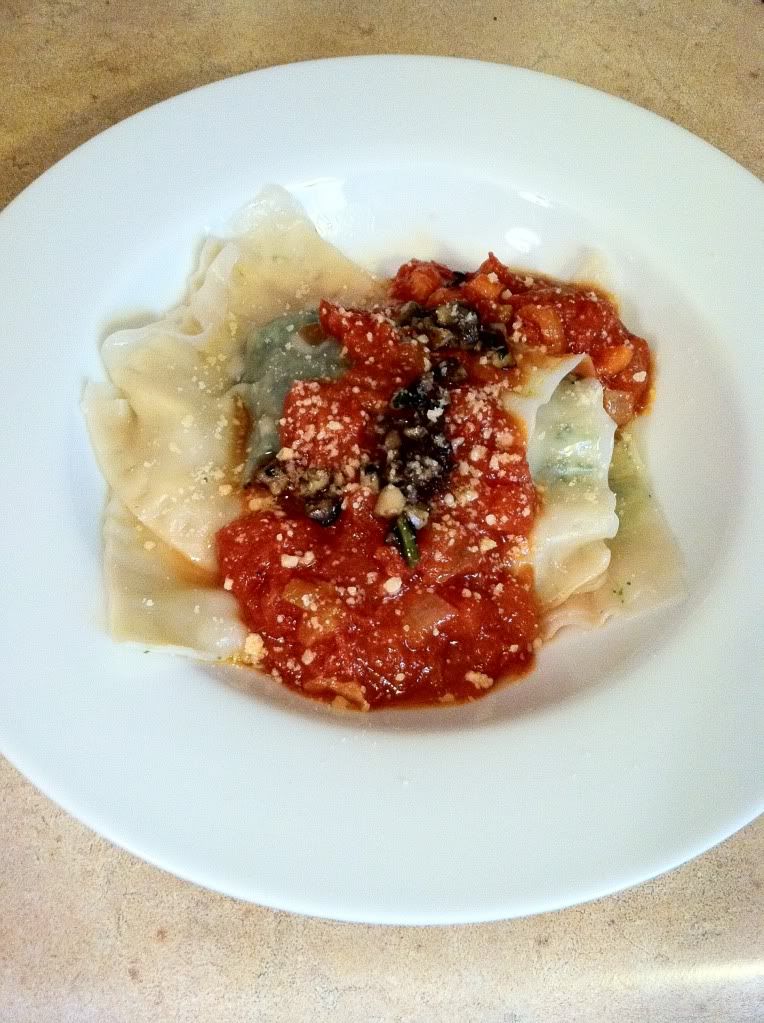
Top each bowl with some of the tomato sauce and a tablespoon or so of the chopped mushrooms plus some Parmesan cheese for garnish.

Taken with J's new iPhone--it is sad that his phone takes better pictures than my camera.  Time for a new camera!
Serves: 4

This recipe makes six cups of tomato sauce.  You will use approximately two cups in the recipe.  The rest can be refrigerated or frozen to use later.  We are using it in our Eggplant-Sausage Roll-ups later this week!

Are you a fan of mise en place?  Have you ever made homemade ravioli?  Now that I know how easy it is, we will be making all kinds of ravioli and tortellini at home.  Is there anything a wonton wrapper can't make better?!?

Thursday, July 7, 2011

Recipes: Jen's Crab Rangoon and Chocolate and Cheese Danishes

With all of the traveling we've been doing lately, I haven't spent much time in the kitchen in the last week; however, I did try Jen of Peas and Crayons (aka Woods' future mother-in-law because he and Madison are dating) Crab Rangoon last night and even managed to take some pictures.

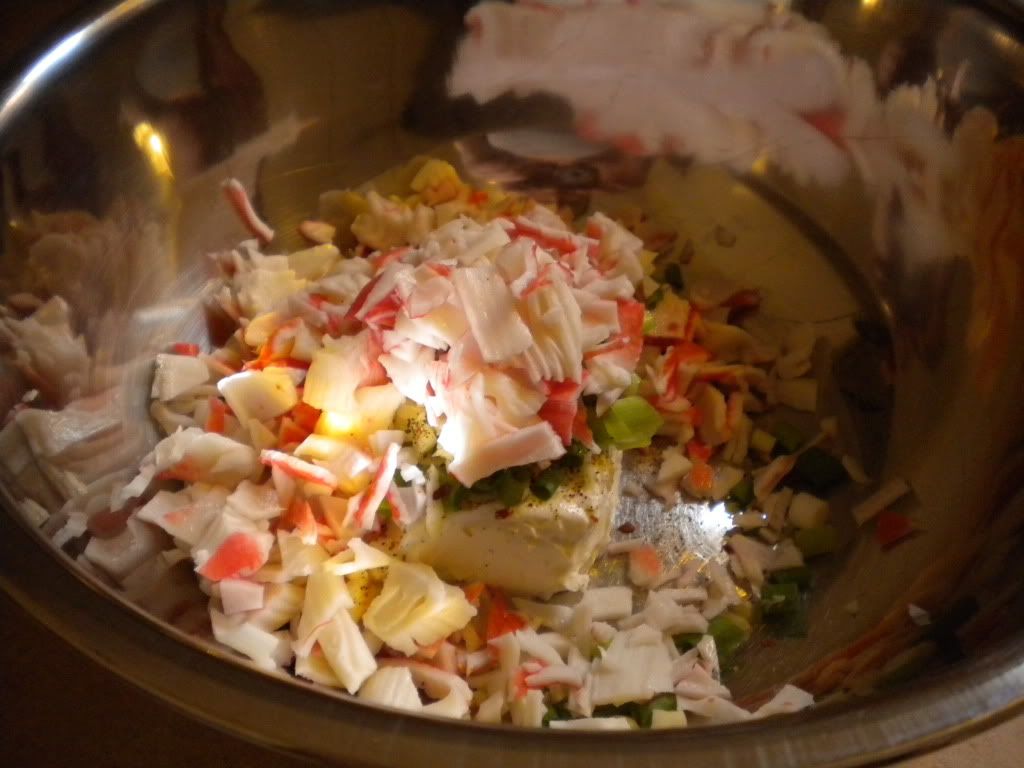
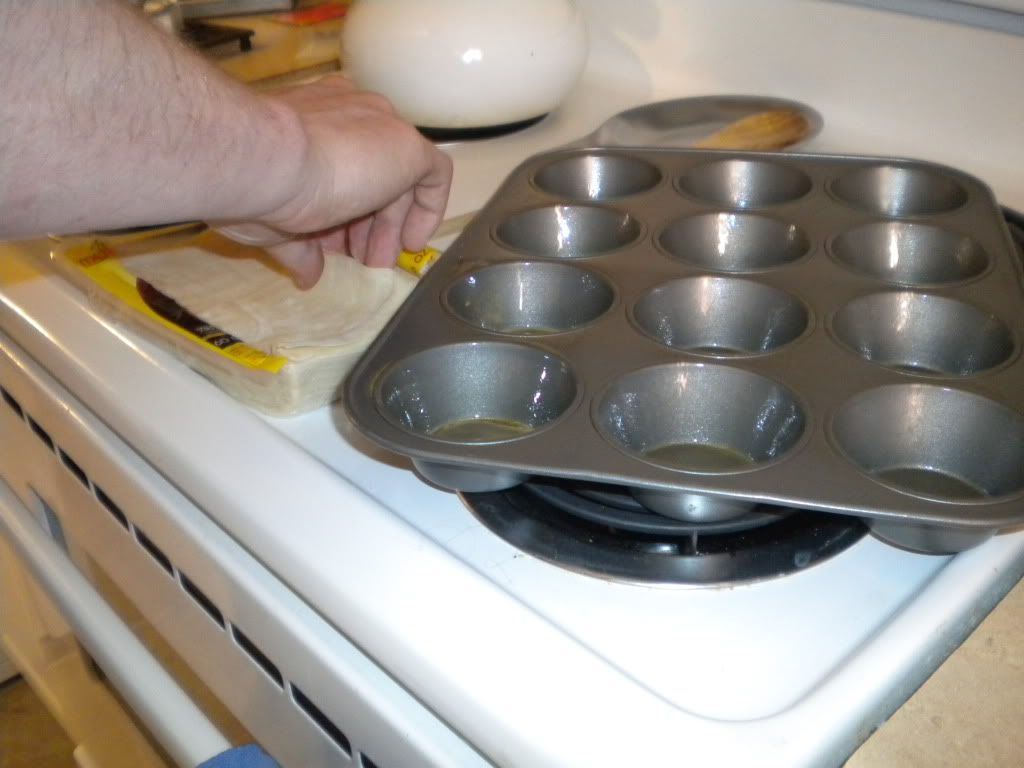
You can find the full recipe here but here's what our dinner preparation looked like last night:


J lining the muffin tins

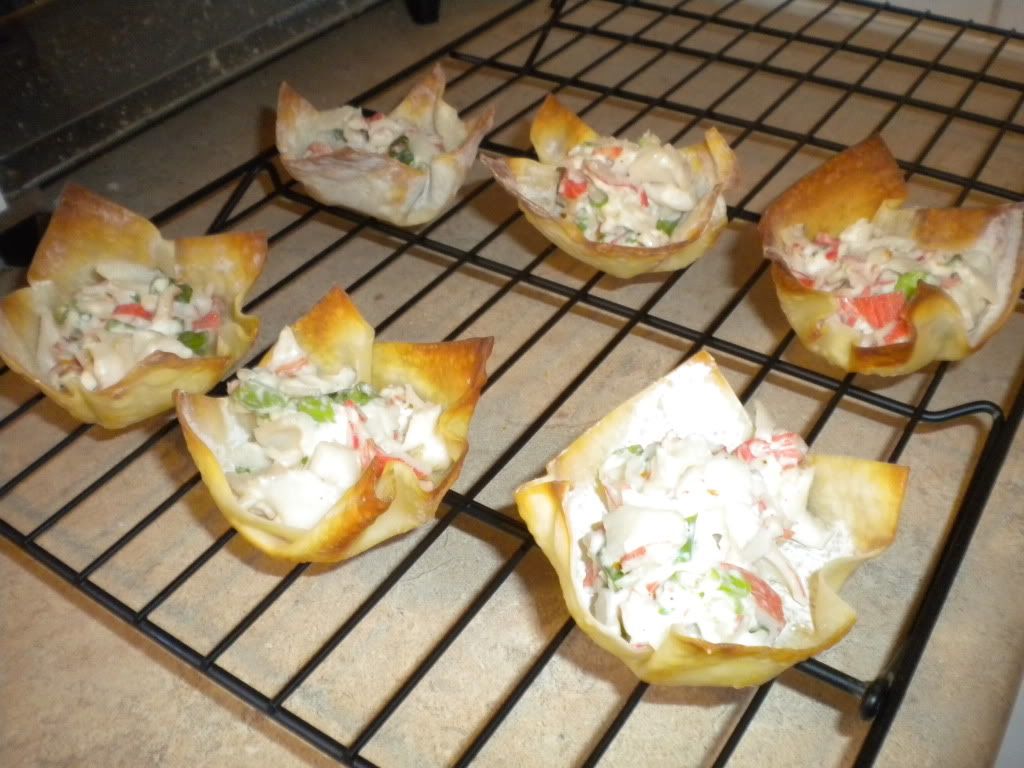
We made six open faced (pictured above) and six closed, dumpling style ones to see which way we liked better.  The open-faced variety looked prettier and were more crispy but the dumpling style ones stayed warmer longer.  We'd love to make open-faced ones for a party since the presentation is so lovely--we will just have to make sure they get eaten quickly.  Somehow I don't think that will be a problem! 


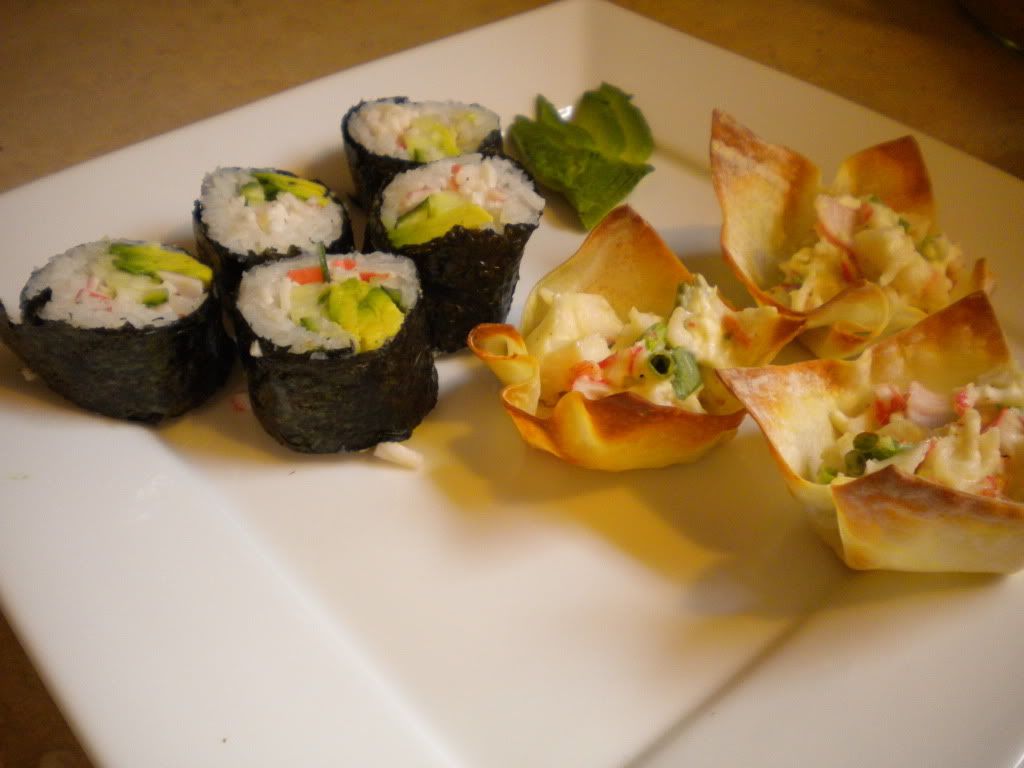
We used crab (or Krab if you want to get technical) because we also made California rolls to accompany the rangoons.   The best part was that I was able to pack a few boxes up while I made dinner, first while the rice soaked and then while it simmered away on the stove.  Woods even got in on the action.


The picture's a little grainy because I had to take it quickly from my iPhone.  Woods is notorious for running away before I can snap a picture of him (case in point: he jumped out of the box as soon as he realized what I was doing).

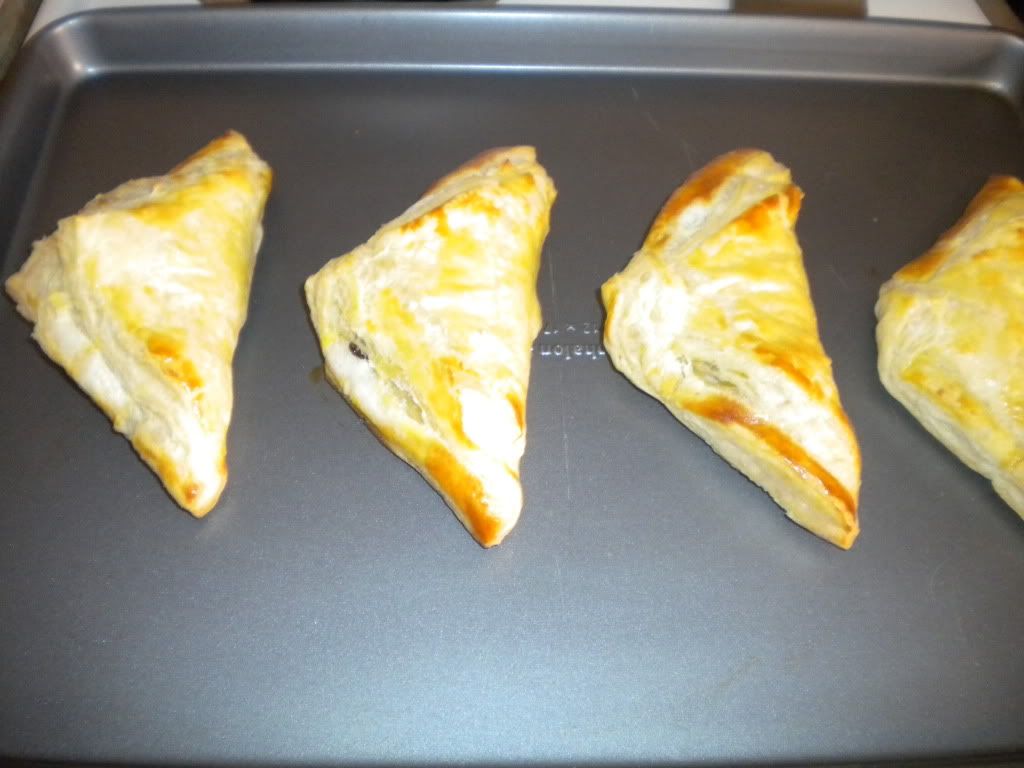
As I got out the cream cheese last night, I realized I hadn't shared the recipe for the cheese and chocolate danishes we had on our date night last week.  The recipe is so easy and tasty I couldn't not post it here.  I halved Giada's original recipe and made a few substitutions so that I could use what I had on hand instead of buying more ingredients at the store.  The results really got my wheels turning as to what else I could stuff inside danishes--they were that easy and that good!


Chocolate and Cheese Danishes, modified from Giada at Home

Ingredients:
1 sheet frozen puff pastry, thawed in the refrigerator for 4 hours or on the counter for 40 minutes
2 ounces reduced-fat cream cheese, room temperature
1 tablespoon vanilla yogurt--we used whole milk vanilla yogurt from Trader Joe's but fat-free would also work
1/2 tablespoon all purpose flour
1 1/2 tablespoons granulated sugar
Pinch of salt
1/4 cup chocolate chips
1 egg, beaten


Kitchen Supplies:
Cutting board
Sheet pan
Small bowl
Ramekin
Pastry Brush
Knife
Cooking spray

Preheat oven to 400 degrees.  Spray sheet pan with cooking spray and set aside.

In a small bowl, stir together cream cheese, yogurt, flour, sugar and salt, mixing until smooth.  Fold in the chocolate chips and set aside.

Unfold the puff pastry and cut into fours.  Spoon 2 to 3 tablespoons of the mixture into the center of each piece of pastry.  Fold one corner of the pastry diagonally over the mixture, leaving yourself a one inch border around the opposite edge.  Brush the egg wash over the folded part of the pastry.  Take the point of the triangle shape you made and fold it on top of the danish for an open-ended danish and a crisp look.  Bake in the oven for 15 minutes until golden and puffy.  Remove from oven and cool for five minutes before serving.

Serves: 4

We waited a bit longer than five minutes to eat them since we had dinner reservations before the concert.  However, they were just as good a few hours later with a glass of crisp white wine! 

Have you ever tried to make danishes?  What about sushi?  They both are definitely way easier than they look!

Wednesday, June 29, 2011

What I Ate (and Will Eat) Wednesday

As I mentioned in this post (and this one), last night we made Chicken Enchiladas with Pumpkin Sauce.  It was so good and so easy I just had to share it with you.  Normally I think of pumpkin as a fall or winter vegetable but in this recipe it becomes more of a mole sauce (without the work!) which would taste great any time of year!

Warning: if you have a cat that is anything like Woods and loves chicken, be prepared for lots of meowing and leg rubbing while you shred the chicken.  I don't think Woods stopped talking for the entire 15 minutes it took me to shred the chicken even after I gave him a few pieces in the living room (where he gets all treats in a vain attempt to keep him from begging).  It was so funny; I really wish we would have gotten the whole thing on video!
Chicken Enchiladas with Pumpkin Sauce, taken from Martha Stewart's Kitchen Everyday Food cookbook

Ingredients:
1/2 roast chicken, skin removed and meat shredded
6 scallions, thinly sliced
Coarse salt
Freshly ground black pepper
1 can (15 ounces) pumpkin puree
4 garlic cloves, peeled
1 jalapeno chile, quartered--remove ribs and sees for less heat if desired.  I removed them because I am not a big fan of super spicy things but with the amount of pumpkin in the sauce, you could leave some or all of the ribs and seeds in.  We missed the heat!
1 teaspoon chili powder
8 corn tortillas (6 inch)
1 1/2 cups (6 ounces) grated sharp white Cheddar cheese


Kitchen Supplies:
Medium mixing bowl
Blender or food processor
Cutting board
2 quart baking dish
Sheet tray

Preheat oven to 425 degrees. In a medium bowl, combine the chicken and scallions.  Season generously with salt and pepper; set aside.

In a blender, puree the pumpkin, garlic, jalapeno, chili powder, 2 1/2 cups water, 2 teaspoons salt, and 1/4 teaspoon pepper until smooth.  Hold the top down firmly with one hand as the blender will be quite full.  Pour 1 cup of the sauce in the bottom of a 2 quart baking dish (square or rectangle).


Lay the tortillas on a work surface; mound the chicken mixture on half of each tortilla, dividing evenly.  Roll up each tortilla in a tight log; place seam side down over the sauce in the baking dish.  My logs didn't stay together very well but the pumpkin sauce and cheese cover all sorts of things.


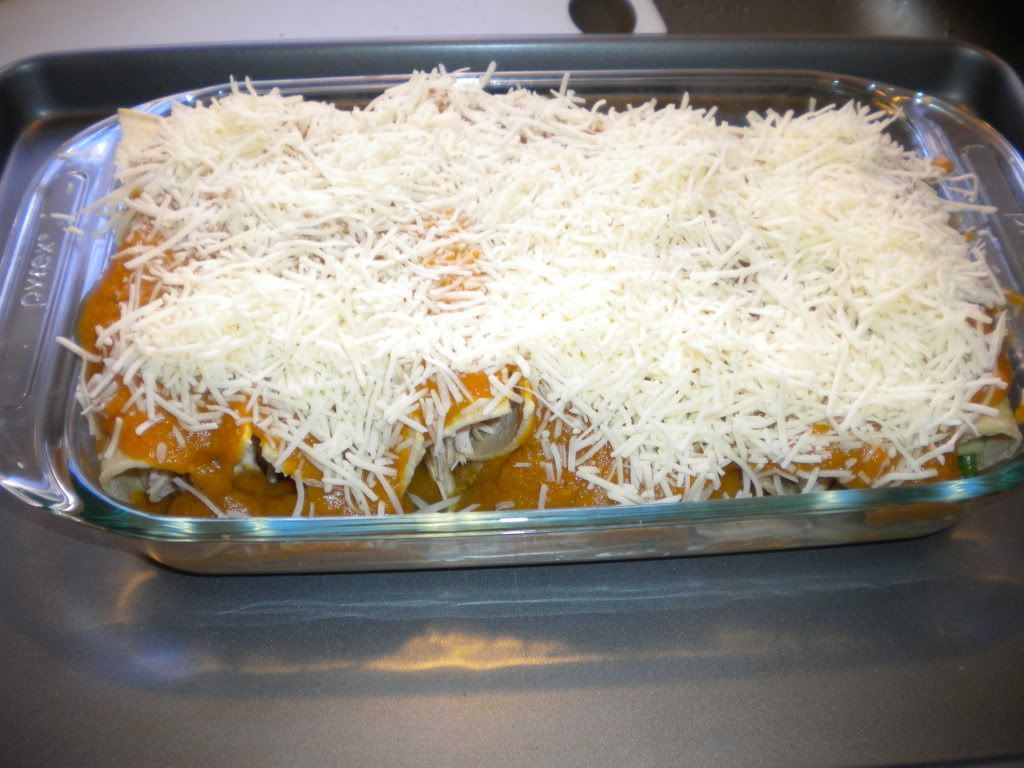
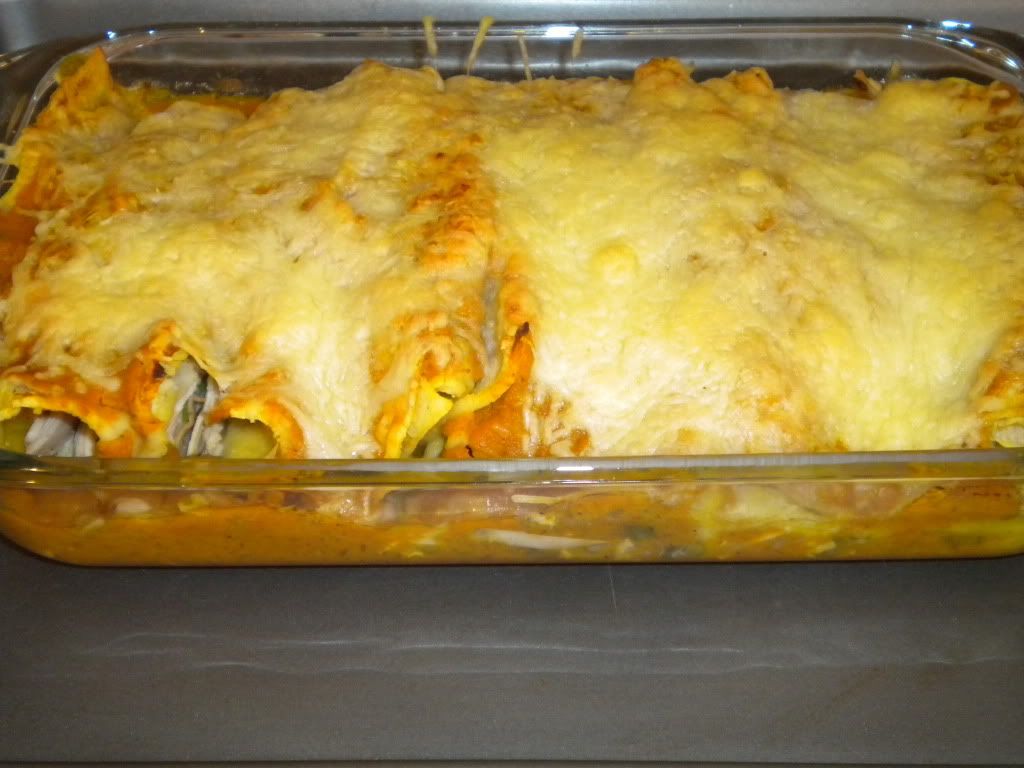
Pour the remaining sauce on top; sprinkle with the cheese.  Place the dish on a baking sheet; bake until the cheese is golden and the sauce is bubbling, 25 to 30 minutes.  Ours took 30 minutes to get really bubbly and golden brown.  Let cool for 5 minutes before serving.


Serves: 4

According to the cookbook, this dish can be made up to 8 hours ahead of time.  Simply prepare as described above, cover with plastic wrap and refrigerate until ready to bake.  Be sure to add a few minutes to the cooking time to account for the chilled dish.

This recipe was everything a weeknight dinner should be (in my book at least): quick, simple, cheap and tasty.  We will definitely be making this again soon.  As is our tradition, we had leftovers of this yummy dinner for lunch today, hence the What I Ate part of the post.


Now for the What I Will Eat part.  In yesterday's post, I mentioned that meal plans should be flexible.  Tonight's dinner is a perfect example of that.  We were planning on making shrimp and egg-knot soup tonight but J emailed me earlier today that he wanted to do something fun tonight.  All of the ingredients for the soup were freezer and pantry items that could keep for another week so we quickly devised a plan: 

Dinner at this local-food restaurant (which came recommended courtesy of Slow Food St. Louis) followed by a free night of jazz music at the Missouri Botanical Gardens.  We will have an appetizer and dinner at Brasserie before we feast on homemade chocolate and cheese danishes and wine at the Botanical Gardens.


Want to know the very best part?  This whole night will be free!  You see, we are having dinner on my parents thanks to a generous anniversary gift they sent our way that has been burning a hole in our pockets sitting in our account for a while now.   THANKS MOM AND DAD!  The concert is free.  We had a bottle of Charles Shaw Pinot Grigio in our fridge and ingredients for the danishes in the pantry and freezer.  So we might have to pay for parking in the Central West End but I think I can handle that.  I can't wait!

What have you eaten this Wednesday?  What will you eat for dinner?  In my family, we always talk about what we are going to eat for our next meal while we are eating our current one, which goes a long way in explaining my love of meal planning and talking about food.  Happy Wednesday everyone!

Monday, June 27, 2011

A French Sunday Night Dinner

Every Sunday night J and I try to make a special meal together for just the two of us where we sit down, talk and really savor our food together.


I've written about this before but growing up, we always had dinner as a family on Sunday nights.  As a doctor, my dad didn't always make it home in time for dinner during the week and for us kids, Friday and Saturday nights were filled with friends and sleepovers and later when we were teenagers, football games, movies and work.  Sunday night was a time we were all home and my dad would whip up another fabulous creation in the kitchen or on the grill.   I love that we are carrying on that tradition with our little family!

This Sunday we had a delicious and organic French-inspired meal that I would like to share with you all.


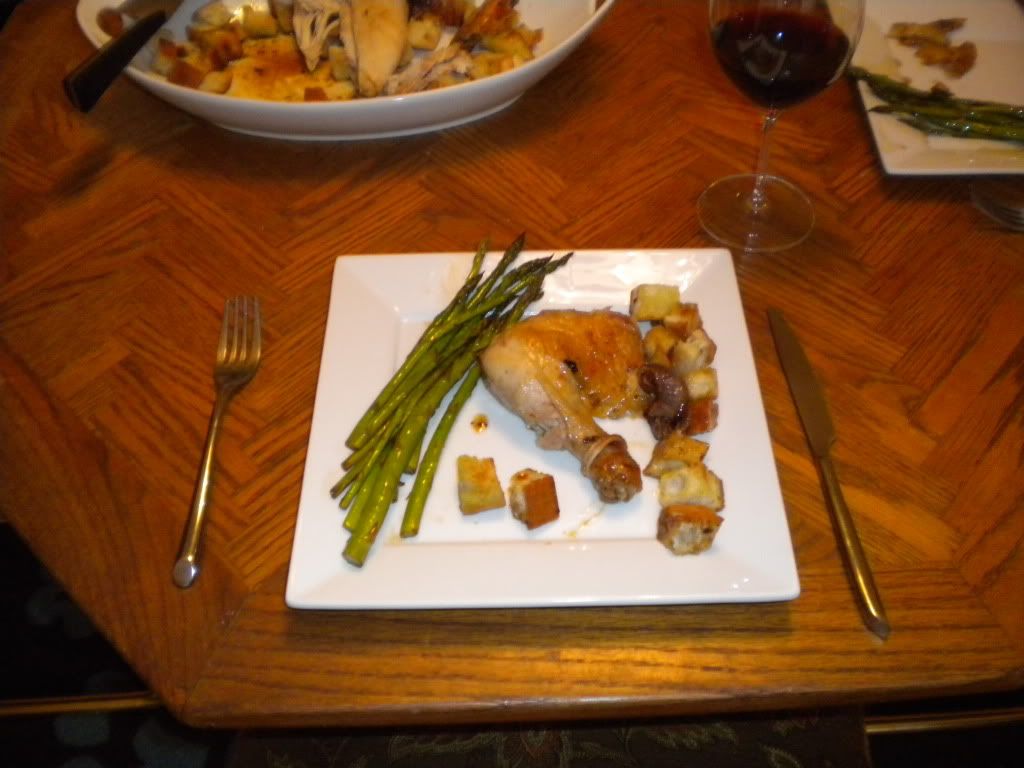
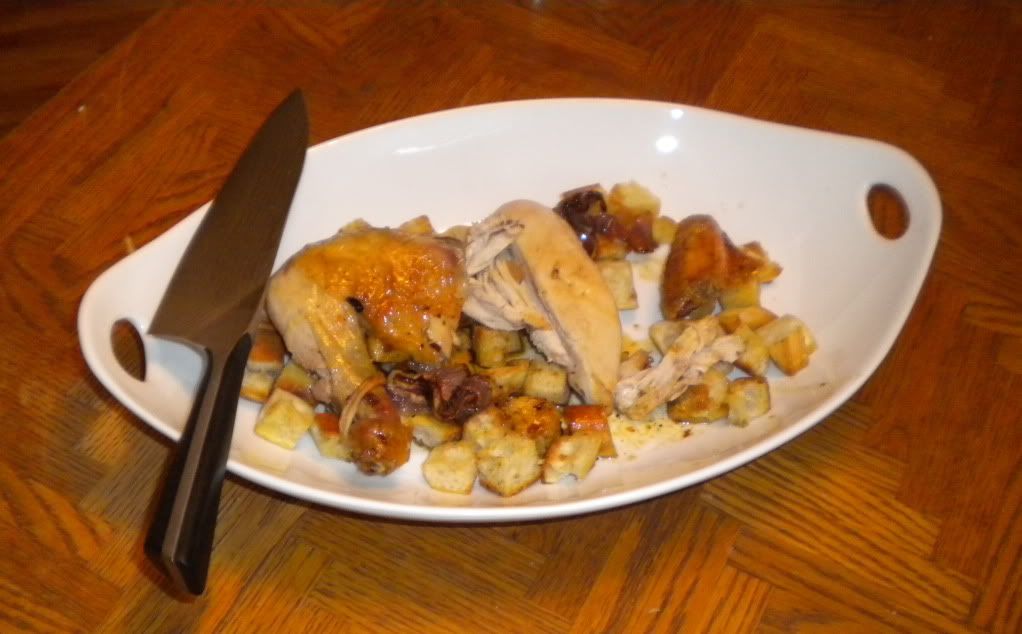
Lemon-stuffed Roast Chicken with Croutons and Roasted Asparagus with Balsamic-Shallot Butter.

Way back in February, I bought two organic whole roasting chickens at Whole Foods during a sale (At $1.69 a pound, I wish I would have bought even more!).  We ate one that Friday and froze the other to use at a later date.  With the big move coming up in just over a month (yikes!), that date was last night.  Using an easy-peasy recipe I saw on Barefoot Contessa last week, we made delicious and tender roast chicken.

Lemon-stuffed Roast Chicken with Croutons, borrowed from Barefoot Contessa's Ina Garten


Ingredients:
1 four to five pound organic roasting chicken
1 large onion, sliced--we used red onion because that is what we had on hand
Olive oil
Kosher salt
Pepper
2 lemons, quartered
2 tablespoons unsalted butter, melted
6 cups bread cubes cut to 3/4" thick or the equivalent of one baguette--if you are making this dish for two people, which we were, you will need half of a baguette or three cups of bread cubes


Kitchen Supplies:
Large oven-proof pan for roasting
Paper towels
Kitchen twine
Small saucepan for melting butter
Pastry brush
Large skillet for croutons
Paring knife
Carving knife and fork

Preheat oven to 425 degrees.  Take the giblets out of the chicken's cavity and wash inside and out.  Remove any excess fat and leftover pin feathers (mine had a few that came right out with a paring knife).  In the roasting pan, toss the onion with a little olive oil to coat then place the bird on top of the onions.  Sprinkle the inside cavity with salt and pepper and place the quartered lemons inside.  Pat the outside of the bird dry with paper towels (this will help get the skin nice and crispy), brush it with the melted butter and season with additional salt and pepper.  Tie the legs together with kitchen twine and cut little slits in the "armpits" of the bird before tucking the wing tips into them so that they do not brown.

Roast for 1 1/4 to 1 1/2 hours until the juices run clear when you cut between the leg and the thigh.  My bird took about 1 hour 20 minutes this time!  Cover with foil and let rest at room temperature for fifteen minutes.

While the chicken rests, heat 2 tablespoons of olive oil over medium-high to high heat.  Add croutons and immediately turn down the heat to medium-low.  This will allow the bread cubes to become golden and crispy rather than soggy!  Saute the bread cubes, stirring frequently for 8 to 10 minutes.  When golden brown, toss with salt and pepper and place in the bottom of a serving platter.  Carve the chicken (J did the honors for us) and place over the bed of croutons before pouring the pan juices over the platter.

We only served half of the chicken--the other half will be turned into a spicy Pumpkin Chicken Enchiladas tomorrow!
On Saturday, I got up early and headed to the Farmer's Market a bit earlier than I usually get there (I arrived at 8:30 and usually do not make it over until 9:30 or 10:00).  I was rewarded with thin and crisp asparagus (one of three bundles left!) which we roasted along with the chicken.  According to my new favorite cookbook and anniversary gift, Williams-Sonoma's Cooking from the Farmer's Market, trimmed asparagus can be stored in a shallow cup of water for up to three days but it is best when eaten shortly after purchase which we did after eating risotto with roasted beets the night before (look for more about the cookbook and the recipe in a future post!).  As good as the chicken was (and it was delicious!), I think the asparagus stole the show!

Roasted Asparagus with Balsamic-Shallot Butter, adapted from The Best of Cooking Light Cookbook

Ingredients:
3 tablespoons finely chopped shallots--we used 3 tablespoons of finely chopped red onion and 1 clove of chopped garlic instead because it is what we had on hand
2 tablespoons butter, melted
2 tablespoons balsamic vinegar
1 teaspoon chopped fresh thyme--we used 1/2 teaspoon of dried thyme instead
3/4 teaspoon salt
1/2 teaspoon grated lemon rind
1 bunch of local asparagus spears fresh from the Farmer's Market

Kitchen Supplies:
Small sauce pan or ramekin (if using microwave) to melt the butter
Mixing bowl
Whisk
Glass baking dish
Cooking Spray
Aluminum foil

Combine shallots, butter, vinegar, thyme, salt and rind; stirring well with a whisk.  Preheat oven to 450 degrees.  Snap off tough ends of the asparagus.  Arrange asparagus in a single layer in a pan coated with cooking spray.  Cover with foil; bake at 450 degrees for 5 minutes.  Uncover and bake an additional 10 minutes or until asparagus is crisp-tender.  Pour butter mixture over asparagus; toss gently to coat.  Serve immediately.

Serves: 4 or in our case, 2

We paired the dinner with a glass of red wine which only added to the French bistro vibe we had going on with the food.  The food was so delicious that we ate all of the asparagus and croutons and had to restrain ourselves from devouring the chicken (since we knew we needed half of it for dinner later this week.)  This chicken recipe will definitely become part of our repertoire!

What was your favorite meal this weekend?  Do you have a night set aside each week for a family dinner like we do?  Anything delicious planned for this week?  Do tell!

Wednesday, June 8, 2011

What I'm Grilling Wednesday and RWW

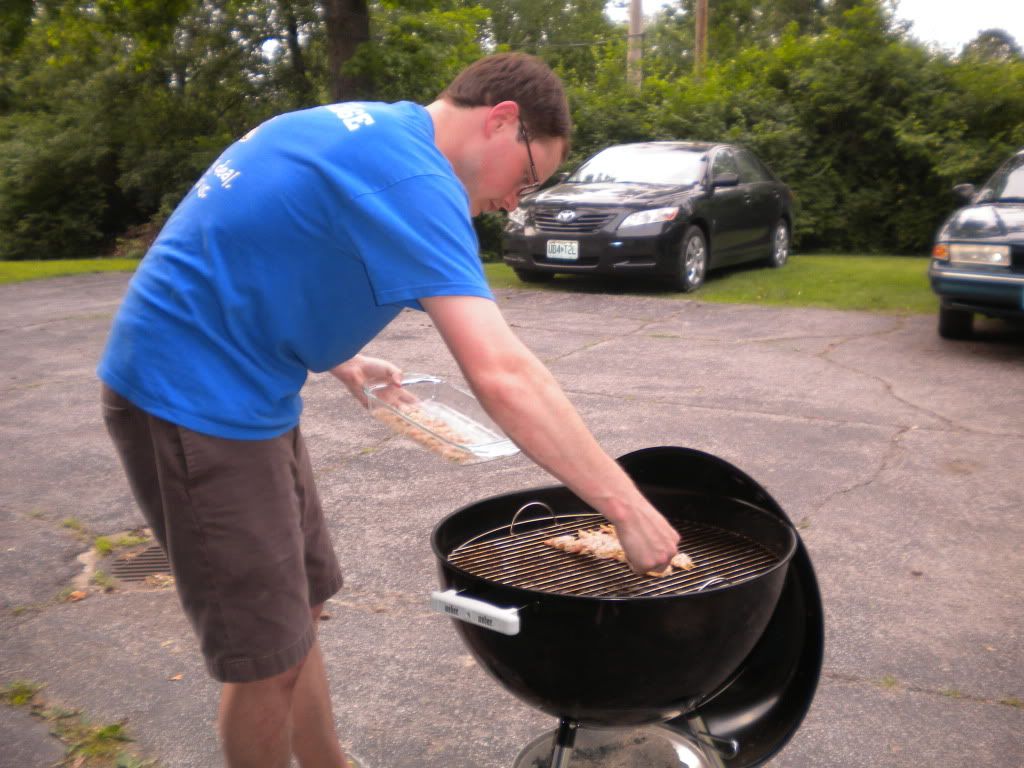
As I mentioned in this post, my dad bought us a grill for a belated house warming gift during graduation weekend.  J and I have used the grill several times since then and I'd like to share some of the recipes (and meals) we've had using the grill.

J getting the grill ready
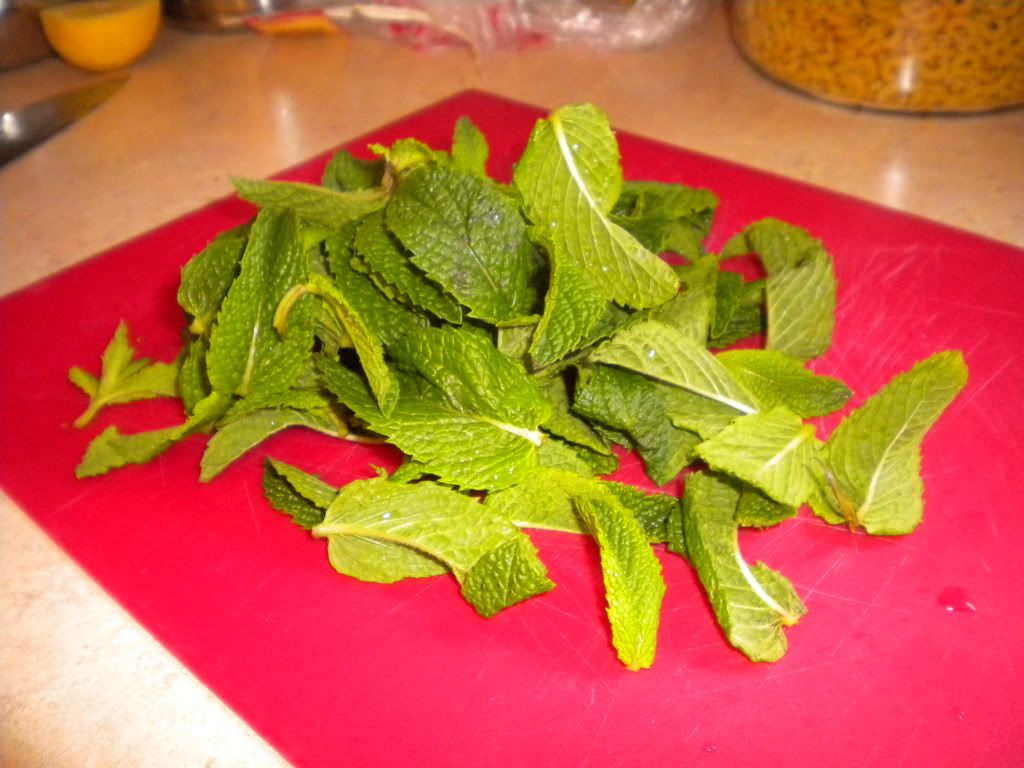
First up was a meal we made last Thursday and it is perfect for the heatwave we've been having: Mint Marinated Grilled Shrimp with Tabbouleh Salad.  I got to cook with an ingredient I'd never worked with before (bulgur) and there is so much mint in the dish, it literally gave me the chills while I was preparing it.  How's that for free air conditioning?


Mint Marinated Grilled Shrimp with Tabbouleh Salad, as seen on Boy Meets Grill by Bobby Flay

Ingredients:
For the tabbouleh salad:
1/2 cup medium or coarsely cracked bulgur--I found it in the bulk bins at our local grocery store (Dierberg's)
1 1/2 cups boiling water
3/4 cup baby arugula leaves
2 large green onions, thinly sliced 
3 tablespoons finely chopped mint leaves, plus fresh mint leaves for garnish
1/4 cup fresh lemon juice--if it is a juicy one, this is about half a lemon
1 clove garlic, finely chopped
1/4 cup olive oil
Salt
Freshly ground pepper

For the grilled shrimp:
1/4 cup fresh lemon juice (the other half of your juicy lemon)
3 tablespoons fresh mint
1/4 cup canola oil
1/4 teaspoon black pepper
1 pound of shrimp (20 to 24 size) shelled and deveined
Salt

Kitchen Supplies:
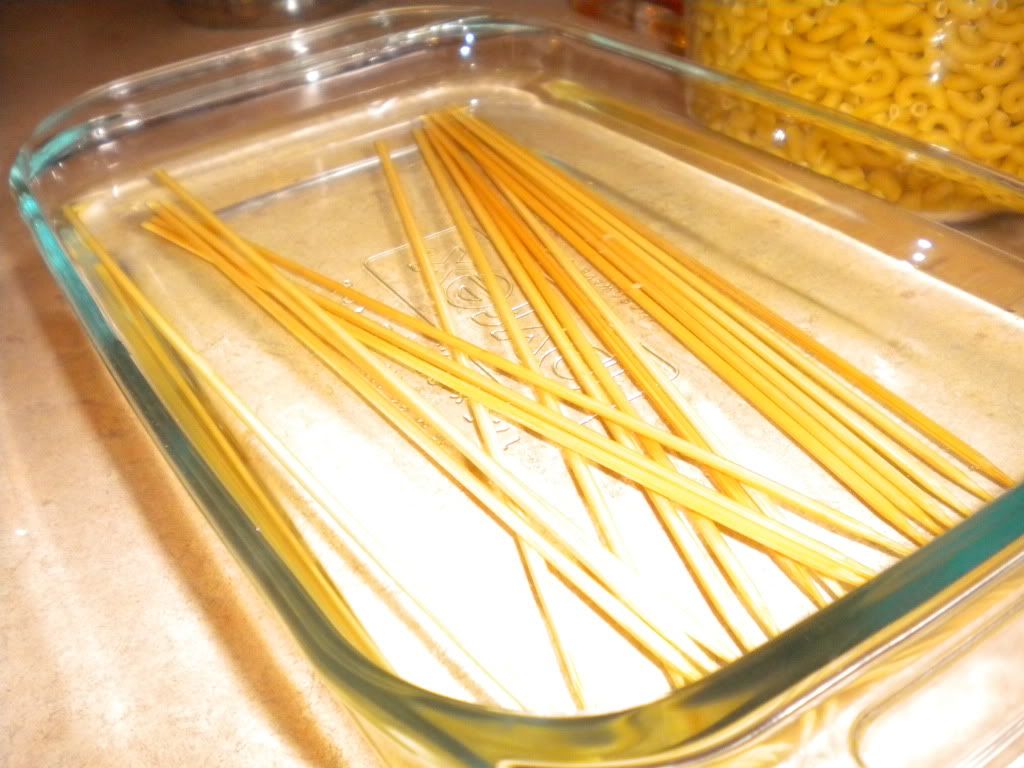
Wooden or metal skewers--if using wooden skewers (which we did) you will need to soak them for at least 12 hours (we soaked them for 24 hours) to prevent them from burning on the grill
Large glass bowl
Medium glass bowl
Small glass bowl
Plastic wrap
Blender or food processor
Grill or grill pan
Fine mesh strainer, for draining bulgur 


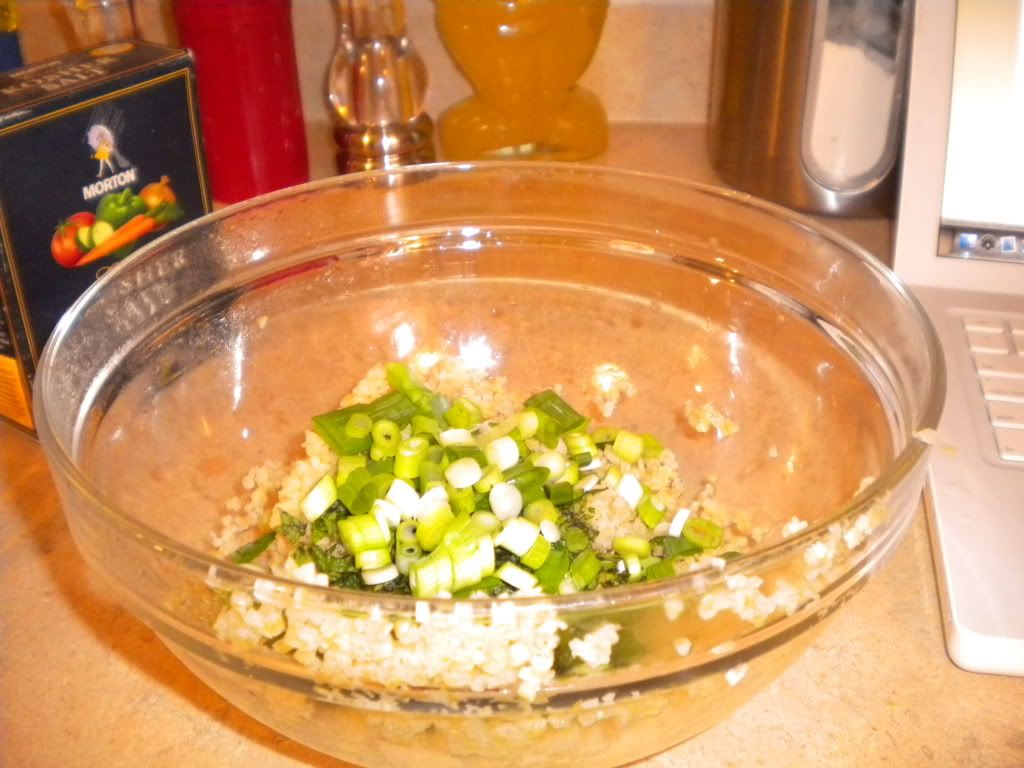
Place bulgur in a large bowl and pour boiling water overCover with plastic wrap and let stand until bulgur is tender, about 90 minutes.


 Drain off any excess liquid and stir in the arugula, green onions and mint. 


Whisk together lemon juice, garlic, and oil and season with salt and pepper.  Pour the mixture over the bulgur and season with salt and pepper. 

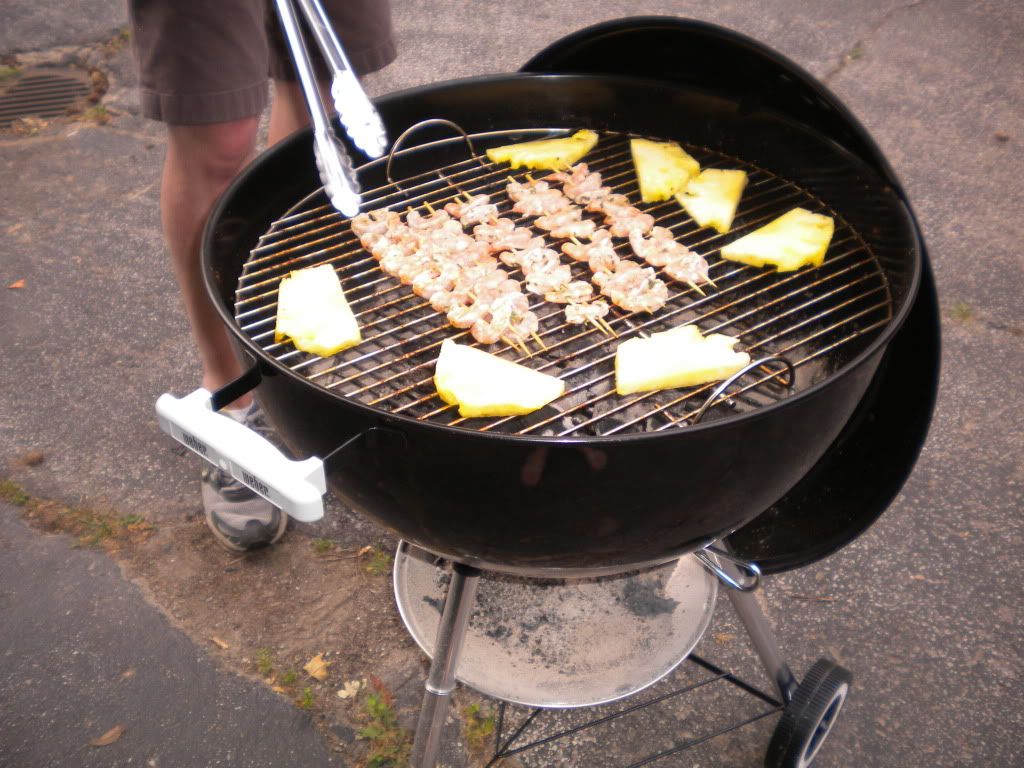
Meanwhile, combine 1/4 cup lemon juice, mint, canola oil and pepper in a blender and blend until smooth.  Place shrimp in a bowl and pour marinade over, stirring to coat thoroughly.  Marinate for 10 minutes.  Heat grill to high heat (ours took about 15 minutes to warm up) and thread shrimp onto skewers.

Here's a tip I read in the latest Real Simple magazine that helped tremendously with the actual grilling of the shrimp.  Instead of sticking one skewer through the center of each shrimp, use two skewers to thread the sides of it.  This will produce a much flatter surface and plane for grilling and will prevent shrimp from sticking as much or falling through the grill plate.  Here is a picture of what I mean.


Season shrimp with salt and grill for 1 to 2 minutes a side or until slightly charred and just cooked through.

Serves: 4

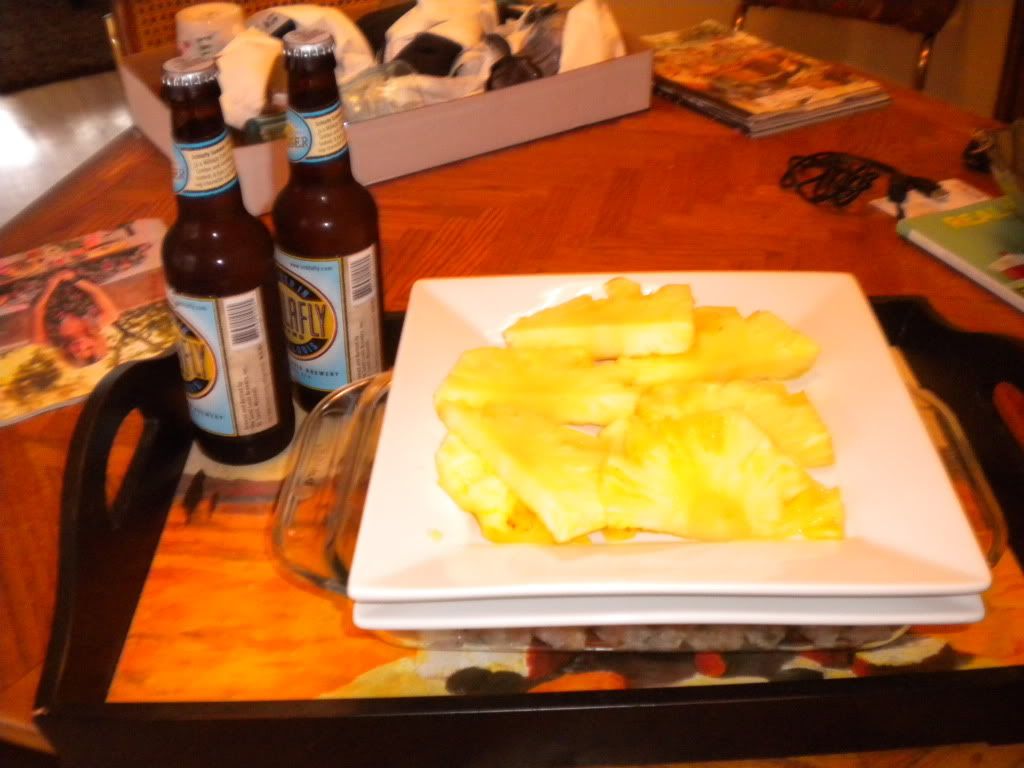
Our grilling tray--2 beers, skewered shrimp on the bottom, two plates and some pineapple

As you can see from the photo, we also grilled some pineapple for a delicious side dish.  We like to season our pineapple with a little chili pepper at the end for some extra kick!

Our next grilling menu is what we had last night (and the leftovers of which I will be eating today, which is how WIAW ties in).  As I alluded to in this post, we were going to have chorizo brats and grilled avocado for dinner last night.  If you have a grill or a grill pan, you must try grilling avocados.  It is just too delicious and easy not too!


Grilled Avocado with Fresh Pico de Gallo sauce, modified from a recipe from our friend HHD

Ingredients:
For the avocados:
2 ripe avocados
Half of a lime, juiced
Drizzle of olive oil

For the Pico de Gallo:
2 tomatoes, chopped
1/2 of a yellow onion, chopped
2 garlic cloves, peeled
Half of a bunch of cilantro, stems removed
1 lime, juiced
Salt 
Pepper
Dash of red pepper flakes

Kitchen Supplies:
Cutting board
Sharp knife
Medium glass bowl
Food processor or blender

Place ingredients for the Pico de Gallo sauce in a food processor and blend until the sauce has the desired consistency--I like my Pico to be mostly smooth but not sauce-like, if that makes sense.  Set aside.

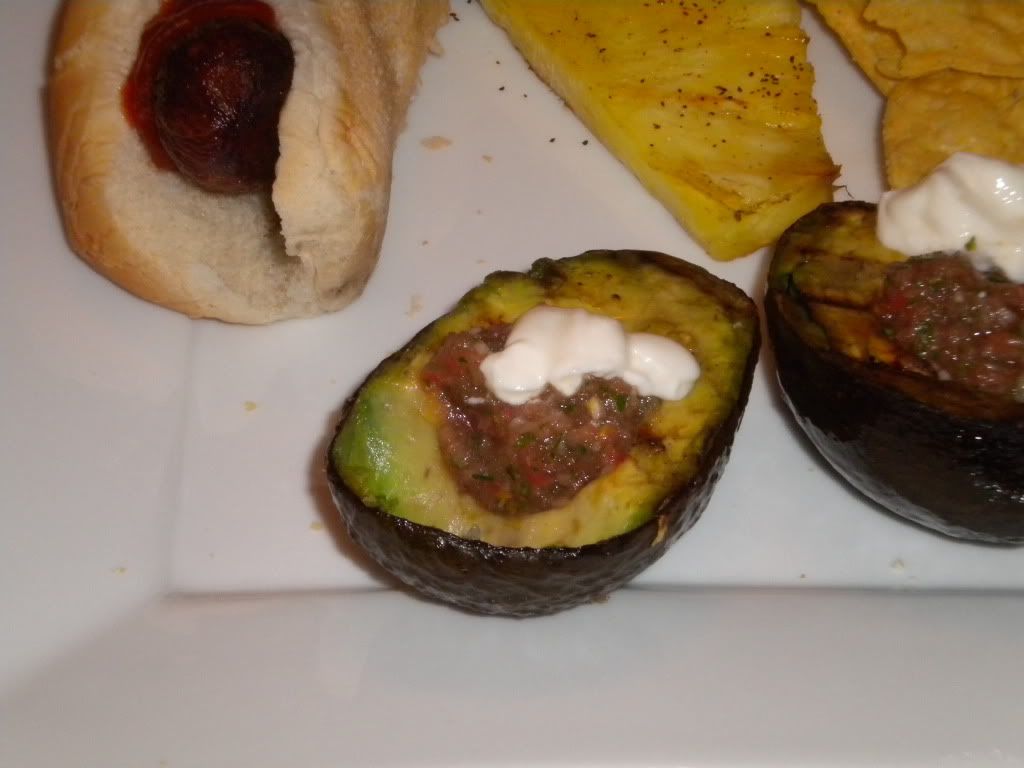
Heat grill to medium-medium high.  Cut avocados in half lengthwise and remove pits.   Squeeze lime juice over each half before drizzling each with a little olive oil.  When you get to the grill, pour out excess lime-olive oil juices (so they don't splatter when you place them on the grill) and place flesh side down on the grill.  Let cook for about 5-6 minutes until char lines appear.  Remove and spoon a little of the Pico de Gallo into the hole of the avocado, topping with sour cream or Greek yogurt if desired.  Devour with a spoon.  No chips required!

I may or may not have taken a bite of this avocado before taking a picture.  Sorry!
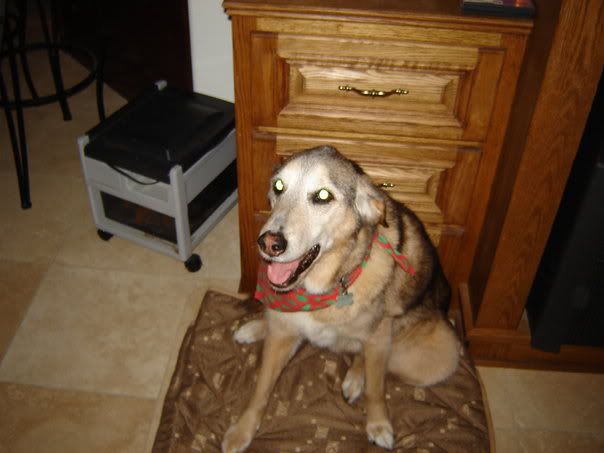
Which brings us to the RWW (Remember When Wednesday) part of the post.  Grilling to me will always remind me of this old girl, our first dog Amber.

This photo is from the last Christmas we had Amber circa 2005
She was born in Missouri and we adopted her when we lived here for two years when I was in first and second grade.  We originally had adopted her sister, Mallory, from a rescue group at a local Petsmart or Petsco, so named because her mom was an Alaskan Malamute.  Sadly Mallory developed some sort of illness a few days after we brought her home and passed away.  Luckily Amber had yet to be adopted and we were able to bring her home with us.  Bringing her home may have involved a long hour drive into rural Missouri where she was living in a farmhouse bathroom, but that's a different story.

The reason I bring up Amber today is that she was an ever-present part of grilling in our house.  As soon as the lid on the grill went up, she was there laying in front of it the entire time we cooked out there just in case any scraps fell off.  If we had steaks or other meat that could be given to her safely with her food, we would always give her and our other dog Rojo a little extra treat in their bowls that night.  I think that might have been the real motivation behind laying by the grill--to remind us she was there and that she expected some treats!

She was so diligent about laying in front of the grill that once when my dad had the lid up (because he had spray painted it black to combat some fading and rust and it was drying) she sat there for days waiting for some food to come her way.  We finally figured out what she was doing out there in the grass and quickly closed the lid (and gave her some treats)!  When J and I grilled this week, we didn't have a dog at our side while we were cooking but we did have a vocal cat who lectured us about coming in and out of the apartment so much while we were cooking.  What is that saying, the more things change, the more things stay the same?

What are you eating this Wednesday?  Do you have a grill or grill pan?  If so, what is your favorite thing to grill?  We are always looking for new grilling ideas!

Wednesday, May 4, 2011

Recipe: French Onion Risotto

We are big fans of risotto, as is evidenced by the number of risotto recipes we have shared on the blog, so it should come as no surprise that the first recipe we wrote our own recipe it was with risotto.

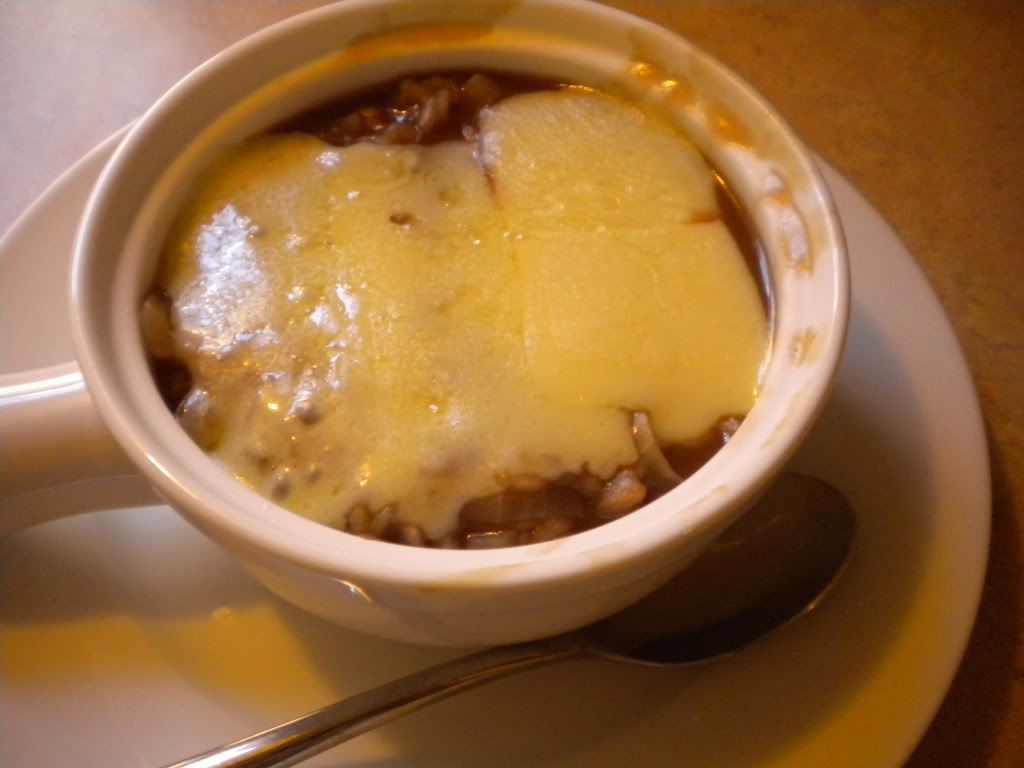
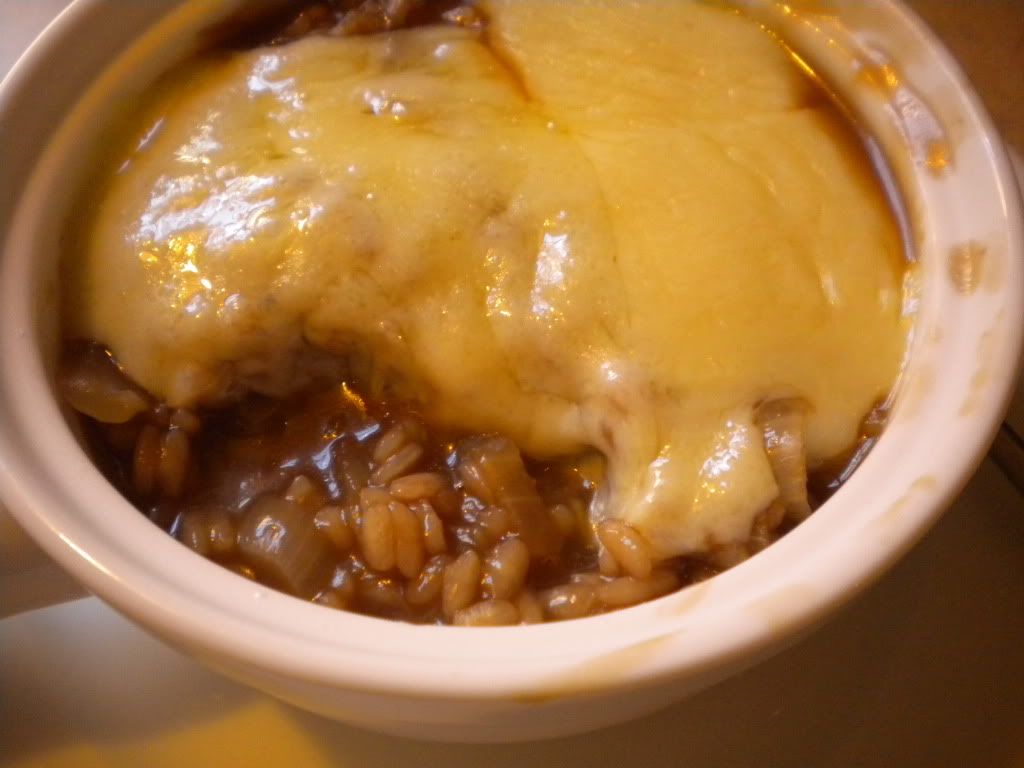
Together we created the following recipe based on the classic French Onion soup.  It is delicious on its own or with a simple salad or served as part of a meal along with a protein such as steak.  The melted cheese on top is a must as it adds a creamy finish to the meal!

French Onion Risotto

Ingredients:
1 yellow onion, sliced
2 tablespoons butter
1 cup of red wine
1 cup of arborio rice
3 cups beef stock
1 cup water
Slices of Swiss cheese--Gruyere would also work here but Swiss was what we had on hand!


Kitchen Supplies:
Medium stockpot
Large 4 cup measuring bowl
Wooden spoon
Ramekins or another ovenproof bowl for melting the cheese under the broiler
Oven mitts

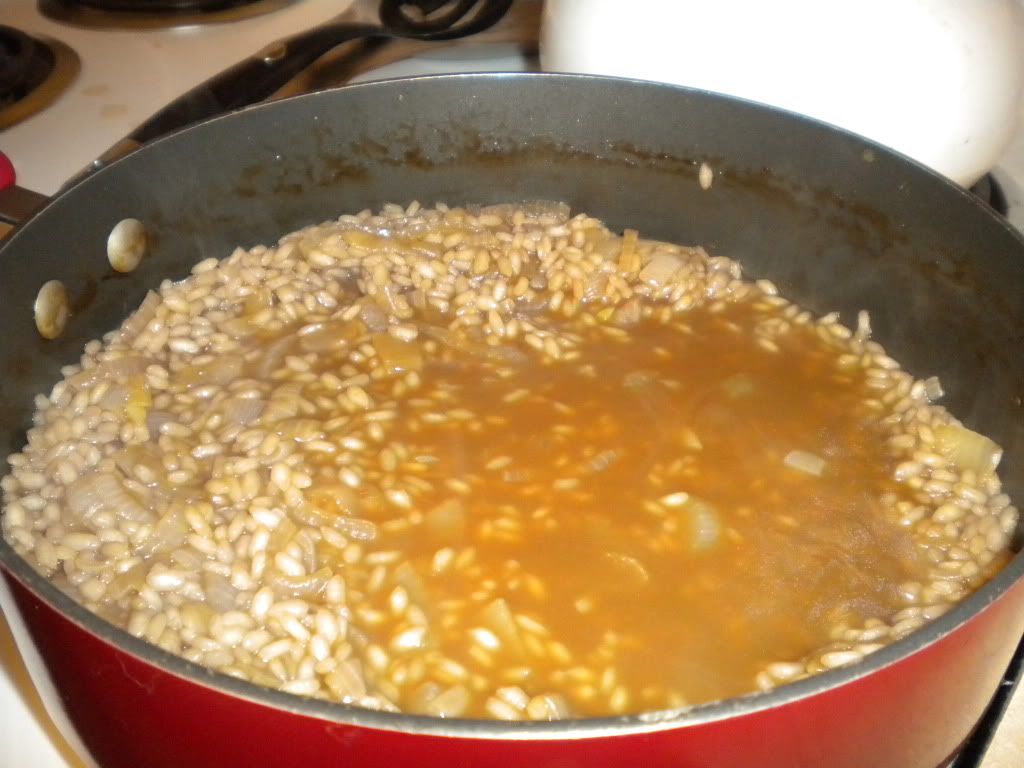
Melt butter in stockpot over medium heat and then add onion.  Allow to soften and caramelize until the onions become golden brown, about 15-20 minutes.  Add rice, stirring constantly for 1 minute or until the edges become semi-translucent.  Add wine, again stirring constantly until it reduces down by half, about 2 minutes.  Add 1 cup of the stock-water mixture, stirring--you guessed it--constantly.  Once it is almost completely absorbed, add 1/2 cup of stock-water mixture at a time over the course of 25 minutes, allowing it to reduce each time before adding the additional mixture.


 Ladle into soup bowls and top with three slices of Swiss.  Turn broiler on high and place bowls under the broiler allowing the cheese to melt and bubble.  Remove carefully and serve.


Serves: 4

This recipe was truly a team effort and I love that we came up with this recipe together!  Not only that, this meal means I can cross another item off my 130 Before I'm Thirty list:

27. Write my own recipe for one dish 


And the best part, at least for us, is that we have enough leftovers to eat it again for lunch today!  I will be pairing it with some fresh greens from our Farmer's Market trip and perhaps a small piece of blackberry pie for dessert.  Yum yum!


 P.S. Today marks two years since we adopted Woods.  Happy Gotcha Day Bubba!

Wednesday, April 27, 2011

Croque Monsiuer Mac and Cheese

Last night J and I made our first recipe out of our new cookbook, Food Network Magazine's Great Easy Meals, using some of the hot ham left over from our Easter dinner.

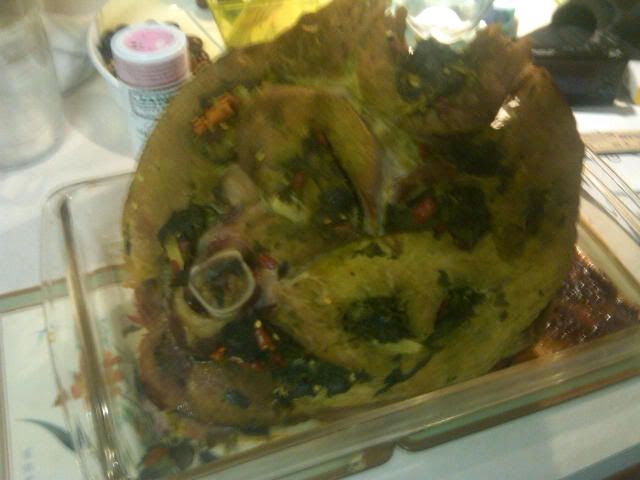
Hot ham is our signature dish come Easter time.  The recipe has been in my maternal grandfather's family for over one hundred years and dates back to the days they lived in Kentucky in the mid to late 1800s.  Basically, you create slits in the top of a fully baked, bone in ham (spiral cut would not work) which you then stuff with dried red chili peppers (also called chili de arbol--hence the "hot" in hot ham), fresh spinach and the white tips of green onions.  After you stuff the ham, you wrap it in cheese cloth to keep the stuffing inside and boil it for a few hours to cook the spinach and green onion.  Right before serving you bake it for about an hour to reheat the ham and crisp the skin.  When it comes time to serve, people can opt for some of the stuffing if they like things spicy or leave it off to enjoy a flavorful ham with just a little kick.

I apologize for the quality of this photo--J took it from his phone because I left my camera at home!
The hot ham is perfect for this recipe although any type of ham would suffice.  We also used smoked Gruyere cheese to bring out the smokiness of the entire dish. 

Croque Monsiuer Mac and Cheese, modified from Food Network Magazine's Great Easy Meals cookbook

Ingredients:
1/2 pound ziti--we used elbow macaroni because that's what we had on hand
2 cups fat free milk
2 cups coarsely grated Gruyere cheese (about 6 ounces)--because we were using smoked Gruyere, we used one cup of Gruyere and one cup of plain Swiss cheese.  This is also a cheaper option since Swiss is such an inexpensive cheese
1 cup finely grated Parmesan cheese (about 4 ounces)
2 large eggs
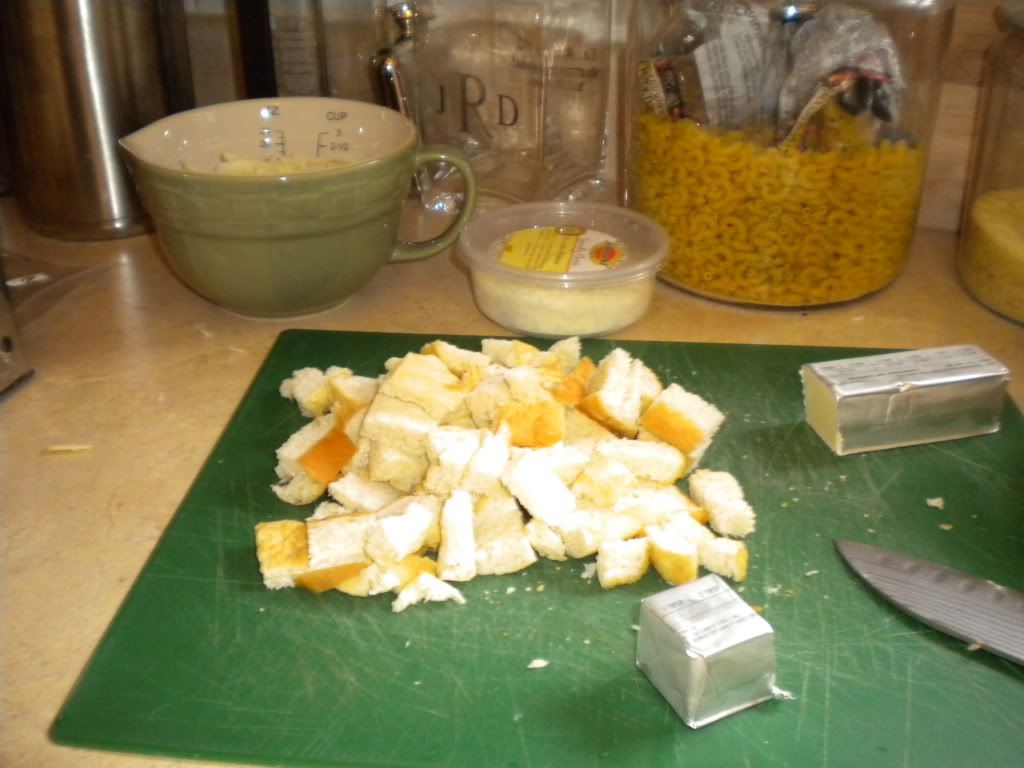
3 slices white sandwich bread, coarsely chopped
2 tablespoons butter, plus more for greasing
1 medium onion, diced
1 garlic clove, minced
3 tablespoons all-purpose flour
1/8 teaspoon nutmeg
1/8 teaspoon cayenne pepper
1 teaspoon salt
8 ounces cooked ham
3 cups fresh spinach--we added this to the recipe for a little green and to use up what we had on hand before it went bad!


Kitchen Supplies:
Large stockpot for pasta
Cutting board
Box or hand grater for cheese
Small saucepan
Whisk
Measuring cups
One large bowl
One medium bowl
2 quart glass baking dish


Preheat oven to 425 degrees.  Bring a large pot of water to boil, add salt and pasta cooking until al dente (six minutes for ziti, eleven minutes for elbow macaroni).  Drain and transfer back to stockpot, tossing with 1/4 cup of milk to keep it from gumming up.

Meanwhile combine cheeses in a bowl.   Beat 1/4 cup of milk and 2 eggs in another bowl; fold in bread and toss with half of the cheese mixture.

Next, melt 2 tablespoons of butter in the saucepan over high heat and saute garlic and onion for two to three minutes until they start to brown.  Add flour, cayenne pepper, nutmeg and salt; cook, stirring about 2 minutes.  Slowly add 3/4 cup of water and the remaining 1 1/2 cups of milk; bring to a boil, stirring until thickened.  Remove from heat and whisk slightly to cool.  Whisk in remaining cheese then add the mixture to the pasta in the stockpot, tossing to combine.


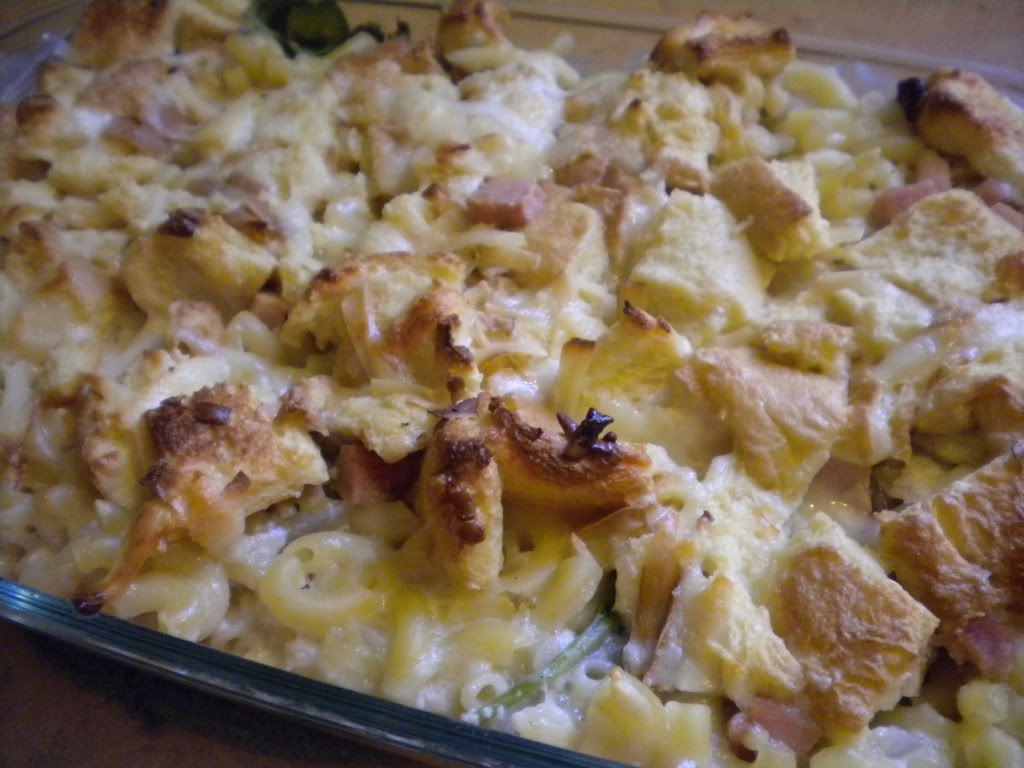
In a buttered glass baking dish, pour half of the pasta mixture followed by half of the ham and all of the spinach.  Top this with the remaining pasta before pouring the bread and cheese mixture on top of it all.  Bake for 20 minutes until golden brown and bubbly.  Let rest a few minutes before serving.


 Serves: 4

This was a delicious recipe and I am looking forward to eating the leftovers for lunch today!


Also because I haven't shared any Woods' photos in a while, here are a few I snapped yesterday.  The first is a picture of his new "bed" next to ours.  I like to think of it as a trundle bed of sorts, one that allows J, Woods and I to sleep better because Woods is no longer hogging half of our full size bed.  We will see how long this phase lasts!


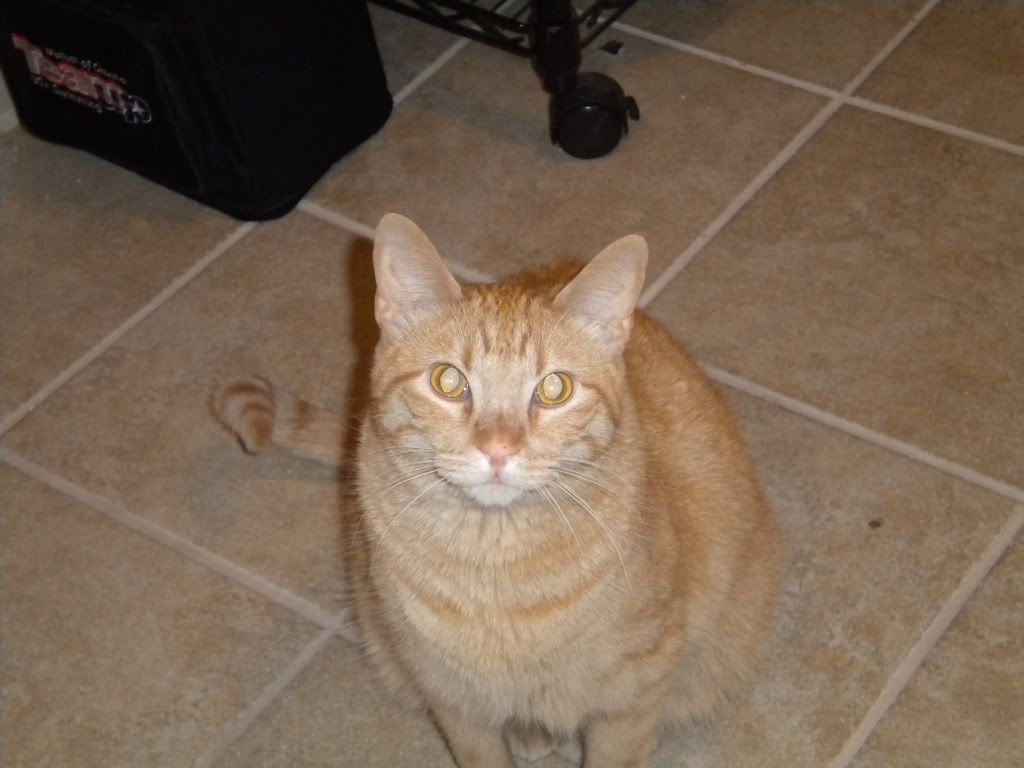
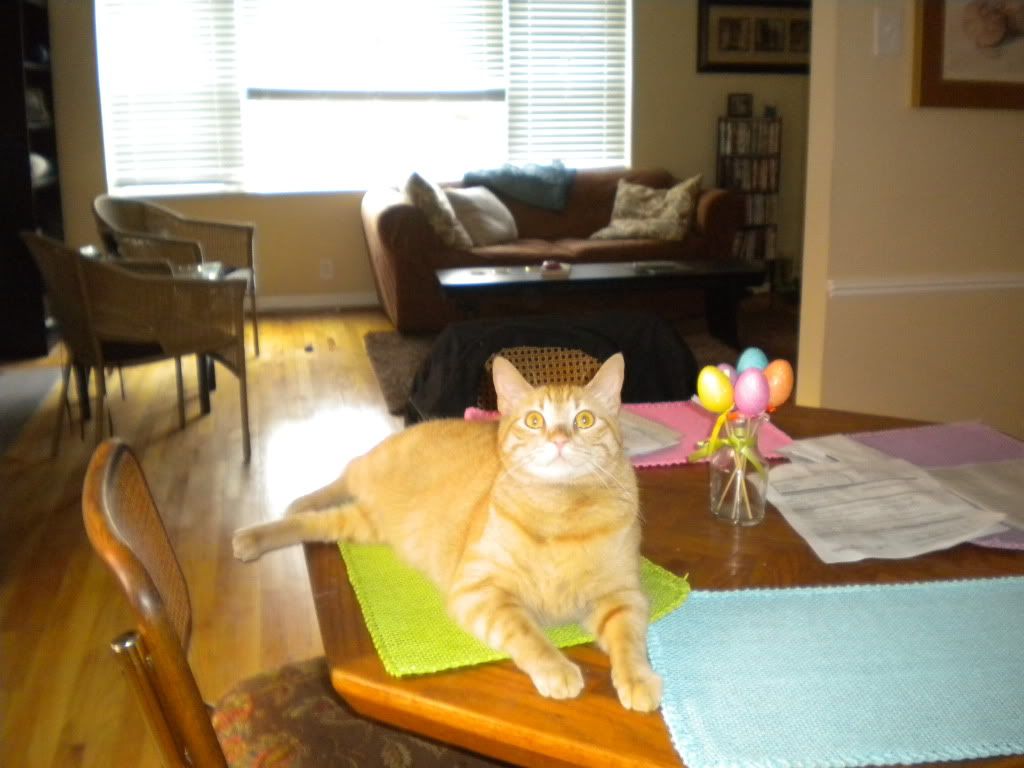
The next is of Woods while we were making dinner.  He is not allowed on our table and he knows it, hence the guilty look on his face when I caught him in the act!


Let's talk holiday food!  What type of protein do you usually have for holiday meals?  Ham? Turkey? Roast beef?