Showing posts with label DIY. Show all posts

Tuesday, June 21, 2011

Visit: Hannibal MO; Part Three or Going Home

I apologize it's taken me a few days to finish this series.  I took a break from blogging this weekend to start packing (eek!), finish reading a great book, stroll around the Farmer's Market, cook some great meals, wash and put away 9 loads of laundry and spend time with J and friends.  Anyway, here is the end of our anniversary trip (read part one and part two here) and a DIY project I completed with some mementos from our trip!

After listening to some great local music (including two very talented harmonica players), we headed back to Lulabelle's for a good night sleep.  We had seen (and heard) our mystery guest earlier that day but figured he would be long retired and in bed by the time we ourselves hit the sack.

Who is this mystery guest?  Well, you saw him in this photo earlier.
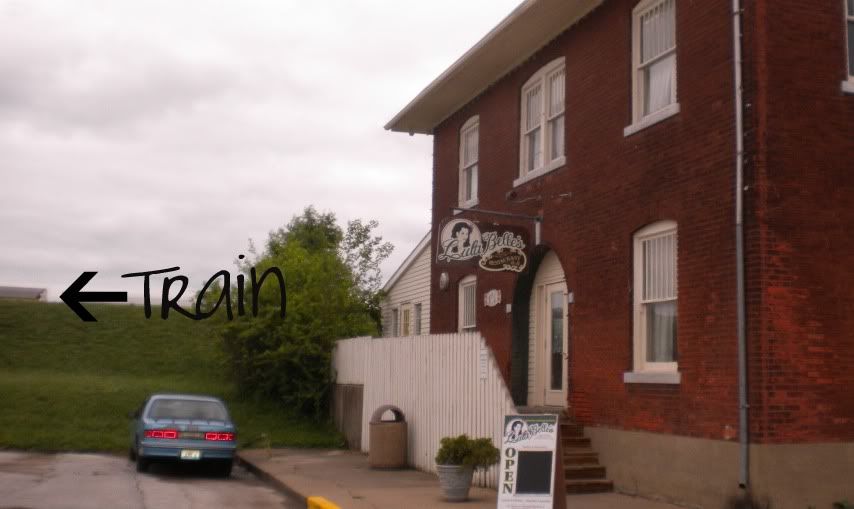

Meet Mr. Train.

Much to our chagrin, Mr. Train went by every hour or so throughout the night, whistling loudly as he came through, letting his presence be known to all.  The B & B did let us know on their website that there were train tracks nearby ("Most of our customers understand that trains are an integral part of the Mississippi River experience, since tracks run right along the river...However, after a glass of wine and a jacuzzi bath, most people don't mind.") and even left out some earplugs for our convenience but we figured with a few glasses of wine and a long day, we would sleep right through it.

Not really.  We tried sleeping without earplugs at first because they can be a bit uncomfortable but after an hour or two, we caved and put them in.  They did a better job of drowning out the horns but we still found ourselves waking up every few hours when the earplugs would slip out.  We gave up sleeping woke up for good around 5:30 and watched the sunrise over the river from our bed.  That part was really neat.  Not sleeping through the night, not so much.  We did have a good laugh about it though before heading to breakfast!

After a hearty breakfast of bacon, eggs and pancakes, we checked out of our room and headed to the Mark Twain Museum for a few hours before hitting the road. 
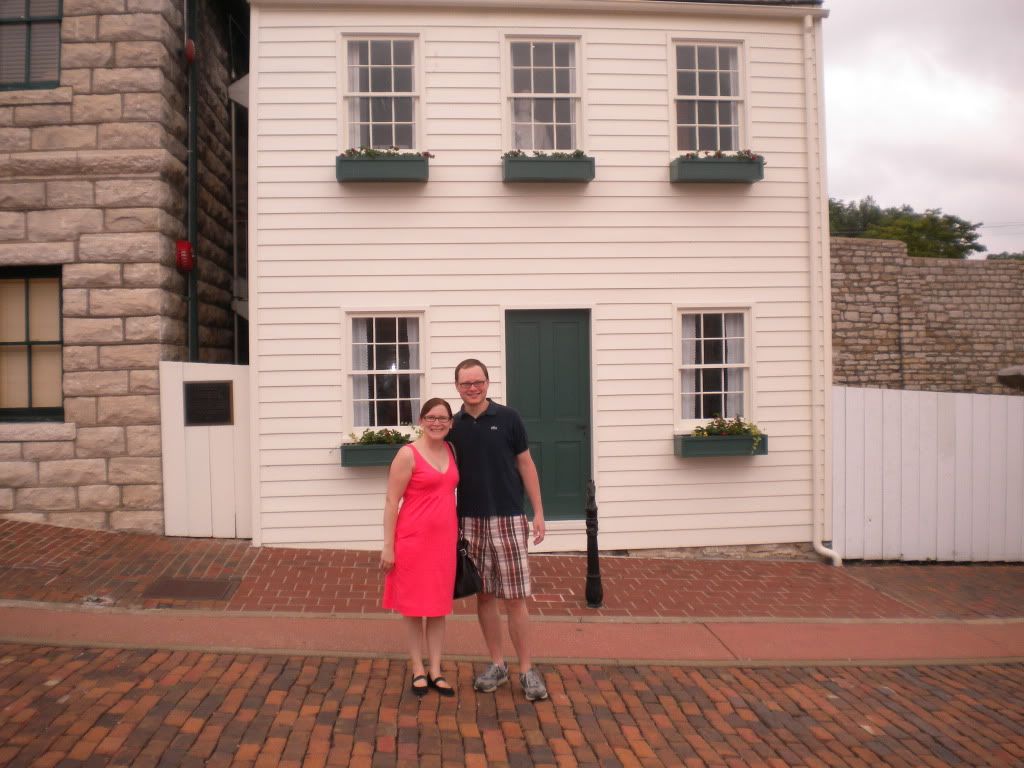
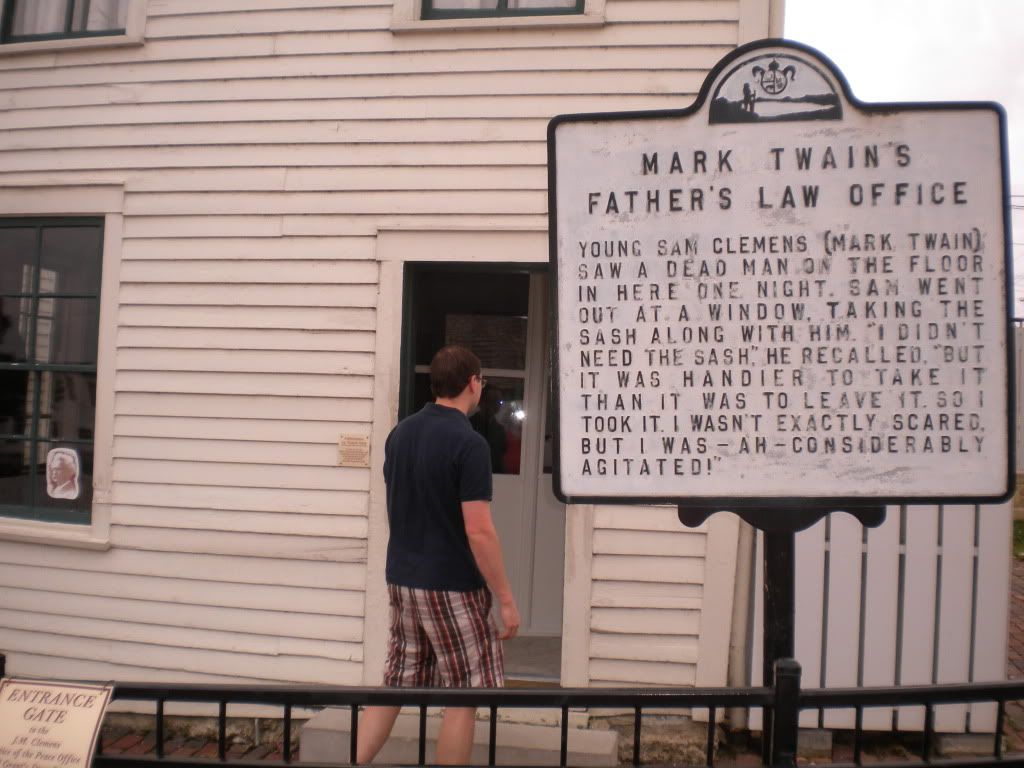
Us in front of Mark Twain's boyhood home
 The museum itself was a complex of building consisting of a visitor's center, art gallery, Mark Twain's childhood home, Tom Blankenship's home (Mark Twain's boyhood friend who inspired the character Huckleberry Finn), the general store and his father's law office. 


Because the museum is not owned by the State or Federal Parks system and therefore relies on private donations and admission fees to keep it up and running, some of the exhibits were more accessible than others (Becky Thatcher's house for example was completely closed for renovation) and others were in need of some repair and updating.  However, it was very interesting to learn about Mark Twain's early life and see some of the places that inspired the novels.   All weekend J and I both remarked that we needed to go back and reread The Adventures of Tom Sawyer again after everything we had read and seen!

We drove back that afternoon pretty tired but after a small lunch, a nap and dinner at a local restaurant we were finally feeling like ourselves again by Sunday night.  Our night with Mr. Train was definitely one for the memory books!

And speaking of memory books, last week I created a little keepsake from our anniversary trip that I wanted to share with you all.  I had picked up some little glass jars from Hobby Lobby last fall with the idea that I would fill each of them with mementos from each of the years we have dated (I've saved movie stubs, wristbands, corks, and so forth over the years).  Alas, many of the mementos are back in California as a result of my move out there after graduation so the jars sat empty in my basement for months until I came up with a new idea.  Why not fill each of them with items from vacations we take together instead? 

Here's what I filled our Hannibal glass jar with:
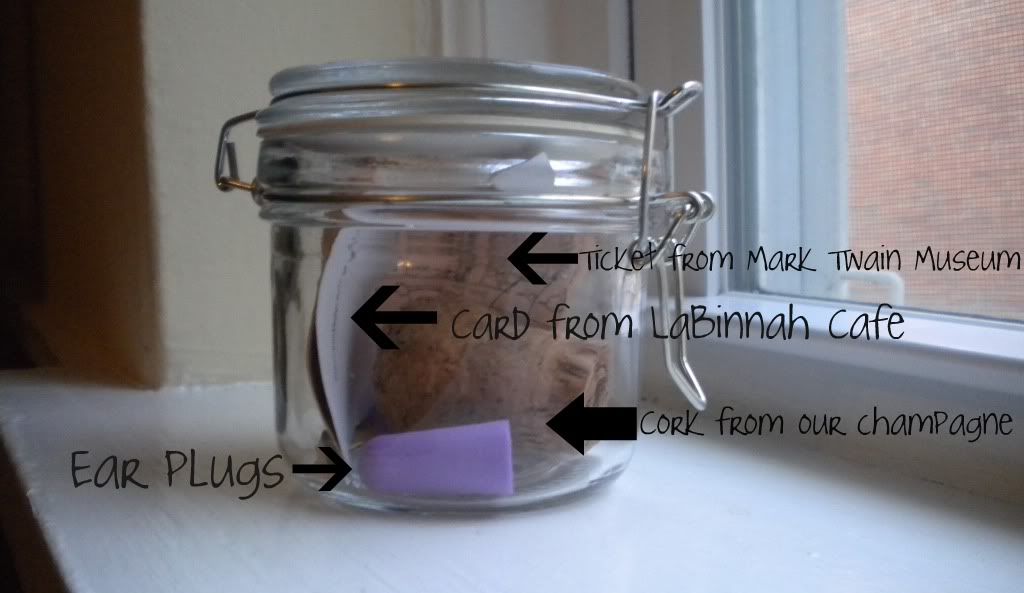

Now I can't wait for us to go on more vacations so that I can fill more of these cute little guys with stuff!  We are already planning to visit Mackinac Island and Toronto sometime next year (these destinations will be a lot closer to us once we move).  I only wish I would have thought of this sooner (like when we went on our honeymoon to San Francisco and Napa Valley last year)!

Do you save things like ticket stubs and wine corks?  Do you buy souvenirs when you go on trips?  If so, how do you display them? 

Thursday, May 5, 2011

Organize: The Kitchen Pantry

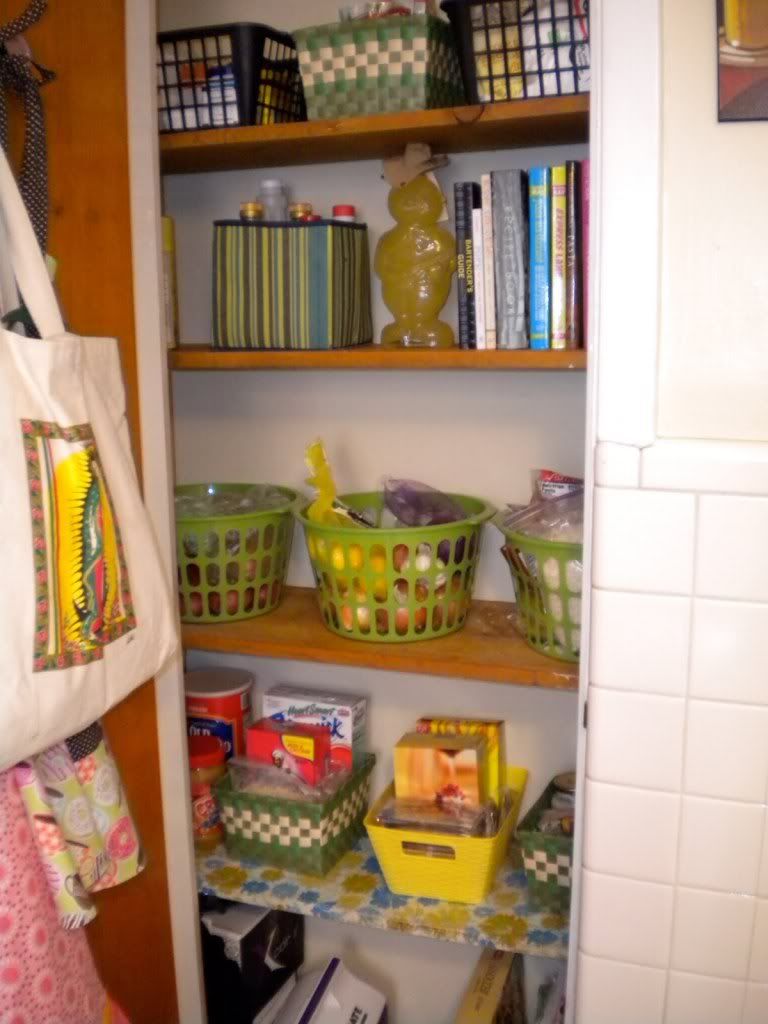
Over a year ago, our kitchen pantry looked like this.


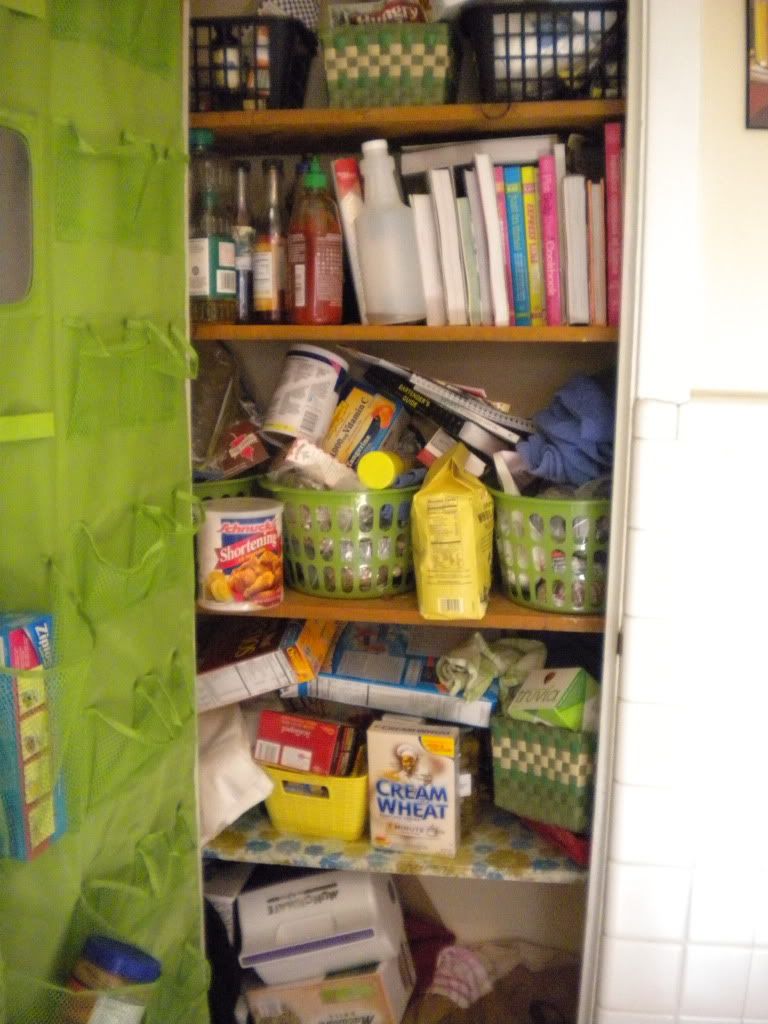
At the time I bought a variety of baskets from the Dollar store without much consideration of how they would fit and what function they would serve inside our pantry.  Most of them never worked quite right and because of this, it didn't take long before our pantry was a disaster area again.  I could never find ingredients I could have sworn we had and every time we open it, I prayed something wouldn't fall on my head.  Nice, right?  This weekend I decided to do something about it.

That's really how our pantry looks.  I'm a little embarrassed to show this on the blog!
I began by taking absolutely everything out of the pantry, tossing expired products into the trash can as I went.  We had more expired items in there than I realized, enough to fill one recycling bin and two trash cans!  Then I began assessing what items we had left.  Most of them were dry goods such as cake flour, lentils, pinto beans, and so forth.  That's when inspiration struck me.  I remembered seeing Jenn use labeled mason jars in one of her posts on her blog a home in the making and decided that was the route for me too! 

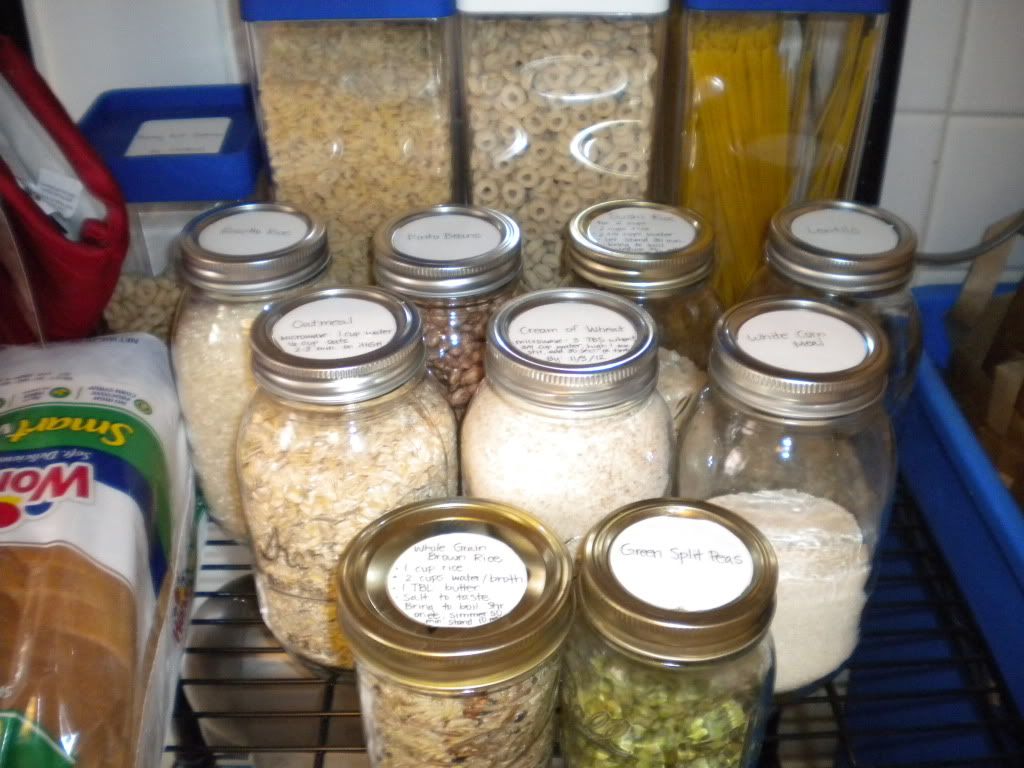
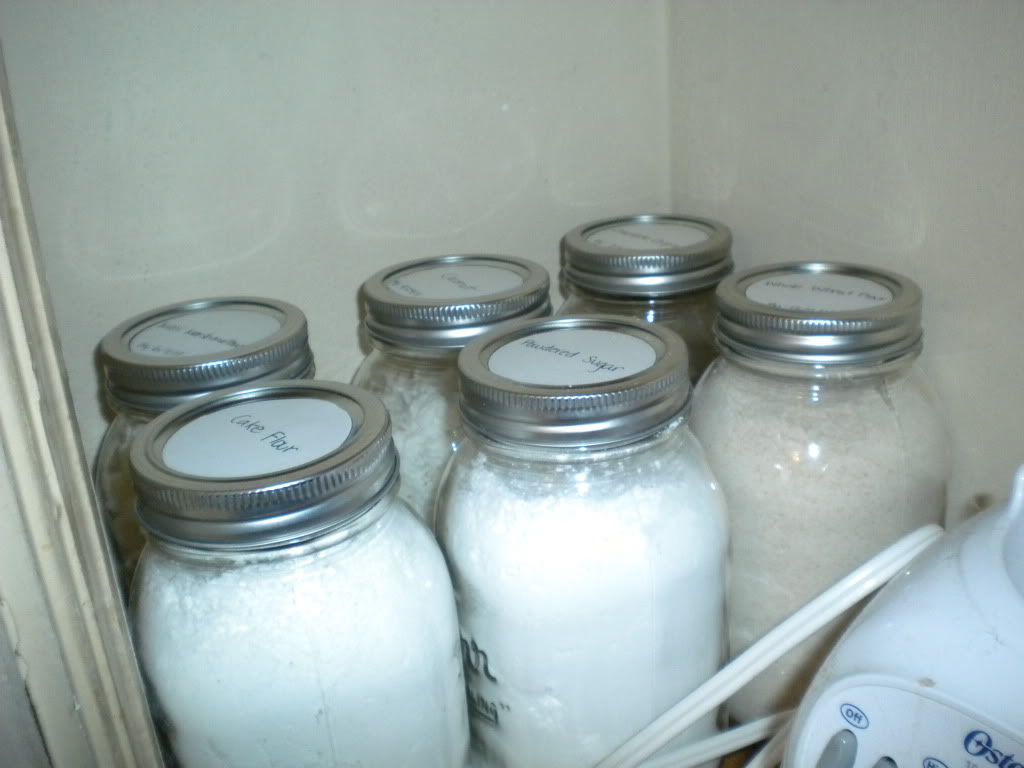
I had a few small mason jars on hand because my grandma often uses them to send me home with food when we come to visit so I decided to experiment with some of my smaller items first.  I poured the green split peas and whole grain wild rice into the two jars (I had a little under half of a small bag of each) and labeled them with some labels I had lying around the house leftover from our wedding.  For the whole grain rice, I also wrote down the preparation instructions since I was throwing the bag that had the original instructions away.  Inspired and excited by how it looked, I quickly counted up how many additional jars I would need and hopped in the car.  $11.00 dollars and a trip to the grocery store later, I had 16 large mouth Mason jars ready and waiting to be filled and labeled. 

Then I remembered seeing large rectangular plastic jars on clearance at Target earlier that week.  I often troll the clearance sections of Target just to see what's available.  At the time I had thought, these would be perfect for pastas like spaghetti and cereals.  At 4.99 a jar (down from 9.99) they were a good deal but at the time I wasn't sure I needed them.  After cleaning out the pantry, I realized I could in fact use them.  After the grocery store, I made a beeline for Target and hoped that the jars were still there.  Lucky for me, they were!  I grabbed three of the taller ones and one smaller one and headed back to the house to put everything back together.

Once I had filled and labeled everything (I also put expiration dates on the labels where applicable so we wouldn't be consuming spoiled or stale food) I surveyed the land before putting things back in its place.  Three things I knew I wanted to accomplish were finding a better place for our kitchen drying towels since many of them ended up on the floor or stuffed behind things never to be found again, getting our KitchenAid stand mixer off of the counter and making our staple ingredients (rices, beans and other dry goods as well as our oils and vinegars) more visible.  Our poor stand mixer had taken quite the beating as I was constantly wiping flour and other sticky substances off of it since it was directly in front of one of our main food prep areas.  I also discovered in the process of cleaning everything out that we had two honey bears of honey and three rice wine vinegars (one was expired and was immediately thrown out).  This can be attributed to the fact that I could never find anything and when I thought we were out of something, really I just couldn't find it in the mess of our pantry.

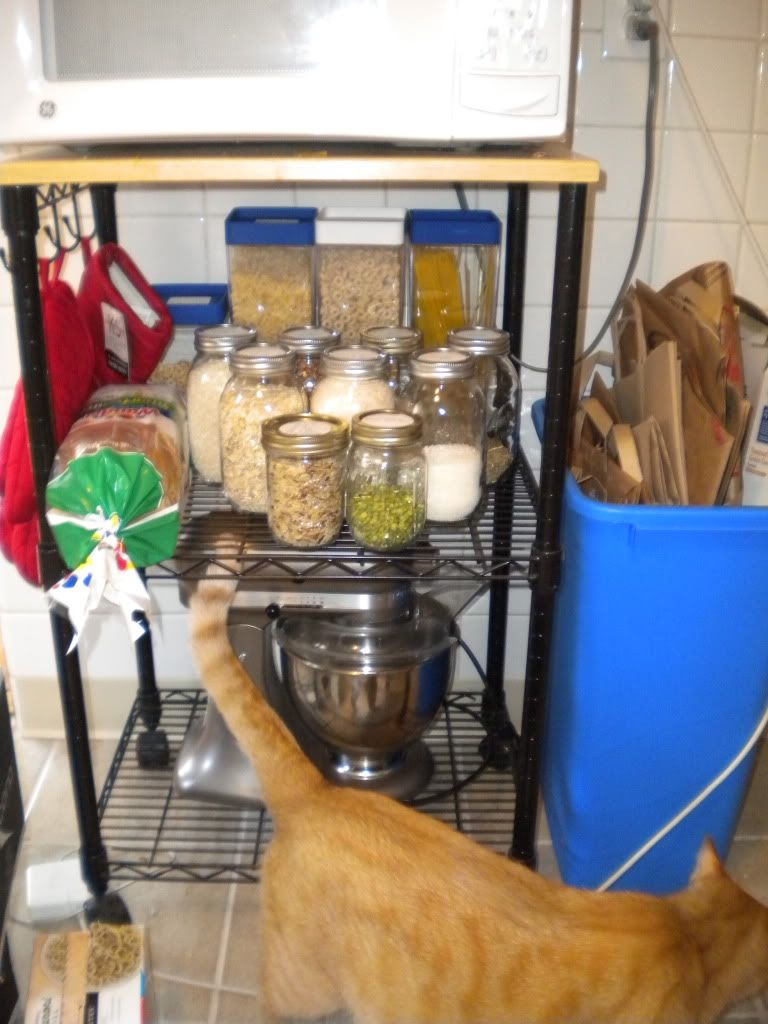
To accomplish this, I decided to move some of our lesser used kitchen items like J's coffee roaster and coffee supplies, our blender and our fondue pot off of our microwave cart and put them in the pantry.  This freed up space for the stand mixer as well as all of the mason jars that were filled with non-baking related items and the cereal/pasta bins and still left room for bread.  Bonus!


Woods inspects my progress
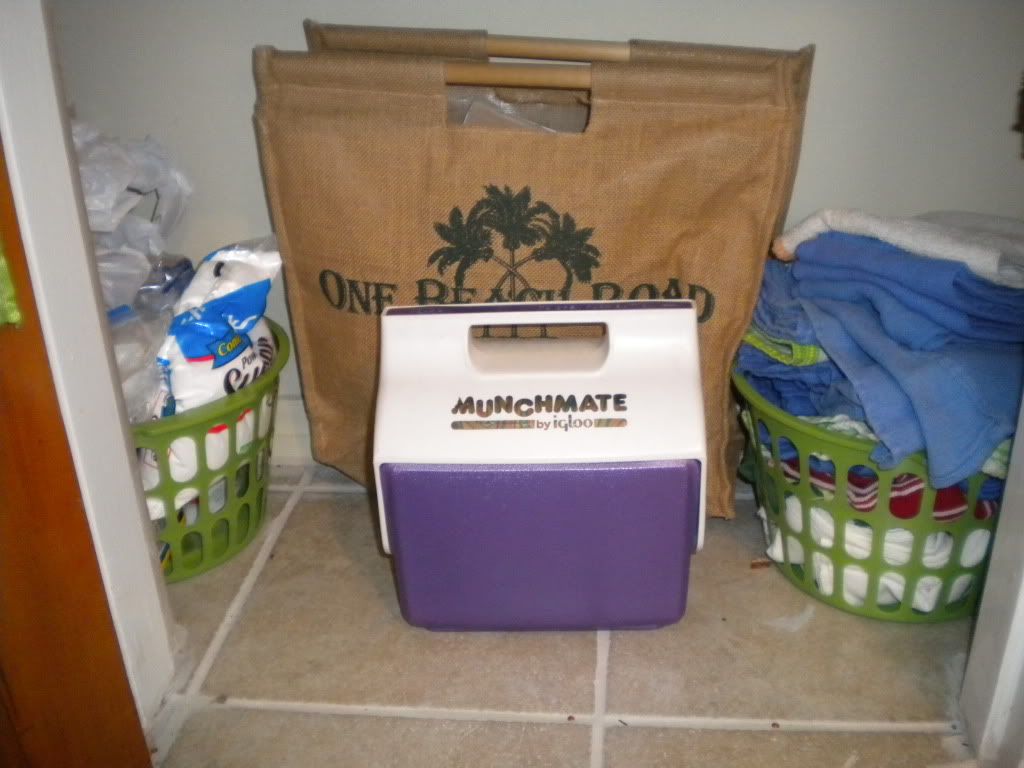
Next I grabbed one of the green plastic bins from before (one of three that made it back into the cupboard) and placed all of our kitchen towels (the ones that were clean anyway) in them and placed them in the bottom of the pantry.  I also placed our lunch boxes and another green plastic bin down there and filled it with the leftover dry goods that wouldn't fit in the jars.  Eventually as we use up what is in the jars, I can refill with these bags and get rid of them too.

The burlap bag corrals some paper bags for art projects, groceries, etc.
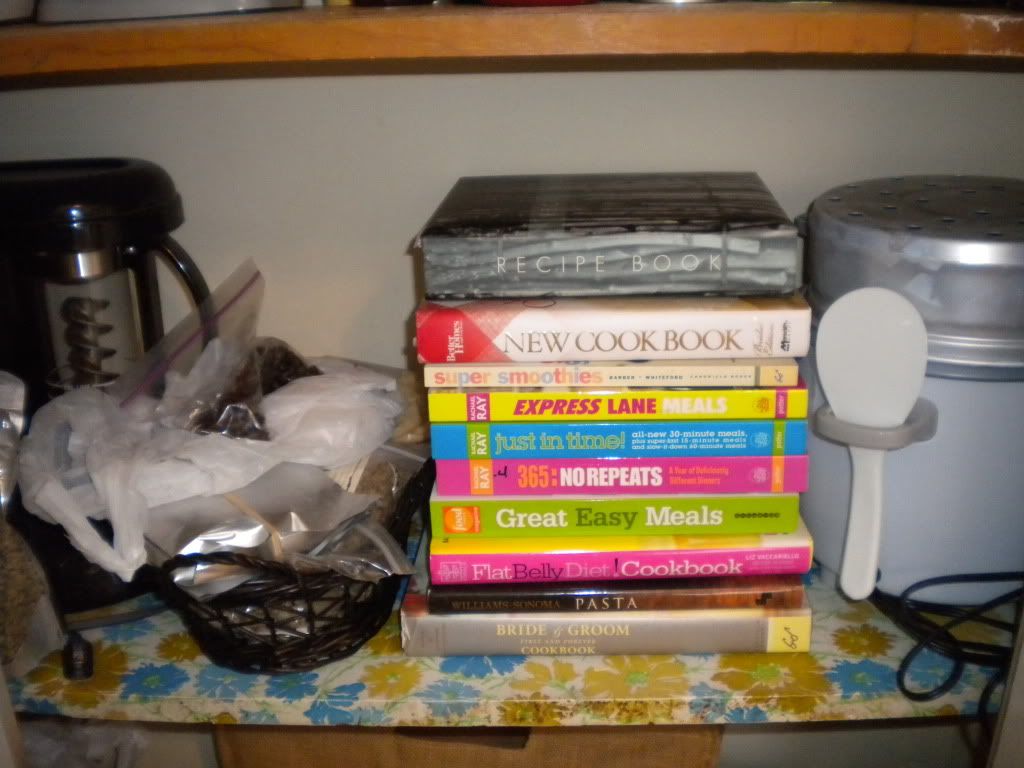
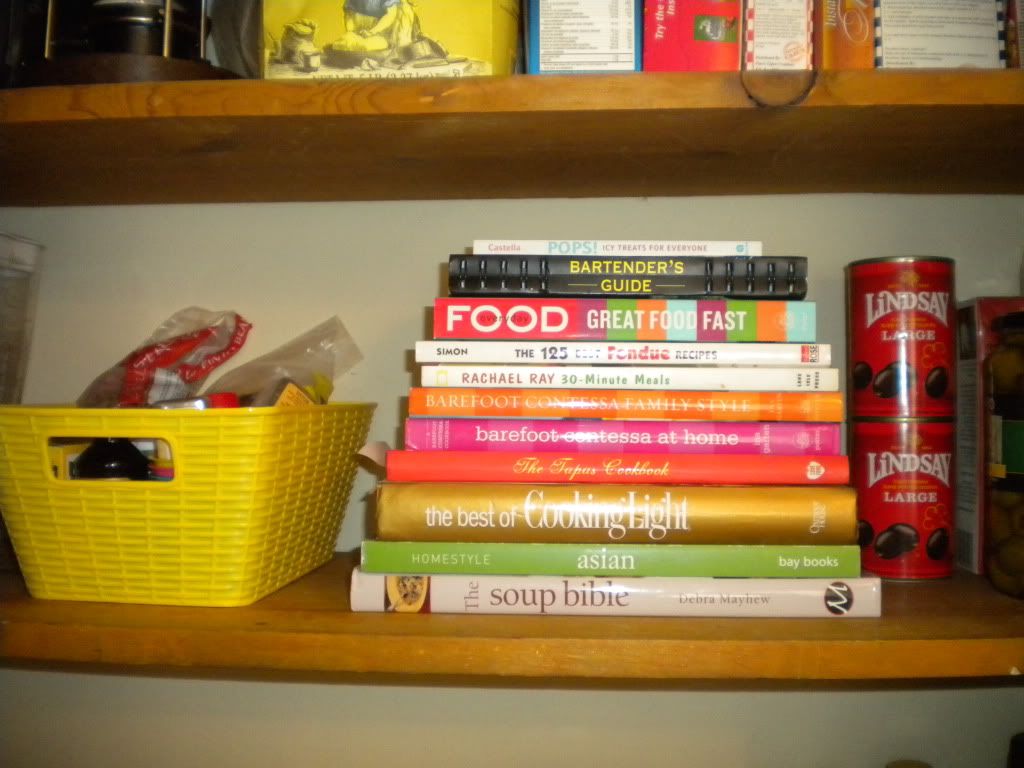
Then I started to work my way up the shelves.  The next shelf now stores J's coffee roaster and other coffee paraphernalia as well as our rice cooker and some of our cookbooks.  I stacked the cookbooks this way for some visual interest and to make it easier to find the one I'm looking for.  Who says a kitchen pantry can't be pretty as well as functional!


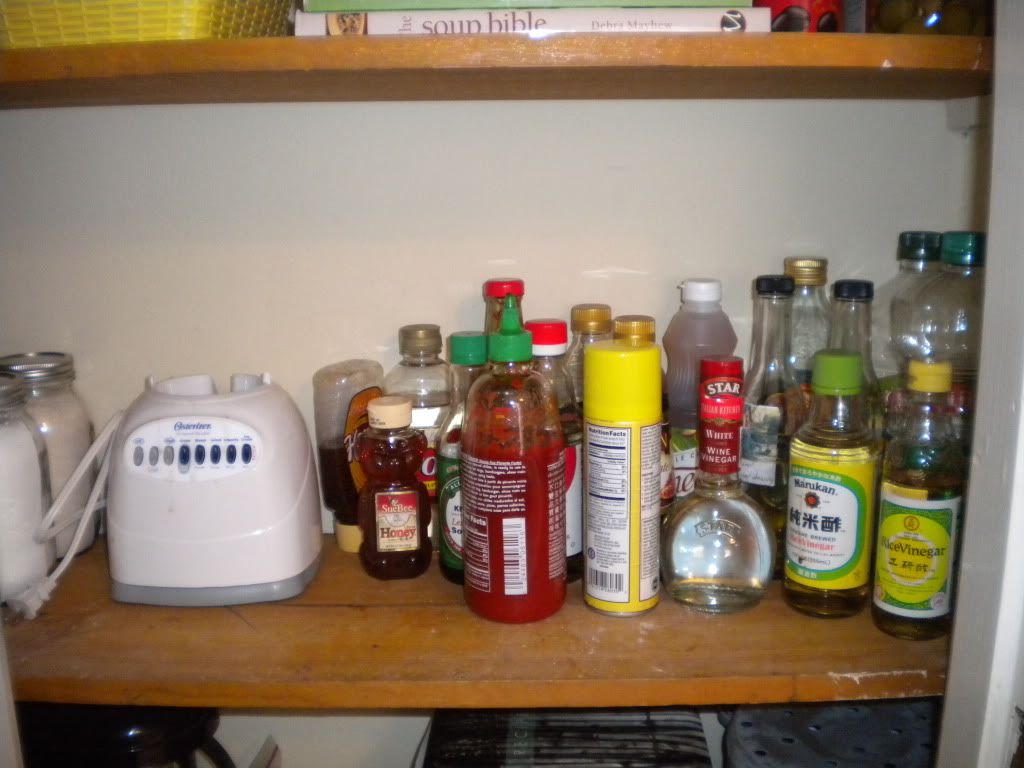
The next shelf holds all of our oils and vinegars which I tried to group together matching like with like (all the oils together, all the vinegars together, and so forth).  It also houses the base to our blender and the six Mason jars that are related to baking (cake flour, whole wheat flour, chocolate chips, coconut flakes, etc.).


As you can see, the shelf after that holds the rest of the cookbooks and some other pantry items.


The yellow bin holds some more baking related materials such as vanilla extract, baking soda, baking powder and food coloring.


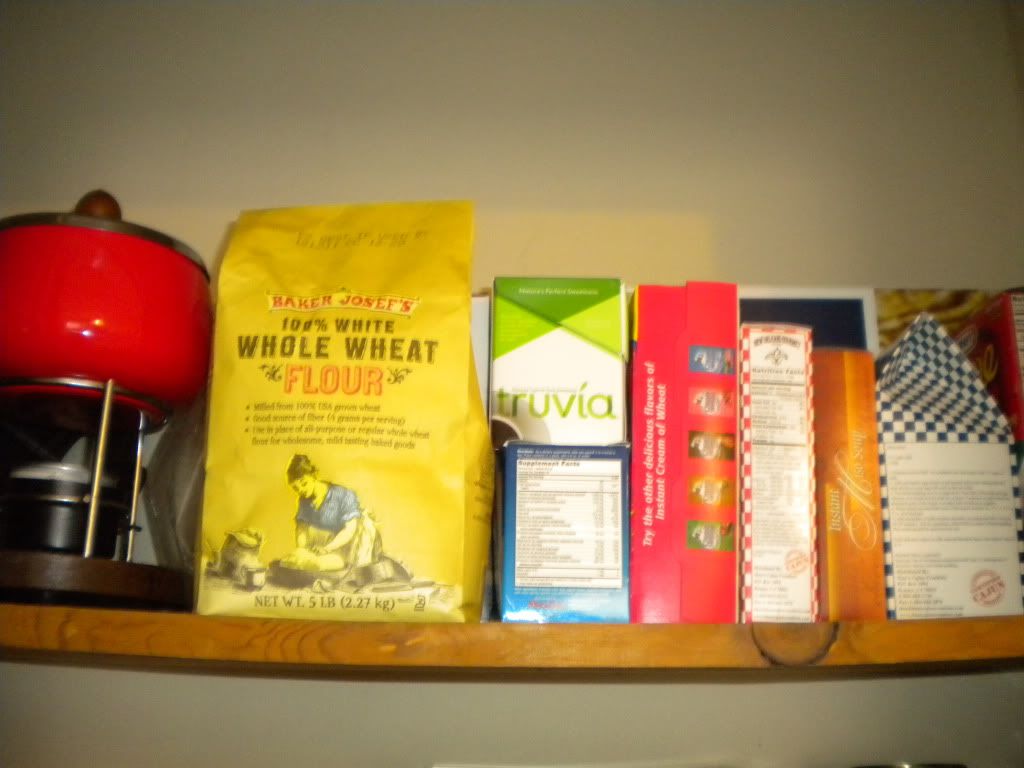
The final shelf holds some bigger pantry items as well as our fondue pot.

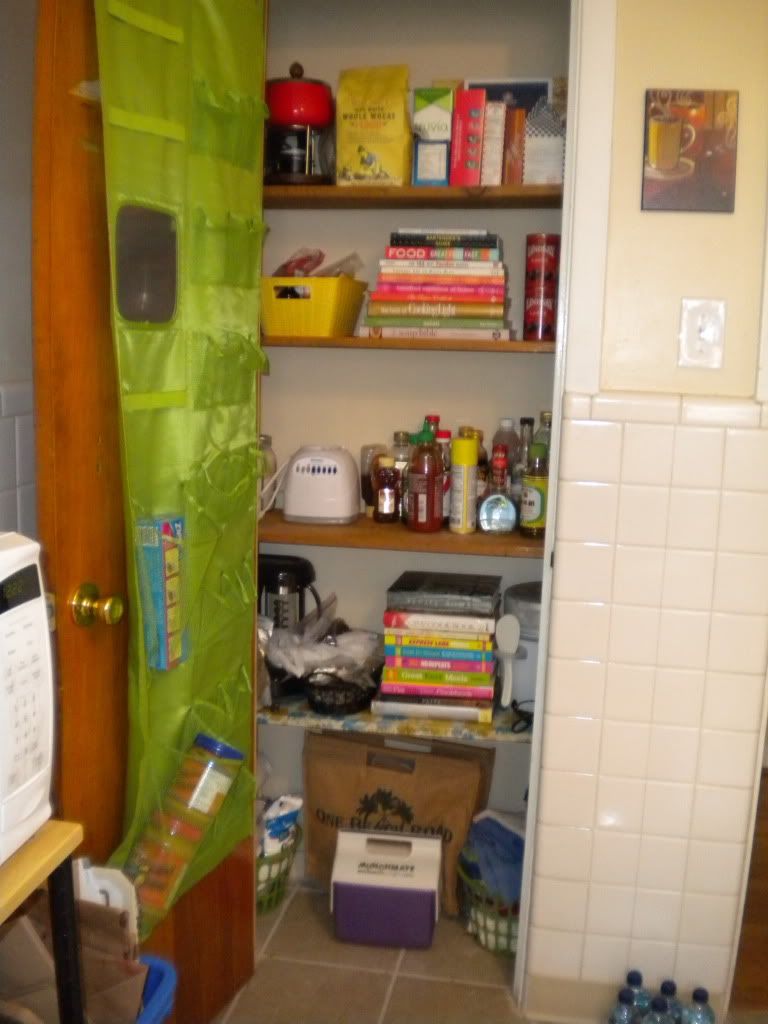
Here's a look at the whole pantry.

Much better right? 

After a few days I still love the new organization and have (surprise, surprise) been working harder to put things back in their place after I use them!  Seeing everything clean and organized has definitely made me want to reorganize other areas of our house which is good because I have quite the list to get through in the next two weeks!

Have you done any major cleaning or reorganizing lately?  Got any tips or before and afters to share?  I'd love to hear about it!

Tuesday, February 8, 2011

Valentine's Day Table Setting

After decorating our glass vases for Valentine's Day, I was itching to create a table setting as well.  I decided that I was going to challenge myself and only use things I already had lying around the house, especially since Valentine's Day isn't a major holiday in our house, like Halloween, Thanksgiving, Christmas and Easter are.  

I still wanted to do something special though, because Valentine's Day has always meant more to us than a commercial holiday since it was very close to when we first started dating (five years on February 20th)--in fact our second and third dates were on Valentine's Day--tomorrow's Remember When will explain more!

So, I went shopping in my closet and our dining room hutch, and this is what I came up with.

 
I used the white runner I purchased back in November and pulled out some red place mats that I've had since I was a junior in college.  They've moved with me from Omaha to California back to Omaha and now to St. Louis.  J and I have eaten many meals on these place mats so it was fun to incorporate them into the table setting.  I pulled away the two other chairs in the dining room because this table setting is just for two!

I layered each place setting with the silver chargers (also a November purchase) and a white plate.


For place cards, I used some scrapbooking materials I had on hand, some cream ribbon and two champagne corks (we save all of our corks and store them in a vase in our hutch). 

 
Our Valentine's Day dinner will of course include some sort of bubbly so I thought the champagne corks added a nice, romantic touch!
 

Woods of course thought they were great toys and relished in knocking them off the table and playing with them.  They have since been relegated to a drawer and will be returned to the table when we have our V-Day dinner.


For the center of the table, I grabbed a milk glass vase I bought a while back at Value Village and filled it with more of the rose petals I bought at The Dollar Tree last week.  Woods also enjoyed playing with these petals, so I placed a candle in the center of it to hopefully prevent him from burying his face in it and tossing them everywhere!  It's working...for now...

The candle I used is not just any candle, but a candle we received at our Engaged Encounter retreat last year when we were going through marriage preparations for our wedding.  It was a wonderful weekend and the candle is a great expression of all the promises and prayers we made together on that weekend.  It also served as a gentle reminder to dig it out and use it every Sunday for our Sunday night dinners together, which we had gotten out of the habit of doing the last few months!

Since we had a white-silver-red theme going on, I pulled out our candlesticks from the hutch and added them for a final flourish, just in time for J to come home and admire my handwork!


What do you think?  Are you decorating for Valentine's Day?  Do you have any big plans, even if it's just with your girlfriends?  Do tell!

Friday, February 4, 2011

Easy Upgrades

Here are a few upgrades we've made around here that have made our home more efficient and more festive, just in time for Valentine's Day. 

The first involves my purse and the numerous pashmina wraps I have collected over the years (for now I have five: white, grey, mustard yellow, lavendar, dark blue).  It's a sickness I tell you but I love using them for scarfs in the winter and wraps for dresses when I'm going out!  Before now, they were clumped in a pile on the floor of our hallway closet (sorry no before pictures, my camera battery died when I went to document this!) which often left them wrinkled.  Likewise, my purse did not have a real home, which meant it ended up on counters, tables, couches, you name it.  I would just drop it wherever I was after I came in our front door.

Since we don't have a lot of space for an entry table, which would be the perfect solution to this problem, I decided to hang a few command hooks (left over from this garland project at Christmas) in our front hall closet.  I'm pretty pleased with the results considering there was no additional cost!


The other quick fix I made involved $3.00 at the Dollar Tree.  Our glass vases have been bare since I removed the ornaments from them (see what I'm talking about here) and needed some sprucing up.  At Easter time, I like to put plastic Easter eggs in the vases so when I saw three packages of artificial rose petals at the dollar store, I knew exactly what I'd do with them: I poured one bag in each vase (two red, one white) and then placed our cream pillar candles on top. It's a subtle change, perfect for Valentine's Day!  I have more Valentine's Day decorating to do this weekend, so stay tuned for those details!

The balance in this picture isn't great--the colors look better in real life!
Finally, I would like to wish my sister and my grandma a very happy birthday today. I hope you both have a wonderful birthday and I wish we could be together to celebrate!

My grandma and me at our wedding--I'm wearing my reception dress
Cheers!

Have you taken on any quick fix projects lately?  What about decorating for Valentine's Day?  I'd love to hear from you!

Tuesday, January 25, 2011

Follow Through = the Name of the Game

I'm ready to tell you my secret now:  I see unfinished projects.

Pardon that lame Sixth Sense reference, but in all honesty I have a few unfinished projects around the house that I'm hoping by sharing with you here, it will hold me accountable and I will actually finish them.


The first is reupholstering our dining room chairs.  I upholstered them over a year ago (in fact it was my first blog post) and while I really liked the pattern, I bought a rug for the space a while back that just doesn't work with the fabric.  The rug was fifty percent off at Target, and since it was a percentage off that I rarely see at my local Target and a great price for a rug (34.99), I snapped it up!  The fabric (a bold blue and white patterned print pictured above) is sitting in my basement waiting to be stapled onto the chairs.

The second is repainting and reupholstering this little stool I bought at Goodwill this fall.  I had always planned to paint or dress it up somehow but never really got around to it.  So while I had the paint and sandpaper out for another project, I decided to paint the legs dark blue using some of the paint left over from painting my dresser this summer.  Now I want to stencil our initial "R" onto the woven basket and reupholster the top, perhaps with some of the fabric left over from the dining room chairs!

The third project is reorganizing our hutch in the dining room.  Right now it is crammed full of things and the display is not very pleasing to the eye.  I am hoping to spend an afternoon (or morning or evening) taking everything out out of it and reassigning some of it to the living room and some of it to our closet so that we can properly display what lovelies we do have.

The fourth is to finish spray painting two owls I bought during various thrift store trips white.  So far I have spray painted them with a primer coat and need to finish the job with a top coat.  You can see the owl cookie jar here and the owl statue here.

The final project involves repainting and re-purposing the wine flight set I bought at a local thrift store a few months ago.  My plan is to turn it into a lovely flower vase set.  So far, I have filled the hole in the tray where the menu would have sat, sanded the piece and painted the base of it white.  All that's left is to prime and paint the insets where the wine pitchers turned flower vases will go blue for a little color!

Please tell me you are like me and have unfinished projects laying around!  

Tuesday, January 18, 2011

Gifts Galore Part 3: Homemade with Love

Considering it's mid-January, I think it's time we wrap up this holiday gift series, don't you?  I thought about leaving this post out all together but the gifts are so unique and heartfelt I just had to share them, even if it's just a record for years to come so I can look back and remember what I got for Christmas in 2010.

First, I received some very special homemade gifts from my Grandma D (whose famous Christmas cookies I shared with you here).  She knitted J and me beautiful scarves to keep us warm this winter along with some house goods that will add a great deal of cheer to our kitchen.  She cross-stitched pictures and the names of fruit on large white kitchen towels, perfect for decorating our oven door or using to help get fresh bread dough to rise.   Here is a little collection of the towels--aren't they bright, fun and just a little bit retro.  I love them and love them even more because I know my grandma made them especially for me!


She also sent us several crocheted wash clothes which we have been using almost daily.  These are great because the holes from crocheting allow the cloths to dry quickly which avoids any mold or musty smells from taking hold.  My favorite is the bright yellow one!


Next, J and I received a very unique and special gift that we will definitely use come football season next year!  It is no secret that J and I root for different football teams: he, being a good Nebraska boy, the Huskers and I, Notre Dame's Fighting Irish.  Therefore, his mom had a bowling ball made for display in our home to let everyone know where our loyalties lie.  


I envision us switching which side faces the front next year based on which game we are watching.  


With Nebraska joining the Big Ten, it might not be that many years before Notre Dame and the Huskers have a rematch game!  That will be a challenging day for our marriage.


The final homemade gift we received was from my brother Dan and was also football related.  This requires a bit of back story however.  My grandparents (the ones who sent us the homemade gifts featured above) are very avid Minnesota Vikings fans and have some of the best tailgate parties during the games.  A vital part of the games, however, was the foam brick, painted in its purple and gold, which was always perched on a TV tray, ready for action.  This was used during games to throw at the TV when the referee or coach made a bad call.  It was and is a great way to get out frustration during the game without doing actual harm to yourself, the TV or those around you!  Dan made a brick for each of us, again with our team colors on them.  I am hoping I won't have to use my brick too much during next year's season, but I will be ready just in case!


So there you have it, part three of our holiday gift series.  Did you get or give anything handmade for Christmas this year?  I'm always looking for homemade gifts (in fact giving all homemade gifts for Christmas one year is number 74 on my 130 list) so let's hear it!

Friday, October 22, 2010

Goodwill Finds

I stopped by Goodwill on my way home from work today and ended up bringing home a few treasures I'd like to share!


The first is a ceramic owl perched on a log.  I bought it for four dollars and plan to spray paint it white or punchy yellow (the color of the handles on our dresser).  It reminded me a lot of the ceramic animals Sherry Petersik and Katie Bower have blogged so much about.  In fact, I think my owl would fit perfectly in Baby Will's nursery!

I also grabbed two red mugs for fifty cents each with the hope to work them into our Thanksgiving and later Christmas table decorations.  At the moment I'm thinking I pair them with white bowls and fun napkins.

The last addition to my shopping cart was a small green vase that I hope to fill with a fat pillar candle, again for our holiday decorations.  The cost of this gem: two dollars.

So there you have it.  My most recent Goodwill loot.  A pretty good way to kick of a weekend if you ask me.  Oh, and I had to include this photo of Woods who kept interrupting me.  He hates having his picture taken but loves getting into shots he's not supposed to be in...


What do you think?  Should I paint the owl?  If so, what color?  White or yellow?  Have any of you found some great thrift store finds as of late?

Happy weekend everyone!

Thursday, October 21, 2010

Bedroom Redesign Post #5: A Picture's Worth A Thousand Words

I apologize for the much used cliche, but it is especially fitting when you hear how I transformed the walls of our bedroom--on the cheap no less!

Before taking on this project, the walls of our bedroom were mostly bare and devoid of personality. We did not have any pictures of ourselves, Woods or our family and friends. For a room we spend a great deal of time in (it has the best TV in the house!), that needed to change, pronto. Here's how I did it.

I knew I wanted to incorporate a photo wall somewhere in the room, and with the air duct running through the wall above our bed, I settled on the only other available wall--thanks to the large window and closet doors that occupy the other two walls.

I also knew I wanted an asymmetrical frame design, similar to the one seen here.  I then decided on a frame color: black.  While we have quite a bit of white in the room with the telephone table, nightstand and tallboy dresser, much of our other furniture in the apartment, including bookcases, coffee table and entertainment center, are black.  Since we are renting, I wanted to use black frames in the event the frames ever have a different home--in say a living or dining room.


Armed with several coupons, I headed to Michael's and I bought ten frames in a variety of shapes and sizes, some with mats and others without.  I also included one shadow box to display some of our wedding mementos. While I was there, I picked up some scrapbook paper for a little art project to fill some of the frames in colors that complimented the bedding: orange, white and blue. 

Inspired by this blog post and armed with an exacto knife and images of Woods that I printed from the computer, I created two silhouettes of Woods and framed them.


Next, I spent some time scouring J's Vanity Fair and The New Yorker subscriptions for a magazine monogram like the one seen on YHL.  I finally found an article that started with the word R: a Vanity Fair article about Norman Rockwell.  Even better, the font for the R was a reddish hue, which matched the colors in the bedroom perfectly.  I cut out the section and went to my local Kinkos, where they helped me blow up the little piece of a magazine article to something that would fit in an 8" by 10" frame.


While reading up on an art related post on YHL which I cannot find for the life of me now, another reader posted a link with a unique idea for wall art: www.wordle.net  I decided to create a word cloud using the words from our wedding vows.  With a bit of tweaking, I was left with this:


I love that our names appear in the center of the cloud and are connected by the word join.  I often catch myself reading over the words and singling out different words of the vows each time I look at it. Sometimes it's love, sometimes it's life, sometimes it's sickness. Whatever my mood, whatever is going on, I can look at the vows and remember the promises we made to each other.

I also printed and framed this photo of us from our wedding.  It was taken during our first dance as husband and wife.  It is one of my favorite photos from that day because if you look closely, you can see my parents in the background watching us!


I added a few more photos, including maps of our respective home towns and a photo of Creighton University, where we met and fell in love. 

When it came time for arranging, I tried, at the suggestion of my friend Ashlee, to group the photos in a somewhat chronological fashion: beginning with the maps of our hometowns, continuing with the photograph of Creighton, our Save-the-Dates, the silhouettes of Woods, a picture of our first apartment and so on.


I also added a mirror to that wall to reflect light and make the somewhat small bedroom seem more spacious.  Woods, the vain cat that he is, likes to look at himself in this mirror quite a bit.  I had originally intended the mirror to hang on the back of our closet door but after losing the screws, it spent several months propped up against my desk in the office.  I was happy to repurpose it and finally give it a proper home.


Some of you may notice that the mirror was attached to the wall with Command hanging strips.  While this may not be the classiest way to hang a mirror, it works great for renters like us!  Some day we will be able to mount heavy things like mirrors directly onto the wall.  Or better yet, DIY a large mirror like this one and lean it against the wall.  Until then, our silver mirror mounted with Command strips works just fine!

After rehanging some of our other decor items, like this crescent moon J bought me on Spring Break a few weeks after we started dating, I was finished. Our room looked much less bare and much more personal!


So there you have it, that's how, with a little inspiration and some creativity, I created meaningful and cheap art for our bedroom!

Friday, October 15, 2010

I've Been Featured!

Beth and Nick of Sawdust and Embryos have been kind enough to feature my dresser makeover on their blog today.  It is such an honor as I truly love their blog and enjoy following their life in Iowa.  Being married to a Midwestern boy and having lived in Nebraska for 4 1/2 years, I feel right at home when I read their blog.  Their amazing creativity and the honesty with which they approach their blog doesn't hurt either!


So head on over and check it out!  Thanks again Beth and Nick for featuring my little project!


Also, a special welcome to any guests from Sawdust and Embryos who are visiting for the first time!  Welcome to my humble blog.  Feel free to look around and I hope to see you back here soon!

Monday, August 16, 2010

Bedroom Redesign Post #2: You're Not Gonna Reach My Telephone


Source


Stop callin', stop callin' I don't wanna think anymore
I left my head and my heart on the dance floor. ~ Lady G


This second segment of my bedroom redesign is all about telephone tables. Ever since I saw this post on Design*Sponge, I have been on lookout for a telephone table that I could redo myself. I love telephone tables and the history behind them. They go back to a time when all phones had cords and most homes were lucky if they had one phone for the whole household! After much searching, I finally found one at Goodwill and better yet, it was half off! I only spent $12 on the table.


It's hard to tell from the photo, but the print on the seat is a really awesome African safari theme!


Full disclosure: I bought and painted this table back in November 2009. I haven't blogged about it before now.


After a fresh coat of paint and a new cushion (for information on how to reupholster a seat cushion, click here), my telephone table went from looking sad and dated to fresh and inviting!


This telephone table has had a few "homes" in the last few months, including a mini mudroom of sorts in our living room, a side table for our couch, and a decorative piece in our dining room.


When I began redesigning and repainting furniture in our bedroom (more on this topic to come, so stay tuned!), the color scheme of the table suddenly matched that of the bedroom where it never had before. A light bulb suddenly went off--bring the telephone table into the bedroom for an instant night stand!


I love this piece because it simultaneously gives me a place to put my purse every day that is off of the floor and gives me a place to stash my book, glass of water and other items. It also has a lower shelf which is a great place for me to put my laptop and journal.

Don't mind the squirt bottle: Woods can be a naughty kitty and has been known to bite us (love bites I swear!) and the squirt bottle is to get him to stop :) I am told he will grow out of this eventually!


I had picked up this little blue tea light lantern for 2.00 a while back at Old Time Pottery. At the time I didn't have a specific use in mind for it, but I couldn't pass up the price. So, after spending a month or so in the closet, I was able to give it a second home in our room! I now use it on my night stand/telephone table to wrangle my hair ties, which previously ended up under our couch because Woods thinks they are toys!


Notice the abundance of pens, hair ties and milk rings in his collection. Two of those items (pens and hair ties are toys he commandeers on his own). The third, milk rings, are toys we give him regularly! I love that our cat likes free toys that are byproducts of things we use and buy on a weekly basis.


So to recap: I love me some Gaga, telephone tables are awesome and can serve multiple functions, Woods likes hair ties and milk rings, and I now have a very functional and beautiful side telephone table.

Next up: a recap of my hunt for fun and fresh new bedding!